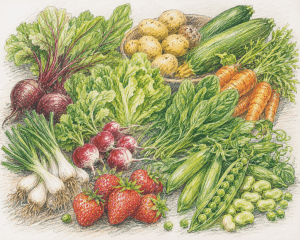
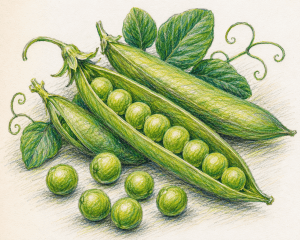
There is something rather magical about picking peas on a June morning.
The plants, once delicate seedlings, are now climbing confidently up their supports, their tendrils reaching out in every direction. Hidden amongst the foliage hang plump green pods, waiting to be discovered. Snap one open and you’ll find a neat row of sweet, emerald-green pearls inside.
Few vegetables reward patience quite like peas. Unlike shop-bought varieties that may have travelled miles before reaching the kitchen, freshly picked peas offer a sweetness that can be astonishing. Their sugars begin converting to starch almost immediately after harvesting, which is why peas eaten straight from the pod often taste so remarkably fresh.
For many gardeners, peas rarely make it as far as the kitchen. They are eaten while wandering between rows, one pod after another, enjoying the simple pleasure of produce at its very best.
Yet a productive pea patch often provides far more than can be eaten fresh in a single sitting. Fortunately, peas are wonderfully versatile and can be enjoyed in countless ways throughout the summer and beyond.
Harvesting and Storing Fresh Peas
Peas are usually ready for harvesting from early June onwards, depending on when they were sown and the variety grown.
The best pods feel full and firm but not overly swollen. If left too long, peas can become starchy and lose some of their sweetness. Regular picking encourages plants to continue producing, often extending the harvest for several weeks.
Once picked, peas are best prepared as soon as possible. If you cannot use them immediately, store the pods in the refrigerator for up to three days.
For longer storage, freezing is an excellent option.
Simply:
- Shell the peas.
- Blanch them in boiling water for 90 seconds.
- Transfer immediately into iced water.
- Drain thoroughly.
- Freeze in containers or freezer bags.
Frozen peas retain much of their flavour, colour and nutritional value, allowing you to enjoy a taste of summer well into winter.
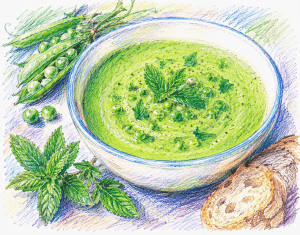
1. Fresh Pea and Mint Soup
Perhaps no dish captures the flavour of early summer quite like pea and mint soup.
The sweetness of the peas combines beautifully with the freshness of mint, creating a vibrant bowl that tastes of the garden itself.
Ingredients
- 500g freshly shelled peas
- 1 onion, finely chopped
- 1 litre vegetable stock
- Small handful of fresh mint leaves
- 1 tablespoon butter
- Salt and black pepper
Method
- Melt the butter in a saucepan and gently soften the onion.
- Add the peas and stock.
- Simmer for 10 minutes.
- Stir in the mint.
- Blend until smooth.
- Season to taste and serve warm.
A swirl of cream or a few whole peas scattered on top makes a lovely finishing touch.
2. Garden Pea Risotto
A creamy risotto allows fresh peas to take centre stage.
The sweetness of the peas balances beautifully with the richness of the rice, creating a comforting yet elegant dish.
Ingredients
- 300g Arborio rice
- 1 litre warm vegetable stock
- 1 onion, finely diced
- 300g fresh peas
- 50g grated Parmesan
- 25g butter
- Olive oil
Method
- Gently cook the onion in olive oil until softened.
- Add the rice and stir for two minutes.
- Add the stock gradually, stirring frequently.
- After about 15 minutes, stir in the peas.
- Continue cooking until the rice is tender.
- Remove from the heat and stir through the butter and Parmesan.
Serve immediately with extra Parmesan if desired.
3. Crushed Peas on Toast
Simple dishes often showcase fresh ingredients best.
This quick lunch celebrates the natural sweetness of garden peas while requiring very little preparation.
Ingredients
- 300g peas
- 1 tablespoon olive oil
- Juice of half a lemon
- Fresh mint
- Thick slices of crusty bread
- Salt and pepper
Method
- Cook the peas for three minutes in boiling water.
- Drain and roughly crush with a fork.
- Stir through the olive oil, lemon juice and chopped mint.
- Season well.
- Spoon generously onto toasted bread.
Delicious served warm on a summer afternoon.
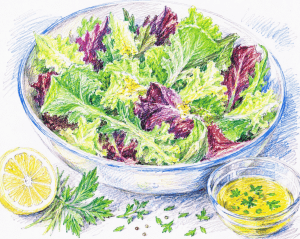
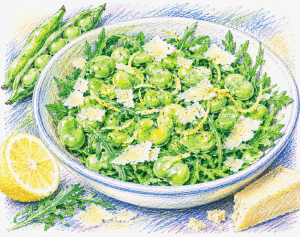
4. Pea, Broad Bean and Herb Salad
When the vegetable garden is at its most productive, simple salads become a celebration of the season.
Ingredients
- 250g peas
- 250g broad beans
- Fresh parsley
- Fresh chives
- Olive oil
- Lemon juice
- Salt and pepper
Method
- Cook the peas and broad beans briefly until tender.
- Refresh in cold water.
- Toss with chopped herbs.
- Dress lightly with olive oil and lemon juice.
- Season and serve.
This salad pairs beautifully with grilled fish, roasted vegetables or a summer picnic.
5. Creamy Pea Pasta
Fresh peas create a surprisingly luxurious pasta sauce.
Their sweetness and bright colour make this a family favourite during the height of the growing season.
Ingredients
- 400g pasta
- 350g peas
- 150ml crème fraîche
- 1 garlic clove, crushed
- Parmesan cheese
- Black pepper
Method
- Cook the pasta according to the packet instructions.
- Boil the peas for three minutes.
- Blend half the peas with the crème fraîche and garlic until smooth.
- Stir the sauce into the drained pasta.
- Add the remaining whole peas.
- Finish with Parmesan and black pepper.
Simple, satisfying and packed with fresh summer flavour.
A Harvest Worth Savouring
Peas are one of the great pleasures of the kitchen garden.
Their season may be relatively short, but perhaps that is part of their charm. For a few precious weeks each summer, they offer a sweetness and freshness that cannot be replicated by anything bought from a supermarket shelf.
Whether stirred into a creamy risotto, blended into soup or enjoyed straight from the pod, peas capture the essence of June in every bite.
By freezing part of the harvest and making the most of the abundance while it lasts, gardeners can continue enjoying their crop long after the vines have been cleared and the season has moved on.
And perhaps that is one of the quiet joys of growing your own food: the opportunity to savour not only the harvest itself, but the memories of warm mornings spent amongst the rows, searching for the next perfectly ripe pod.
Further Reading: From Vegetable Plot to Plate in June, Savouring June: Seasonal Ingredients to Enjoy This Month, What to Forage in June, The June Garden: Roses, Foxgloves and the Romance of Early Summer, What to Harvest in June from the Vegetable Garden
Follow us on Instagram, Threads, BlueSky, Twitter, Pinterest & Facebook
Not sure where to start? Take a look at our Grow Your Own Packs with detailed step by step instructions, seeds and one years online support.