There is a particular kind of satisfaction that belongs only to July.
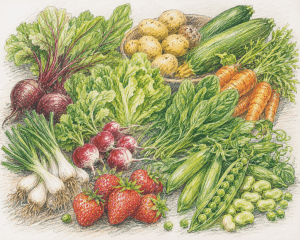
The garden has finally found its stride. The patient sowing of spring, the careful watering through early summer and the endless battle against weeds suddenly begin to feel worthwhile. Every visit to the vegetable patch offers another surprise. A courgette that seemed too small yesterday is suddenly ready to pick. The first beans dangle beneath leafy vines. Tomatoes begin to blush from green to red, and potatoes that have quietly grown beneath the soil reveal themselves like buried treasure.
July is generous.
Unlike the hungry gap of spring, when every harvest feels precious, midsummer rewards the gardener with abundance. Meals become lighter, fresher and more colourful, often travelling no further than the distance between the garden gate and the kitchen table.
Here are some of the finest crops that truly begin their season during July, together with their nutritional benefits, ideas for enjoying them and the best ways to store your harvest.
1. Courgettes
Perhaps no vegetable captures the spirit of July quite like the humble courgette.
One day they seem barely noticeable beneath their broad leaves, and the next they have doubled in size overnight. Picked young, when they are around 15–20cm long, they are tender, sweet and remarkably versatile.
Many gardeners joke that July is the month they quietly leave bags of courgettes on neighbours’ doorsteps.
Nutritional highlights
Courgettes are naturally low in calories while providing:
- Vitamin C to support the immune system
- Vitamin A for healthy eyesight
- Potassium for heart and muscle function
- Fibre to aid digestion
- Antioxidants including lutein and zeaxanthin
From plot to plate
One of the simplest pleasures is to slice courgettes lengthways, brush lightly with olive oil and grill until lightly charred before finishing with lemon zest, thyme and crumbled feta.
They also work beautifully in:
- Courgette fritters
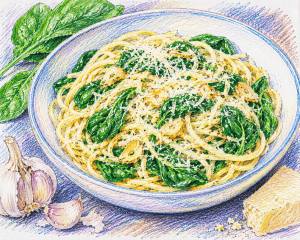
- Summer pasta dishes
- Ratatouille
- Soups
- Chocolate courgette cake
Storing your harvest
Fresh courgettes keep well in the salad drawer of the refrigerator for around a week. They can also be grated and frozen for soups, cakes and winter casseroles.
2. French Beans and Runner Beans
July marks the beginning of one of the most productive harvests of the gardening year.
Beans seem to appear almost overnight and, when picked regularly, reward you with weeks of continuous cropping.
The secret is never to allow pods to become old and stringy. Frequent harvesting encourages the plants to produce even more flowers.
Nutritional highlights
Beans provide:
- Plant-based protein
- Fibre for gut health
- Folate
- Vitamin C
- Iron
- Magnesium
- Vitamin K
From plot to plate
Fresh beans need very little.
Steam for just a few minutes before tossing with butter, chopped parsley and toasted almonds.
They are also excellent in:
- Warm potato salads
- Stir-fries
- Bean casseroles
- Nicoise salad
- Homemade pickles
Storing your harvest
Store unwashed beans in the fridge for up to one week. They freeze exceptionally well after blanching for two to three minutes.
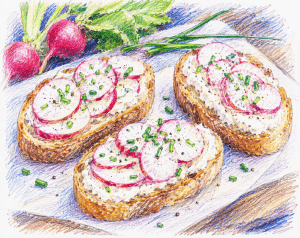
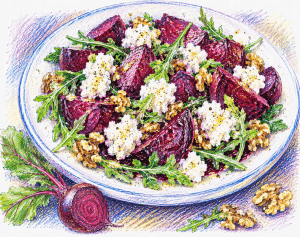
3. Beetroot
Few vegetables feel more rewarding to pull from the soil than beetroot.
Each deep crimson globe emerges coated in earth, hiding the jewel-like colour beneath. Even the leaves are edible and delicious.
Young beetroot is wonderfully sweet and lacks the earthy intensity of larger roots.
Nutritional highlights
Beetroot contains:
- Folate
- Potassium
- Manganese
- Vitamin C
- Dietary fibre
- Natural nitrates that may support healthy circulation and exercise performance
From plot to plate
Roasting transforms beetroot into something almost caramel-like.
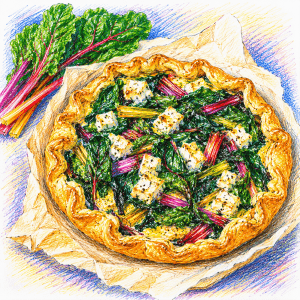
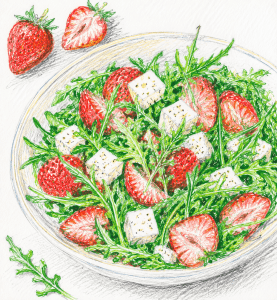
Serve with goat’s cheese, walnuts and rocket, or blend into:
- Beetroot hummus
- Summer salads
- Homemade burgers
- Borscht
- Beetroot brownies
Storing your harvest
Twist off the leaves rather than cutting them to reduce bleeding.
Store roots in a cool place for several weeks, or pickle them for a traditional pantry favourite.
4. Maincrop Potatoes
There is something almost magical about lifting potatoes.
You push a fork gently beneath the soil and suddenly discover dozens of smooth, golden tubers hidden beneath the surface.
Freshly dug potatoes bear little resemblance to those bought in supermarkets. Their skins are delicate, their flavour sweeter and their texture wonderfully creamy.
Nutritional highlights
Potatoes provide:
- Vitamin C
- Vitamin B6
- Potassium
- Fibre (particularly when skins are eaten)
- Complex carbohydrates for sustained energy
From plot to plate
Simply steam or boil before tossing in butter, mint and garden parsley.
Other favourites include:
- Potato salad
- Homemade wedges
- Dauphinoise potatoes
- Bubble and squeak
- Herb-roasted potatoes
Storing your harvest
Allow potatoes to dry briefly before storing them somewhere cool, dark and well ventilated. Never refrigerate them, as cold temperatures alter their natural sugars.
5. Tomatoes
Few gardeners can resist checking tomato plants every morning once July arrives.
One day the fruit is green. A few days later the first scarlet, golden or striped tomatoes are ready to pick.
Sun-warmed tomatoes eaten straight from the vine remain one of gardening’s greatest pleasures.
Nutritional highlights
Tomatoes contain:
- Vitamin C
- Potassium
- Vitamin K
- Folate
- Lycopene, a powerful antioxidant linked with heart health
From plot to plate
Fresh tomatoes barely need preparation.
Enjoy them with basil, mozzarella and olive oil or use them in:
- Bruschetta
- Homemade tomato soup
- Pasta sauces
- Gazpacho
- Oven-roasted tomatoes
Storing your harvest
Never refrigerate ripe tomatoes if possible. Keep them at room temperature to preserve both flavour and texture.
Surplus tomatoes freeze well or can be made into passata.
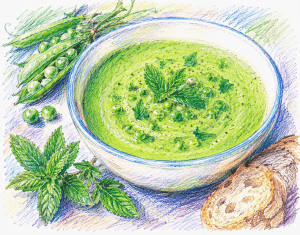
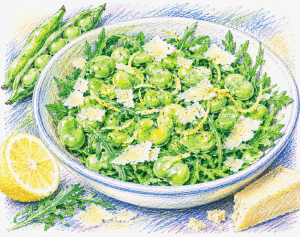
6. Broad Beans
Although the first pods appear earlier, July is often when broad beans reach their peak.
Young beans are beautifully sweet, while slightly older beans benefit from being double-podded to reveal their vibrant green centres.
Nutritional highlights
Broad beans offer:
- Protein
- Fibre
- Folate
- Iron
- Magnesium
- Potassium
From plot to plate
Broad beans pair wonderfully with mint, lemon and pecorino cheese.
Try them in:
- Risotto
- Pasta
- Summer salads
- Bean purée
- Vegetable tarts
Storing your harvest
Beans can be frozen after blanching or dried once mature for winter cooking.
7. Cucumbers
July’s warmth finally delivers crisp, refreshing cucumbers in abundance.
Harvest little and often before they become overly mature, when seeds begin to develop.
Nutritional highlights
Cucumbers provide:
- Vitamin K
- Vitamin C
- Potassium
- Hydration, being over 95% water
- Small amounts of magnesium and antioxidants
From plot to plate
Perfect sliced into salads, but also delicious:
- Pickled
- Added to tzatziki
- Mixed into chilled soups
- Layered in sandwiches
- Infused into summer drinks
Storing your harvest
Keep cucumbers refrigerated and use within a week. Home-grown cucumbers are generally more delicate than shop-bought varieties.
8. Sweetcorn
The arrival of sweetcorn signals that high summer has truly arrived.
Timing is everything. Pick cobs just as the silks begin to brown and the kernels release a milky liquid when gently pressed.
The natural sugars begin turning to starch almost immediately after picking, making home-grown sweetcorn exceptionally sweet.
Nutritional highlights
Sweetcorn contains:
- Fibre
- Vitamin B1
- Vitamin C
- Folate
- Magnesium
- Natural antioxidants including lutein and zeaxanthin
From plot to plate
Boil for just a few minutes before serving with butter and black pepper.
Sweetcorn is also excellent in:
- Chowder
- Mexican salads
- Fritters
- Barbecue dishes
- Homemade salsa
Storing your harvest
Eat as soon as possible after picking for the sweetest flavour. Sweetcorn freezes exceptionally well after blanching.
The Joy of July
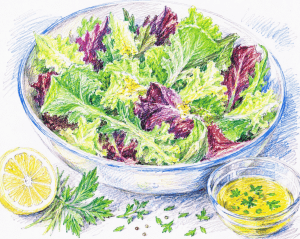
The beauty of July lies not simply in the quantity of food the garden provides, but in its immediacy.
There is a quiet pleasure in gathering supper while the evening sun still hangs low in the sky. A handful of beans, a basket of tomatoes, a freshly dug potato and a courgette picked moments before cooking remind us that food need not travel hundreds of miles to taste extraordinary.
Gardening teaches patience, but July rewards it generously. Every meal becomes a celebration of the season, every harvest a reminder that some of life’s richest pleasures are grown slowly, tended carefully and shared around the table.
Further Reading: Wonderful Ways to Use Fresh Garden Peas, Grow Your Own Food: Save Money & Eat Well
Follow us on Instagram, Threads, BlueSky, Twitter, Pinterest & Facebook
Not sure where to start? Take a look at our Grow Your Own Packs with detailed step by step instructions, seeds and 1 years online support.