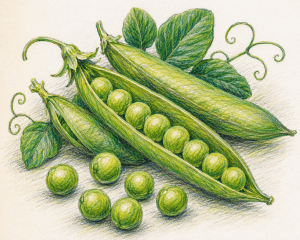
How to Grow Radishes at Home

Radishes are one of the easiest and most rewarding vegetables to grow, making them an ideal choice for children, families, and beginner gardeners. Whether you’re a home cook looking to add a crisp, fresh crunch to your meals or someone eager to explore the joys of gardening, radishes are a perfect starting point.

Freshly harvested radishes.

In this guide, we’ll walk you through everything you need to know about growing radishes—from the best planting techniques and proper care to harvesting your crop at the right time. Let’s roll up our sleeves and get started on your radish-growing journey!

Why Grow Radishes?

Radishes are crisp, peppery root vegetables that add a burst of flavour and colour to your meals. While they’re most commonly small, round, and red with white flesh, they also come in a variety of shapes and hues, including pink, white, purple, and even black!

Nutritional Benefits

Radishes are more than just a crunchy garnish—they’re packed with nutrients that can boost your health. Rich in vitamin C, they help support a strong immune system, while their antioxidants combat inflammation. Low in calories and high in fibre, radishes also promote healthy digestion, making them a smart choice for any diet.

Creative Ways to Use Radishes

Radishes aren’t just for salads! Slice them thin for a refreshing sandwich topping, pickle them for a tangy bite, or roast them to bring out their mellow, earthy sweetness. Don’t toss the greens, either—sautéed radish leaves add a delicious, nutrient-rich touch to soups, pastas, or stir-fries.

Now that you know why radishes are a worthy addition to your kitchen, let’s explore how to grow them in your own garden.

When and Where to Sow Radishes

Radishes are a fantastic choice for gardeners who enjoy quick-growing crops. Here’s everything you need to know about the best timing and conditions for sowing radishes in the UK.

  • Best Time to Sow: Begin sowing radish seeds in March, once the soil starts to warm. The growing season extends until August, allowing you to enjoy a continuous harvest by sowing seeds every two weeks.
  • Ideal Growing Conditions: Radishes thrive in well-drained soil and plenty of sunlight, although they can tolerate light shade. Providing shade during hotter months can help prevent bolting (premature flowering).
  • Fast Harvest: Radishes are ready to harvest in just three to four weeks, making them an excellent choice for beginners eager to see quick results.

How to Prepare the Vegetable Bed

Proper preparation of the vegetable bed is key to ensuring your radishes develop healthy, robust roots. Follow these simple steps:

  1. Clear the Area: Remove weeds, rocks, and debris from the planting site to create an open, clean space for growth.
  2. Loosen the Soil: Use a hand fork or rake to loosen the soil to a depth of about 15cm (6 inches). Radishes grow best in light, crumbly soil that allows their roots to develop freely.
  3. Add Compost: Enrich the soil with a layer of compost to provide essential nutrients and improve texture. Avoid over-fertilising, as it can encourage leafy growth at the expense of the root.

How to Sow Radish Seeds

Sowing radish seeds may be simple, but attention to detail can significantly improve your harvest. Here’s how to do it:

  1. Mark the Rows: Create shallow furrows around 1cm deep, spacing them approximately 15cm apart using a stick or the edge of a hoe.
  2. Plant the Seeds: Sow the seeds thinly along the furrow, aiming to leave 2-3cm between each seed. Proper spacing helps avoid overcrowding, which can lead to misshapen radishes.
  3. Cover and Water: Gently cover the seeds with soil, pat it lightly, and water thoroughly. Keep the soil consistently moist, especially during dry spells, to support healthy growth.

By following these steps, you’ll be well on your way to growing crisp, delicious radishes that are ready to enjoy in no time!

Caring for Your Radish Plants

Radishes are an easy, low-maintenance crop, but they still need some attention to thrive. Here’s how to keep them healthy and productive:

  • Thin the Seedlings: Once your plants are a few centimetres tall, thin them out to ensure about 5cm of space between each one. This allows the roots to develop fully without competition.
  • Maintain Moist Soil: Water regularly to keep the soil consistently moist. Dry soil can lead to tough, woody radishes, while overwatering may cause root rot. Strike the right balance for optimal growth.
  • Remove Weeds Frequently: Weeds compete for essential nutrients and light. Clear them away promptly to give your radishes the best chance to flourish.

Tips for a Perfect Harvest

Timing is everything when it comes to harvesting radishes. Follow these tips to ensure your radishes are crunchy, tender, and full of flavour:

  • Monitor the Size: Radishes are typically ready to harvest when the root tops are about the size of a marble or small golf ball. Always check the seed packet for specific guidelines.
  • Harvest at the Right Moment: Don’t delay harvesting, as radishes left in the ground too long can become pithy and lose their taste.
  • Store Properly: To keep radishes fresh, store them in the fridge for up to a week. Wash off any dirt and remove the tops if you’re not planning to use them, as this preserves their crispness.

Bonus Tips for Growing Radishes

Take your radish-growing skills to the next level with these helpful suggestions:

  1. Companion Planting: Radishes pair well with carrots, lettuce, and beans. They also grow quickly, making them a great crop for marking rows of slower-germinating plants.
  2. Experiment with Varieties: Explore the different flavours and appearances of radishes by trying unique types like long white daikon or black Spanish radishes.
  3. Start Indoors: If outdoor planting conditions aren’t ideal, begin sowing radishes in small pots indoors for a head start on the growing season.

Grow Your First Radish Crop Today

Radishes are the perfect crop for beginner gardeners. Their fast-growing nature makes them ideal for families, children, or anyone eager to explore the joys of home gardening. With their vibrant colours and versatility in the kitchen, radishes are sure to brighten your meals and your garden.

Grab a packet of seeds, roll up your sleeves, and start growing today! Whether you’re teaching kids about gardening or simply looking to grow your own food, radishes are a rewarding vegetable to begin your gardening journey. Happy planting!

Further Reading: Grow Food to Feed your FamilyWhy Growing Your Own Food Has Never Been More Important

Follow Us on Instagram for Daily Inspiration 💚

A Guide to Growing Broad Beans this Spring

Spring is a magical season for gardeners, filled with opportunities to cultivate fresh, homegrown produce. Among the most rewarding and beginner-friendly crops to grow are broad beans. These versatile vegetables thrive in the crisp spring air and are a delight both to nurture and harvest.

Broad Bean Plants

Whether you’re a seasoned gardener or embarking on your first planting journey, this guide will walk you through the essentials of growing broad beans. From planting and care to harvesting, you’ll discover everything you need to ensure a bountiful spring crop.

What Are Broad Beans?

Broad beans, commonly known as fava beans, are a beloved staple in UK gardens and kitchens. These resilient legumes are prized for their rich, nutty flavour, culinary versatility, and their ability to naturally improve soil health. Growing on compact, sturdy plants, broad beans feature vibrant green pods brimming with plump seeds. Not only are they a delight to eat, but they’re also rewarding to cultivate, making them an excellent choice for anyone looking to embrace the joy of homegrown produce.

Nutritional Benefits of Broad Beans

Broad beans are more than just a garden favourite—they’re a nutritional powerhouse. Packed with plant-based protein, fibre, and essential vitamins like folate and vitamin B6, they contribute to a healthy, balanced diet. Additionally, they are rich in key minerals such as iron, potassium, and magnesium, which support overall well-being. Adding home-grown broad beans to your meals not only enhances flavour but also provides a wholesome, nutrient-dense boost to your diet.

Can You Sow Broad Beans in Spring in the UK?

Absolutely! Spring is an excellent time to sow broad beans in the UK. While autumn is a popular choice for many gardeners, spring sowing comes with its own advantages. The warmer soil temperatures in spring promote quicker germination, helping your plants establish themselves rapidly. If you missed the autumn sowing season, don’t fret—there’s still plenty of time to enjoy a bountiful harvest. Simply plant your seeds as soon as the danger of frost has passed, typically between March and May, depending on your location.

Why Do Some Gardeners Sow Broad Beans in Autumn?

Have you ever wondered why some gardeners opt to sow broad beans in autumn rather than spring? Planting in autumn allows the beans to develop deep, sturdy roots before settling into winter dormancy. This head start can lead to an earlier harvest—often up to a month ahead of spring-sown crops.

However, autumn-sown plants face greater exposure to harsh weather, making adequate winter protection essential to help them withstand cold snaps. Ultimately, the decision to sow in autumn or spring depends on your climate and gardening goals.

How to Sow Broad Beans in Spring

Step 1: Preparing for Sowing

Choose a robust, reliable variety such as ‘Aquadulce Claudia’ or ‘Green Windsor.’ For early spring sowing, opt for larger seeds, which generally deliver better results. Broad beans grow best in well-drained, fertile soil, so enrich your soil with compost or well-rotted manure before planting.

You can sow seeds directly into the ground or start them indoors in small pots. Plant seeds about 5cm deep and space them approximately 20cm apart. If planting in rows, leave around 60cm between rows to allow enough room for healthy growth.

Step 2: Transplanting Seedlings

If you started your seeds indoors, the seedlings should be ready for transplanting after 3–4 weeks, once they’ve developed a few sturdy leaves. Choose a sunny, sheltered spot in your vegetable patch for optimal growth. Broad beans thrive in soil with good drainage and a slightly alkaline pH. If your soil is acidic, adding a bit of lime can help create the ideal conditions.

Step 3: Companion Planting

Maximize your garden’s potential by pairing broad beans with companion plants such as spinach, lettuce, or marigolds. These plants coexist harmoniously, avoiding competition for nutrients. Marigolds, in particular, offer the added benefit of repelling pests like aphids. This thoughtful combination creates a thriving mini-ecosystem, providing healthier and more productive plants.

How to Care for Broad Beans

General Care

Broad beans are easy to grow but thrive with a bit of care. Keep the soil consistently moist, especially during dry periods, and apply mulch to help retain moisture. Regularly remove weeds to ensure your plants don’t compete for nutrients.

Protecting Against Pests

Unfortunately, pests like blackfly and slugs can pose a threat to your plants. To ward off blackfly, pinch out the growing tips once the plants reach about 15cm in height. For slugs, use organic slug pellets or scatter crushed eggshells around the base of the plants as a natural barrier.

Supporting Your Plants

As broad beans grow, their height and weight can cause them to topple. Prevent this by providing sturdy support with stakes or string. Place stakes at both ends of each row and tie string between them to create a support system for the plants to lean against. This simple measure will keep your plants upright and strong throughout their growth.

When Are Broad Beans Ready to Harvest?

Broad beans are usually ready for harvest 12–16 weeks after planting, though this can vary depending on the weather and the variety you’re growing. The best time to pick them is when the pods are green, plump, and still tender. Start by harvesting the lower pods first, then work your way up the plant. Regular harvesting not only ensures peak freshness but also encourages the plant to produce more pods, so keep an eye out for new growth.

How to Store Broad Beans

To make the most of your harvest, proper storage is key. Here are three effective ways to keep your beans fresh:

  • Refrigeration: Fresh broad beans can be stored in the fridge for 5–7 days. Place them in a breathable bag to help maintain their freshness.
  • Freezing: For larger harvests, blanch the beans in boiling water for 2–3 minutes, then transfer them to an ice bath before freezing. This method locks in their vibrant colour, flavour, and nutrients.
  • Drying: For long-term storage, allow the pods to dry completely while still on the plant. Once dried, remove the beans from the pods and store them in airtight containers for future use.

By following these tips, you can enjoy the taste of fresh broad beans long after the growing season ends!

Embark on Your Spring Broad Bean Journey!

Growing broad beans this spring is a fulfilling and beginner-friendly gardening project that brings life to your garden and flavour to your dinner table. From planting seeds and tending to your crops to enjoying the satisfaction of a bountiful harvest, each step offers a chance to connect with nature and relish the rewards of your effort.

With this guide, you’re ready to cultivate broad beans like a seasoned gardener. So grab your seeds, prepare the soil, and watch your garden thrive!

Happy gardening!

Further Reading: Grow Food to Feed your Family, Why Growing Your Own Food Has Never Been More Important

Follow Us on Instagram for Daily Inspiration 💚

A Guide to Growing Lettuce

Lettuce is one of the most satisfying crops to grow at home, whether you’re tending a sprawling garden or a few pots on your windowsill. It’s perfect for both gardening novices and seasoned pros, offering fresh, crisp leaves that can elevate any meal. Beyond its versatility, lettuce comes in a variety of flavours and textures, making it a delightful addition to your self-sufficient living goals.

This guide will take you through every step of growing lettuce, from planting and care to harvesting and managing pests. Roll up your sleeves and get ready to experience the joy of growing your own greens!

When to Plant Lettuce

Timing plays a key role in successfully growing lettuce. Here’s how to get it just right:

  • Early Planting: Start sowing seeds under cover from February for planting outdoors in April. Alternatively, wait until March to sow seeds directly in the garden.
  • Succession Planting: To ensure a continual harvest, sow small batches of seeds monthly through autumn. Succession planting prevents waste and ensures fresh lettuce all year.
  • Winter Varieties: Opt for hardy winter varieties and sow them in August. With a polytunnel or greenhouse, you’ll enjoy fresh greens even in the middle of winter!

If you’re starting with seedlings, plant them 15–30cm apart in well-prepared soil or containers. Water regularly and keep the area weed-free to help your lettuce thrive.

Planting Lettuce

Every tiny seed holds the potential for a bountiful plant, so sow carefully to avoid waste or oversupply. Begin by estimating how much lettuce your household typically uses in a month. “Cut and come again” varieties are a great option for flexibility, allowing you to harvest individual leaves as needed. Here’s how to get started:

Steps for Sowing Lettuce Seeds

  1. Prepare the Soil

Choose a cool, north-facing bed to shield your plants from harsh heat. Enrich the soil with organic matter, and rake it finely to create the ideal sowing environment.

  1. Sow the Seeds

For direct sowing, create shallow drills about 1cm deep. Water the drills during warm, dry weather to cool them before sowing. Space seeds roughly 2cm apart and cover lightly with fine soil or compost.

  1. Evening Sowing

If temperatures are high, sow seeds in the cooler evening hours to encourage germination.

  1. Care for Seedlings

Once the seedlings are about 2–3cm tall, thin them out to ensure ample space (15–30cm apart). The thinnings can be enjoyed as baby greens or transplanted to another part of the garden.

Alternatively, start seeds indoors in trays or modules. Once the seedlings are strong enough, transplant them to your garden on a cool, damp day to minimise stress.

Growing Lettuce in Containers

Limited space? Lettuce thrives in containers, making it perfect for balconies or patios. “Cut and come again” varieties are ideal, as they allow you to harvest as needed.

Tips for Container Success

  • Partial Shade

Place containers in a shaded spot to keep the soil cool and prevent bolting.

  • Adequate Depth

Use pots with enough depth to prevent overheating.

  • Rich Soil

Fill containers with peat-free compost mixed with garden soil or your homemade compost for nutrient-rich conditions.

Position your pots near your kitchen or back door for quick and easy access when prepping meals.

How to Care for Lettuce

Lettuce is straightforward to grow but needs consistent care to flourish.

Watering

Lettuce has shallow roots and can quickly dry out, especially during hot or dry weather. Water regularly to keep the soil consistently moist but not soggy. Add mulch to lock in moisture, boost fertility and keep weeds at bay.

Pair Planting

Lettuce pairs well with slow-growing crops like brassicas or potatoes. Plant it among these vegetables to make the most of partial shade while maximising space.

Harvesting Lettuce

One of the joys of growing lettuce is how quickly it’s ready to eat.

  • Baby Leaves

Start harvesting individual leaves around six weeks after sowing. Continue picking leaves over the next three months.

  • Hearting Lettuce

For varieties that develop hearts, allow approximately 10 weeks to mature. Once ready, they can hold for up to a month, weather permitting.

Pro Tip

If you see a central stem forming, your lettuce is starting to bolt. Harvest immediately to avoid bitterness.

Dealing with Pests and Diseases

Sadly, lettuce isn’t just loved by humans. Many pests and diseases may affect your crop, but with some preventative care, you can keep potential problems at bay.

Common Pests

  • Slugs and Snails

Protect seedlings with barriers like seaweed granules or slug traps. Conduct night checks and remove pests by hand if needed.

  • Aphids

Watch for greenfly and squash them before they spread. Encourage natural predators like ladybirds and lacewings by planting pollinator-friendly flowers.

  • Root Aphids

Rotate your lettuce crops annually to avoid a build-up of root aphids.

Common Diseases

  • Grey Mould

Avoid wetting leaves when watering, and ensure greenhouse plants are well-ventilated to reduce the risk of fungal infection.

  • Downy Mildew

Choose disease-resistant varieties and promptly remove infected foliage. Increase air circulation to manage the spread.

  • Leaf Viruses

Remove any diseased plants quickly and rotate crops to mitigate contamination.

Seasonal Checklist for Growing Lettuce

Keep your lettuce patch productive year-round with this seasonal guide:

  • Spring: Start seeds under cover in February or direct sow in March.
  • Summer: Sow monthly, thin rows and ensure plants are well-watered.
  • Autumn: Plant winter lettuces under cover for a year-round supply.
  • Winter: Harvest protected crops regularly from beds or containers.

Frequently Asked Questions

  • Does lettuce need full sun?

Lettuce thrives in partial shade. Too much sun can cause bolting, so aim for 4–6 hours of sunlight daily.

  • Can lettuce be grown indoors?

Yes! Baby salad leaves do well on a sunny windowsill. However, full-sized lettuces require more light and space.

  • How can I stop lettuce from bolting?

Stress from heat or drought triggers bolting. Provide consistent watering, partial shade, and nitrogen-rich soil to delay the process.

  • How long does it take to grow lettuce?

Baby leaves are ready in six weeks, while hearting lettuce takes 10–12 weeks to mature.

Start Growing Today!

Growing lettuce is an enjoyable and rewarding way to elevate your meals and reduce food waste. Whether in garden beds or containers, the crisp, fresh taste of home-grown lettuce is unbeatable. You’ll love the sense of self-sufficiency and the pride in harvesting greens you planted yourself.

Grab your tools, prep your soil, and start growing today. Happy gardening! 🌱

Further Reading: The Importance of Growing Your Own Food, Freshen Up Your Winter Diet with these Garden Salads, The Art of Companion Planting

20 Recycled and Repurposed Items to Sow Seeds In

Planting seeds is one of life’s simplest joys, but what if it could be even more rewarding? By using recycled or repurposed items to start your seeds, you can save money, reduce waste and give a new lease of life to things you already have at hand. It’s sustainable, creative and a wonderful way to bring a sense of purpose to everyday objects.

Whether you’re an eco-conscious gardener, someone on a budget or just a lover of all things green, these ideas are bound to inspire. Here’s a collection of 20 household, garden and pre-loved items you can turn into seed-sowing pots.

1. Newspaper Pots

Transform yesterday’s news into tomorrow’s garden! With a potmaker, you can easily roll up strips of newspaper into biodegradable seed pots. Perfect for planting straight into the soil, as the paper will break down naturally.

2. Toilet Roll Tubes

Those cardboard tubes left behind after the loo roll is gone? They’re a seed-sowing classic! Ideal for deep-rooted plants like beans and peas, simply stand them upright in a tray, fill them with soil and plant your seed.

3. Tin Cans

Save your baked bean tins and soup cans—they make sturdy planters! Just be sure to add drainage holes at the bottom before use. A coat of paint or a splash of creativity can make them even more cheerful.

4. Egg Boxes

Cardboard egg cartons are brilliant for starting seeds. Their individual compartments are perfect for small seedlings and when the plants are ready, you can cut them apart and plant them directly into the ground.

5. Coffee Tins

Metal coffee tins are not only functional but chic as well. Remove the lid, add drainage holes and you’ve got a sleek container for your seeds. Bonus points for upcycling something stylish!

6. Plastic Bottles

Single-use plastic bottles get a new purpose as mini greenhouses. Cut them in half and use the bottom as a plant pot; the top half can act as a lid to trap warmth and humidity for germinating seeds.

7. Yoghurt Pots

Instead of tossing those little plastic pots into the bin, give them a rinse and reuse them for seed sowing. They’re lightweight and the perfect size for starting your garden.

8. Eggshells

Nature’s own tiny pots! Gently crack your eggs in half and save the shells to plant your seeds. They’re compostable, so you can bury the whole thing in the soil once your seedlings are ready.

9. Food Trays

Plastic or cardboard food trays from produce or baked goods make excellent seed-starting containers. Just add some drainage holes, and they’re ready to be filled.

10. Ice Cream Tubs

Ice cream tubs offer plenty of space for a variety of seedlings. They’re especially useful if you want to grow a little forest of seedlings in one go!

11. Milk Cartons

Empty milk cartons can be transformed in two ways—cut them in half to use the bottom as a seed container or use the top as a mini watering can by poking holes in the lid!

12. Old Teacups

Unearth those chipped or mismatched teacups at the back of your cupboard (or pick some up from a charity shop). They’re ideal for growing one or two seeds and add a whimsical touch to your windowsill garden.

13. Baking Tins

Have rusted cake tins you don’t use anymore? They make excellent sturdy containers for planting seeds. They’re also great for grouping multiple seedlings together.

14. Ice Cube Trays

Each little compartment in an old ice cube tray can house a single seed. Once your seedlings sprout, pop them out like ice cubes and transplant them into larger pots or your garden bed.

15. Shoes and Boots

An old pair of wellies or shoes can be turned into quirky planters. Simply fill them with soil, add your seeds, and watch as new life emerges!

16. Coconut Shells

If you have access to coconut shells, they can be repurposed as rustic, biodegradable seed pots. These work wonders for a tropical vibe in the garden!

17. Jam Jars

Glass jars are perfect for seeds that don’t require drainage—just place a layer of pebbles or stones at the bottom to prevent waterlogging.

18. Biscuit Tins

Old biscuit tins can double as planters. Line them with some drainage material and they’ll add vintage charm to your garden.

19. Mushroom Tubs

Plastic tubs from pre-packaged mushrooms are sturdy, reusable and spacious enough for planting seeds. Just remember to add holes for drainage!

20. Colanders

Worn-out colanders that no longer strain your spaghetti can serve a new purpose as unique planters. They’re ready-made with drainage holes and bring a fun look to your space.

Ornate Picture Frame
Image of Recycled Pots: Clean tin cans, egg boxes and Paper Pots

Sowing Seeds Sustainably

Repurposing everyday items to sow seeds not only saves money but also helps reduce waste and supports a more sustainable lifestyle. Every small choice adds up to big change, and by giving these objects a second life, you’re contributing to a healthier planet.

Which items will you repurpose first? Share your seed-sowing creations with us and join our community of eco-conscious gardeners. Together, we’re making sustainability bloom. 🌱

Further Reading: The Benefits of Growing your own Vegetables, Grow Your Savings The Smart Way Leverage Your Garden to Combat Rising Food Prices, Growing Food in Your Garden: A Beginner’s Guide to Feeding Your Family

Parsnips: History, Cultivation, and Storage

Ah, the humble parsnip! Often overshadowed by flashier vegetables, this root has a fascinating history, is a delight to grow and stores beautifully, making it a must-have for foodies, gardeners and fans of self-sufficiency alike.

A Brief History of Parsnip

Did you know parsnips have been around for centuries, way before the potato became the starchy king of the table? These creamy, sweet roots graced the feasts of the Romans, who prized their nutty flavour and versatility. During the Middle Ages, parsnips were a staple across Europe, providing a rich source of carbohydrates, especially in colder months when other crops failed.

And here’s a fun fact for you—ancient Britons embraced parsnips long before the Columbian exchange brought potatoes to our soils. Roasted, stewed or even brewed into parsnip wine; this vegetable was an essential part of their culinary repertoire. While potatoes eventually stole the spotlight, the parsnip remains a beloved addition to British roasts and hearty winter soups.

How to Sow and Grow Glorious Parsnips

“Think growing parsnips is tricky? Not on our watch!”

Growing parsnips might require a little patience, but the rewards—a bumper harvest of delicious roots—are well worth it. Here’s how to do it right:

Step 1: Start with rich, deep soil

Parsnips are fussy about their growing medium. They love loose, well-draining soil with plenty of organic matter. If your soil is heavy or rocky, you might end up with forked or stunted roots. Make sure to dig the ground thoroughly—think tilth as fine as breadcrumbs!

Step 2: It’s all about timing

Parsnips are cool-loving veggies, so timing is key. Aim to sow seeds between March and May, once the soil temperature is around 10°C. Don’t rush—you want those seeds to germinate under the right conditions to ensure you get beautifully straight, robust roots.

Step 3: Direct sowing is best

Parsnips dislike transplanting, so sowing them directly where they’ll grow is the way to go. Space the seeds 15cm apart in rows about 30cm apart to give each plant room to stretch its roots.

Step 4: Water and wait

After sowing, water the area gently and keep the soil moist. Patience is key—parsnip seeds can take up to three weeks to germinate! But don’t fret—those tiny seedlings are busy preparing to wow you with big, hearty roots.

Step 5: Thin and nurture

Once the seedlings are up, thin them to the healthiest, strongest plants. Keep an eye out for weeds and water regularly but avoid overwatering. Parsnips are resilient but appreciate steady hydration, especially in dry spells.

Step 6: Harvesting your treasure trove

Parsnips are slow growers, taking about 4-5 months to mature. The best part? Frost improves their flavour, turning their starches into sugars. Wait for that first nip of frost before harvesting for the sweetest results. Simply loosen the soil around them with a fork and pull them up carefully—there’s nothing like that first crunch as you unearth these pale beauties!

Storing Your Parsnip Gold

You’ve grown the perfect parsnips—now how do you keep them fresh and fabulous? Parsnips are fantastic for storage, making them a favourite for the self-sufficient among us.

Option 1: Keep them in the ground

If your winters are mild, leave your parsnips in the soil where they grew. Just cover them with straw or mulch to prevent the ground from freezing solid. That way, you can pull them out fresh whenever you fancy.

Option 2: Store them like a true grower

Want to store them indoors? Trim the leaves and pack the parsnips into a box of damp sand or sawdust. Keep the box in a cool, dark and frost-free location. This method replicates natural conditions and prevents them from drying out.

Option 3: Freeze for future feasts

Blanch chopped parsnips in boiling water for a couple of minutes, then plunge them into ice water. Once cool, pack them into the freezer for soups, stews or those spontaneous Sunday roasts!

Why Parsnips Deserve a Spot in Your Life

From their storied history to their sweet, earthy flavour, parsnips are a vegetable full of character. Whether you’re a foodie excited by their culinary potential, a gardener keen to grow a showstopping harvest, or someone simply seeking self-sufficiency, these roots have something to offer.

And here’s the best part—there’s no better time to champion the parsnip than now. Add them to your allotment plans, experiment with hearty recipes and discover for yourself why they’ve stood the test of time.

Further Reading: The Benefits of Growing Your Own Food, How to Grow Potatoes at Home, How to Grow Asparagus in Your Home Garden

The Benefits of Growing Your Own Food

Picture this: the crunch of a freshly plucked cucumber, the vibrant aroma of basil and the satisfaction of knowing each bite is a result of your own care and dedication. Growing your own food is more than just a hobby; it’s a lifestyle that connects you to nature, enhances your health, saves money and delivers unbeatable freshness. It’s time to dig in (pun intended) and explore the countless benefits of homegrown food.

Get Outdoors and Cultivate Wellness

Gardening has a magical way of drawing you outdoors. With every seed planted, you’re nurturing more than vegetables—you’re also nurturing yourself. Spending time in the garden immerses you in fresh air, encourages physical activity and provides a much-needed break from screens. Pulling weeds and shovelling soil might not feel like a workout, but trust me—those steps and stretches add up.

Even more incredible are gardening’s benefits for mental health. Research shows that the act of tending to your plants reduces stress, boosts mood and fosters mindfulness. Imagine taking a moment to check on your seedlings and being greeted by the sight of young leaves sprouting—proof of growth and life, right in your garden.

Taste the Difference

If you’ve only tasted supermarket produce, you haven’t truly experienced the essence of food. Homegrown fruit and veg have a flavour that’s unparalleled. Why? Because they’re harvested at peak ripeness, not weeks before to ensure they survive transportation.

Freshness isn’t just about taste—nutritional content is at its highest when produce goes straight from your garden to your plate. That means less vitamin depletion and more natural goodness in every bite. Your salads will POP with vibrant crunch, and your meals will taste like you’ve just returned from the Mediterranean.

Save Money, Gain Independence

With the rising cost of groceries, who wouldn’t want to save a bit more? Growing your own food is a brilliant way to cut down on those weekly spends. A single pack of lettuce seeds might cost the same as a bag of pre-washed leaves, but in return, you’ll get dozens of harvests. And think of the courgettes! You’ll likely have to give some away because one plant alone can yield far more than your household could consume.

Plus, it’s an excellent way to reduce dependency on supermarkets. No more concerns about shortages or overly packaged produce. You’re in control, and you know exactly what’s gone into every carrot, beetroot or strawberry. No worrying about chemicals or pesticides—your garden is pure, sustainable and just how nature intended.

Connect to Nature and Your Community

There’s something grounding about the simple act of planting seeds, watering them and watching them grow. It’s a chance to connect with the rhythm of the seasons and appreciate nature’s pace.

Growing your own food can also create opportunities to engage with others. Trade a jar of your homemade tomato chutney for your neighbour’s freshly baked bread, or swap your extra cucumbers for their herbs. Whether you participate in community gardening or share tips with friends, gardening fosters a sense of connection and teamwork.

A Greener Tomorrow

For the environmentalists among us, home gardening is a powerful step toward sustainability. By reducing reliance on transported goods, you’re cutting down on fossil fuels and emissions. Plus, composting your leftover veg scraps closes the loop and nourishes future growth—keeping your garden and the planet healthier.

It’s Time to Grow

Are you ready to transform your garden, balcony or even your windowsill into a thriving food haven? Growing your own food isn’t just a practical choice—it’s a rewarding adventure that brings joy, health, and sustainability into your life.

Dig into this fulfilling lifestyle and experience the change for yourself. Start small with herbs or go big with a veggie patch—the possibilities are endless. Remember, every seed planted today is a step toward a tastier, healthier, greener tomorrow.

Your garden awaits. All that’s left to do is pick up your first pack of seeds, roll up your sleeves, and begin growing food that tastes as good as it feels to grow.

Further Reading: How to Start Your Own Vegetable Patch The Ultimate Guide to Garden Seed Ordering for Your Home Vegetable Patch 

Take a look at our beginners seed starter packs, not just seeds – but complete with step by step guide and support from us!

How to Start Your Own Vegetable Patch

Growing your own vegetables is rewarding. You’ll save money, reduce your carbon footprint, and enjoy fresher produce than anything you’ll find in a supermarket. If you’re a beginner gardener or an enthusiast looking to live more sustainably, creating a vegetable patch is the perfect way to get started.

1. Choose the Right Location

The success of your vegetable patch begins with where you choose to place it. Vegetables thrive in a sunny, sheltered location. Aim for an area that gets at least 6-8 hours of sunlight a day, as most crops need plenty of light to grow. Avoid areas prone to waterlogging, as soggy soil can damage your plants’ roots.

If possible, pick a spot close to your house or kitchen. This makes harvesting and monitoring your plants more convenient and ensures you’ll keep up with watering, weeding, and pest checks.

2. Clear the Area and Prepare the Soil

Once you’ve selected your spot, it’s time to clear the area. Remove any turf, weeds, or debris. If you have grass, you’ll need to dig it up or cover the area with cardboard or black plastic sheet for a few weeks to kill it off naturally.

Next, focus on preparing the soil:

  • Remove Stones and Large Debris: Start with a clean slate.
  • Loosen the Soil: Use a fork or spade to break up compacted soil, allowing better drainage and root growth.
  • Test Your Soil: Consider testing your soil for pH levels. Most vegetables thrive in slightly acidic to neutral soil (pH 6-7).

This will set the foundation for healthy plant growth.

3. Decide on Bed Size

For beginners, starting small makes the process more manageable. A single bed measuring around 1.2m x 2.4m (4ft x 8ft) is a good starting point. This size gives you enough room to grow a variety of vegetables without feeling overwhelmed.

If you want multiple beds, ensure there’s space between them for paths. Around 30-40cm (12-16 inches) should work, making it easy to access all parts of your patch without stepping on the soil.

Raised beds are also a great option, especially if your soil quality is poor or you want a more organised look. They provide better drainage and warmth, which benefits your vegetables.

4. Improve Your Soil

While your soil is already prepared, giving it a boost will make it even better. Add organic matter like compost, well-rotted manure, or leaf mould to improve fertility and structure. Spread a 5-10cm (2-4 inch) layer over the soil and work it into the top few inches.

Well-fed soil leads to healthier plants, and, in turn, better harvests.

5. Decide What Crops to Grow

The key to a successful vegetable patch is to grow what you’ll use. Think about your family’s favourite veggies, and focus on crops you enjoy eating. For beginners, consider these easy-to-grow options:

  • Leafy Greens like lettuce, spinach, and kale
  • Root Vegetables such as carrots, radishes, and beetroot
  • Herbs like basil, parsley, and coriander
  • Fruit Vegetables like tomatoes, courgettes, and peppers

Bear in mind your local climate and planting season. Check seed packets or local gardening resources to ensure the crops you plant thrive in your area.

6. Plan the Layout of Your Vegetable Patch

Proper planning is essential to make the most of your space. Each vegetable has unique spacing and sunlight requirements, so consider these when mapping out your patch. Here are a few tips:

  • Spacing: Allow enough room between plants. Crowded spaces can lead to poor growth and make your plants more vulnerable to diseases.
  • Positioning: Place taller plants like tomatoes and runner beans at the back (or north side) of the patch to avoid shading smaller crops.
  • Companion Planting: Research which vegetables grow well together. For example, carrots and onions are great companions as they repel each other’s pests.

Sketch a simple layout before planting to envision the space and avoid any last-minute surprises.

Bonus Tip: Mulch for Maintenance

Once your plants are in the ground, cover the soil with a layer of organic mulch. This helps retain moisture, suppress weeds, and maintain soil temperature. Straw, wood chips, or even chopped leaves make excellent mulching materials.

Start Planting Today!

Starting a vegetable patch may take some initial effort, but the rewards of growing your own fresh produce make it all worthwhile. Follow these steps to create a productive, healthy garden, and enjoy the satisfaction of home-grown tomatoes or crisp lettuce in your next salad.

If you need more tailored advice, visit your local gardening centre or community gardening group. With a little planning and care, you’ll soon have a thriving vegetable patch to be proud of!

Further Reading: Why Choose Sow It Grow It and Feast, The Ultimate Guide to Garden Seed Ordering for your Home Vegetable Patch

How to Direct Sow Seeds for a Thriving Garden

Direct sowing is a low-cost and rewarding technique for planting seeds directly into the soil, skipping the indoor growing stage. If you’re a gardening enthusiast or looking for sustainable, natural ways to cultivate your own greens, this method is perfect for you. It’s simple, eco-friendly, and brings you closer to nature—no fancy equipment necessary.

Here’s everything you need to know about direct sowing, from prepping your soil to thinning out seedlings for a healthier, bountiful garden.

What is Direct Sowing?

Direct sowing is the practice of planting seeds straight into your garden or outdoor soil, right where you want them to grow. It’s ideal for plants with hardy seeds or those that don’t like being disturbed, such as carrots, beans, radishes and sunflowers. This method relies on nurturing seeds naturally in their environment, which means no transplant shock and often quicker establishment.

Not only does direct sowing make gardening accessible to beginners, but it’s also a budget-friendly, sustainable choice since it avoids plastic trays, pots or excessive supplies.

How to Direct Sow Successfully

Gardening with direct sowing does require some planning and proper techniques to achieve the best results. Follow these steps to set yourself up for success:

1. Soil Preparation

Healthy soil is the foundation of any growing process—but it’s particularly crucial for direct sowing. Follow these steps to prepare your soil:

  • Clear the Area: Remove weeds, debris and large rocks from the chosen planting area. Weeds can compete with your seedlings for water and nutrients.
  • Loosen the Soil: Use a hoe, rake or gardening fork to cultivate the soil to a depth of 6-12 inches. Loosening improves aeration and makes it easier for young roots to establish.
  • Amend the Soil: Mix in compost or organic matter to enrich the soil with nutrients. Many seeds thrive in well-drained, nutrient-rich substrates.

Tip: Avoid compacted soil—seeds germinate poorly in dense, hard soil.

2. Seed Spacing

Proper seed spacing is vital to avoid overcrowded plants, as spacing ensures healthy growth and allows airflow. Always check the seed packet or label for specific spacing recommendations as different plants have unique requirements.

  • Make Furrows or Holes: Use a stick or your finger to create planting furrows or small holes at the recommended depth.
  • Plant Sparingly: Don’t scatter seeds randomly; place seeds deliberately based on the spacing suggested. It often helps to use a ruler or a string as a guide.

If you’re after neat rows, draw straight planting lines across your soil bed before sowing.

3. Watering & Caring for Seeds

Once your seeds are planted, water them gently to ensure they’re in good contact with the soil. Use a watering can with a soft spray attachment to prevent displacing the seeds. Keep the soil consistently moist—but not waterlogged—through the germination period.

A layer of mulch or straw can be added to help retain moisture and regulate soil temperature, but ensure it doesn’t smother the seeds.

4. Thinning Seeds

After germination, you may notice clumps of tiny seedlings popping up in your soil. Thinning is the process of removing overcrowded seedlings so the healthiest ones have room to thrive. Overcrowding leads to weak, spindly plants that don’t flourish.

  • Use small scissors to snip off extra seedlings at their base. Avoid pulling them out—you risk disturbing your remaining plants’ roots.
  • Maintain the strongest seedlings based on the recommended spacing guidelines. Give them room to stretch and spread out.

Common Challenges to Address

While direct sowing is incredibly rewarding, you may encounter a few common issues:

  • Pests: Birds and insects love feasting on seeds. Use fine netting or plant covers to protect them during early stages.
  • Weather: Sudden frost or excessive rainfall can be tough on seeds. Plan your sowing around optimal weather conditions for the plant variety.

Why Choose Direct Sowing?

Direct sowing is more than just a gardening method—it’s a step towards sustainability. By growing food and plants directly in your garden, you save on waste, avoid unnecessary packaging, and support the natural lifecycle of your local ecosystem. You also learn to work in harmony with your environment, fostering a deeper connection to the earth.

Even if you’re new to gardening, direct sowing is a rewarding way to get started without feeling overwhelmed. With time, you’ll develop a knack for knowing your soil, weather, and plant needs.

Final Thoughts

Direct sowing is a straightforward, hands-on gardening method that lets you cultivate vibrant, healthy gardens with minimal tools. From soil prep to thinning, following these steps will give your seeds the best chance to thrive.

Take a deep breath, dig in and enjoy the process of nurturing life from seed to harvest. Nothing tastes better than food grown by your own hands!

Further Reading: Why Choose Sow It Grow It and Feast, How to create a Foragers’ Garden

How to Plan and Design Your Dream Vegetable Patch

Creating your own vegetable patch is one of the most rewarding gardening projects you can undertake. Whether you’re a beginner or a seasoned green thumb, a well-planned vegetable patch can provide you with fresh, flavourful produce and a satisfying connection to nature. Here’s a step-by-step guide to help you plan and design a vegetable patch that works beautifully for you.

Step 1: Choose the Right Location

The location of your vegetable patch is crucial for its success. Vegetables typically need at least 6-8 hours of sunlight daily, so pick a sunny spot in your garden. Avoid low-lying areas where water accumulates and make sure the spot has good drainage. Consider proximity to water sources, like a garden tap or rainwater barrel, for easy irrigation.

Additionally, think about how accessible the patch is from your home. The easier it is to reach, the more motivated you’ll be to maintain it and harvest your crops.

Step 2: Decide on the Layout

The layout of your vegetable patch will depend on the size of your garden and your personal preference. Here are a few key considerations:

Beds vs. Rows

  • Raised Beds: Perfect if you have poor soil or want to improve drainage. Raised beds are also easier to maintain and can give your patch a neat, organised look.
  • Traditional Rows: This is a classic layout that works well for larger plots of land, with space between rows for easy weeding and planting.

Pathways

Include pathways to make your vegetable patch accessible without stepping on the soil, which can compact it and impede plant growth. Gravel, bark or stepping stones are excellent materials for pathways, as they allow good drainage and keep weeds at bay.

Make sure the pathways are wide enough—about 60-90cm is ideal—to comfortably walk through or manoeuvre a wheelbarrow.

Step 3: Plan for Crop Rotation

Crop rotation is essential to maintain soil fertility and prevent diseases and pests. Divide your vegetable patch into several areas or beds, each designated for a specific crop group. Rotate these groups every year. Here’s a simple rotation plan:

  1. Area 1 – Leafy Greens

Grow spinach, lettuce, kale and cabbages. This group thrives on nitrogen-rich soil.

  1. Area 2 – Root Vegetables and Tubers

Include carrots, beets, radishes and potatoes. These crops benefit from soil that’s less rich in nitrogen but still loose and fertile.

  1. Area 3 – Fruiting Vegetables

Tomatoes, peppers, cucumbers and courgettes belong here. They need potassium-rich soil for healthy fruit development.

  1. Area 4 – Legumes

Beans and peas add nitrogen back into the soil, making this group an essential part of the rotation cycle.

By rotating these groups each year, you’ll help replenish nutrients in the soil while reducing the risk of pests building up.

Step 4: Consider Bed Sizes

The size and number of beds will depend on the space you have and the vegetables you plan to grow. Here are some tips for bed sizing:

  • Keep beds 1.2m wide or less, so you can easily reach the centre without stepping on the soil.
  • Leave at least 30-45cm between raised beds to act as pathways.
  • A bed length of 2-3 metres is manageable for most gardeners while providing plenty of growing space.

If you’re short on space, vertical gardening (using trellises for climbing plants like beans and tomatoes) is another option to make the most of the area.

Step 5: Match Vegetables to Growing Conditions

Not all vegetables have the same needs, so place plants strategically within your patch:

  • Sun-loving plants (tomatoes, peppers, courgettes) should be positioned where they get the most light.
  • Shade-tolerant plants (lettuce, spinach) can go in slightly shadier areas.
  • Group vegetables with similar watering requirements together to make irrigation simpler and more efficient.

Step 6: Add Finishing Touches

These final considerations will help make your vegetable patch even more enjoyable and productive:

  • Compost Bin: Set up a compost bin nearby to recycle kitchen scraps and garden waste. You’ll have a ready supply of organic fertiliser for your vegetables.
  • Watering System: Drip irrigation or soaker hoses can save time and ensure consistent watering.
  • Pest Protection: Add netting or fencing to keep out birds, rabbits, or other hungry visitors.
  • Seasonal Cover: Consider cold frames or cloches to protect crops during colder months and extend your growing season.

Start Growing Today!

Planning and designing your vegetable patch may take some effort upfront, but the result is worth it. Not only will you enjoy fresh, home-grown produce, but you’ll also create an outdoor space that’s both functional and beautiful.

Begin small and adjust your plan as you gain experience—gardening is a learning process, and every season brings new opportunities to refine your patch. Whether you’re dreaming of summer salads or hearty winter soups, your vegetable patch can make those dreams come true. Happy gardening! 🌱

Further Reading: How to Discover your Soil Type, How to Plan and Create a Foragers’ Garden

Why Choose Sow It Grow It and Feast for Your Garden?

As more people turn towards sustainability and self-sufficiency, the joy of growing your own food, herbs and flowers has never been more popular. Whether you’re a seasoned green thumb or a gardening novice, Sow It Grow It and Feast offers everything you need to create a thriving garden right at home. From luscious salads to vibrant flowers, and even herbs for tea or medicinal uses, their beautifully curated garden sets make cultivating your dream garden not only possible but incredibly enjoyable.

Here’s why Sow It Grow It and Feast is the game-changer you’ve been looking for.

What is Sow It Grow It and Feast?

Imagine turning your garden into a vibrant, delicious oasis of health and flavour, guided every step of the way. Sow It Grow It and Feast is a comprehensive gardening solution that combines expertly curated seed packs with all the tools and guidance you need to succeed. With options ranging from growing your own tea to feeding your family with homegrown vegetables, each set is designed to help you grow, harvest, and enjoy your very own feast.

Perfect for gardeners at every experience level, these sets make it easy to learn how to bring life to your outdoor space while enjoying the satisfaction of growing and eating your own produce—all with premium quality seeds and excellent expert support.

What Makes Sow It Grow It and Feast Great?

There are countless reasons why Sow It Grow It and Feast is a standout choice for new gardening enthusiasts:

1. Expert Curation

Each gardening set is thoughtfully curated by gardening experts, ensuring that even beginners can achieve success. Whether you’re growing a salad patch or cultivating medicinal plants, every seed is selected for its quality and yield.

2. Comprehensive Guidance

Gardening can feel intimidating, but not with Sow It Grow It and Feast. Each set comes with:

  • A detailed and easy-to-follow information booklet that guides you through every step, from sowing to harvesting.
  • Online support to answer all your gardening questions.
  • Regular email reminders bursting with tips, hints, and seasonal advice.

3. Beautifully Packaged Sets

Gardening isn’t just practical—it can also be a source of joy and beauty. These sets come beautifully packaged, making them perfect for gifting to aspiring gardeners and home cooks. From the moment you open your set, you’ll feel inspired to bring your garden to life.

4. A Versatile Approach

Whether you want to grow your own herbs for tea, produce to feed your family, or flowers for a beautiful cutting bed, Sow It Grow It and Feast has you covered. Customise your experience based on your interests and discover how rewarding gardening can be.

5. Added Perks

Every gardening set comes with a voucher for discounts on future purchases—perfect for expanding your garden. You’ll also join a growing community of gardeners who share hints, tips and inspiration to keep your gardening experience vibrant and enjoyable.

Seed to Feast Garden Sets – What Can You Grow?

Sow It Grow It and Feast offers a range of seed sets catering to different preferences. Here are a few standout options:

Grow Your Own Tea

Imagine stepping outside to harvest your own chamomile, mint, or lavender for the perfect cup of tea. These packs include everything you need to cultivate a herbal tea garden that’s as calming to grow as it is to drink.

Feed Your Family

Transform your home-cooked meals with fresh, organic produce from your own garden. From rich tomatoes and crunchy cucumbers to crisp lettuces, the “Feed Your Family” garden sets allow you to enjoy food at its freshest, knowing exactly where it came from.

Flourishing Flowers

Bring vibrant colour and joy to your home with a cutting bed brimming with beautiful flowers. These sets make it easy to create stunning bouquets to brighten your space or share with loved ones.

Medicinal Marvels

Grow a homegrown first-aid kit with the medicinal plant garden sets. These feature seeds like aloe vera and echinacea so you can tap into the power of plants for healing and wellness.

Salad Patch Essentials

Perfectly curated for fresh summer salads, these sets offer seeds for everything you need to create healthy, delicious dishes straight from your garden.

Why Should You Choose These Sets?

For the Love of Gardening

Every seed you plant takes you on a joyful, rewarding journey. With Sow It Grow It and Feast, you’ll learn not just how to grow plants but how to love the process. Whether it’s for stress relief, family bonding or simply enjoying beautiful blooms and fresh food, gardening with these packs elevates the entire experience.

Sustainability at Heart

By growing your own food and herbs, you reduce your carbon footprint while enjoying organic, pesticide-free produce. It’s a win-win for the planet and your health.

Perfect Gifts for Loved Ones

These beautifully crafted sets make fabulous, meaningful gifts for anyone looking to connect with nature and elevate their culinary skills. You’re not just giving seeds—you’re offering the joy of watching something grow, the pride of self-sufficiency and the pleasure of fresh flavours.

Join a Community

Gardening is more than just what happens in the soil—it’s a shared passion. Join the Sow It Grow It and Feast community to exchange ideas, seek advice and celebrate your successes.

Your Gardening Adventure Starts Here

Why simply dream of a bountiful garden when you can grow one? With Sow It Grow It and Feast, the tools, seeds, and expert guidance you need are just a click away. Whether you’re creating a first-aid kit, a cutting bed, or a salad patch, these sets make gardening easy, enjoyable, and incredibly rewarding.

Take the first step today—explore Sow It Grow It and Feast and find the perfect set to transform your garden. Your green thumb awaits!

We have a great range of themed grow your own garden sets to be found here.

Follow Us on Instagram.