How to Freeze Fresh Herbs

There comes a moment in every gardener’s summer when the herbs seem to have made a decision.

One day, you’re snipping the occasional sprig of parsley for a salad or a few basil leaves for a homemade pizza. The next, the mint has ambitions of taking over the flower bed, the chives are producing enough leaves for an entire village, and the parsley has become so enthusiastic you’re wondering whether it secretly grows while you’re asleep.

It’s one of gardening’s happiest problems.

After all, there’s only so much rosemary one roast dinner can manage.

Rather than watching those precious herbs flower, fade or end up on the compost heap, why not save their wonderful flavour for the colder months? Freezing herbs is one of the simplest ways to reduce waste and make the most of your harvest, ensuring that a little taste of summer is always within easy reach.

On a grey January afternoon, when the garden is resting beneath winter skies, opening the freezer and finding a handful of fragrant herbs feels rather like discovering sunshine tucked away in a drawer.

Why Freeze Herbs?

Fresh herbs are one of the easiest crops to grow, whether you have a large kitchen garden, a small patio or simply a few pots on a sunny windowsill.

They ask for very little but give generously in return.

The difficulty comes when everything is ready at once.

Parsley doesn’t politely wait until you’ve used the first handful before producing another. Basil grows happily through warm weather, and mint seems determined to remind you that it has no intention of behaving itself.

Freezing herbs allows you to capture them at their very best.

Unlike dried herbs, which often lose some of their brightness and delicate flavour, frozen herbs retain much of their freshness, making them perfect for soups, stews, pasta sauces, casseroles and countless everyday meals.

It’s also wonderfully satisfying to know that the herbs flavouring your winter cooking were gathered from your own garden months earlier.

Which Herbs Freeze Best?

The good news is that most herbs freeze remarkably well.

Soft-leaved herbs are particularly successful because they’re usually added to cooked dishes, where their flavour matters far more than their texture.

Excellent herbs for freezing include:

  • Parsley
  • Chives
  • Basil
  • Coriander
  • Dill
  • Mint
  • Tarragon
  • Lovage

Woody herbs such as rosemary, thyme, sage and oregano also freeze well, although many gardeners prefer to leave these outdoors and harvest them fresh throughout much of the year.

If you have a particularly abundant crop, freezing is still an excellent option.

Harvest at the Right Time

The best herbs are harvested during the morning, once the dew has dried but before the heat of the day begins to draw away their aromatic oils.

Choose healthy stems with fresh green leaves and avoid anything that has started to flower or become woody.

A quick walk around the garden with a small basket and a pair of scissors soon provides enough herbs to fill several freezer bags.

There is something wonderfully peaceful about this simple task.

The scent of mint clinging to your fingers.

Bees drifting lazily between the flowers.

The quiet satisfaction of gathering food you’ve grown yourself.

It’s one of those moments that reminds you gardening is about far more than producing ingredients.

Wash and Dry Carefully

Once indoors, rinse the herbs gently in cool water to remove any dust or visiting insects.

Shake away the excess water before laying them on a clean tea towel or kitchen paper to dry.

This stage is worth taking your time over.

Freezing wet herbs can lead to ice crystals, which reduce their quality and make them more difficult to use later.

A salad spinner works surprisingly well if you’re harvesting larger quantities of parsley or coriander.

Four Simple Ways to Freeze Herbs

There isn’t just one correct method.

Choose whichever suits the way you cook.

Freeze Whole Sprigs

For rosemary, thyme and sage, simply place clean, dry sprigs into freezer bags or airtight containers.

Label them clearly before freezing.

When needed, remove a sprig and use it exactly as you would fresh.

Chop and Freeze

Parsley, chives, coriander and dill are easily chopped before freezing.

Spread them loosely on a tray for an hour or two before transferring them to labelled freezer bags.

This keeps the leaves separate, allowing you to take only what you need.

Freeze in Ice Cube Trays

One of the handiest methods is to finely chop herbs before dividing them between the compartments of an ice cube tray.

Top each compartment with a little water or olive oil before freezing.

Once frozen, transfer the cubes into labelled freezer bags.

They can be dropped straight into soups, casseroles, curries and pasta sauces as they cook.

Make Herb Butter

Softened butter mixed with finely chopped herbs freezes beautifully.

Parsley and garlic, rosemary and lemon, or chives with black pepper all make delicious combinations.

Roll the butter into a log using greaseproof paper before freezing.

Simply slice off a round whenever you fancy adding a little extra flavour to vegetables, fish or freshly baked potatoes.

Don’t Forget the Labels

Every experienced gardener has, at some point, confidently reached into the freezer believing they’ve found parsley, only to discover it was mint.

Or dill.

Or something that remains a complete mystery.

A simple label with the herb and date saves considerable confusion later.

Future you will be very grateful.

How Long Will Frozen Herbs Last?

Most herbs keep their best flavour for around six to twelve months.

Although they’ll remain safe beyond that, their aroma gradually begins to fade.

Thankfully, most gardeners are usually harvesting another fresh crop before the previous year’s supply has disappeared.

It’s a wonderfully reassuring cycle.

The Best Ways to Use Frozen Herbs

Frozen herbs are ideal for cooked dishes.

Add them directly from the freezer to:

  • Soups
  • Stews
  • Casseroles
  • Pasta sauces
  • Homemade bread
  • Risotto
  • Stir-fries
  • Vegetable dishes
  • Curries
  • Omelettes

There’s usually no need to thaw them first.

Simply stir them in during the final few minutes of cooking to preserve as much flavour as possible.

A Little Taste of Summer

One of the loveliest things about freezing herbs isn’t really the convenience.

It’s the memories they carry.

That cube of basil may remind you of warm evenings in the greenhouse.

The chopped parsley recalls afternoons spent in the vegetable garden.

The mint brings back thoughts of summer drinks enjoyed in the sunshine while bees busied themselves among the lavender.

Good gardening has a remarkable way of following us through the seasons.

Waste Less, Enjoy More

Growing your own herbs teaches you to appreciate abundance.

There will always be moments when the garden gives more than we can use in a single week.

Freezing allows us to celebrate that generosity rather than waste it.

Every handful tucked safely into the freezer represents meals yet to be shared, soups yet to be stirred and quiet winter evenings made just a little brighter by the flavours of summer.

It is a simple habit, but one that rewards you long after the growing season has ended.

So the next time your parsley begins to take over the raised bed or the basil threatens to fill every spare pot on the patio, don’t see it as a problem.

See it as the garden quietly inviting you to save a little sunshine for another day.

Because some of the greatest pleasures of growing your own aren’t found only in the harvest itself.

They’re found in those cold winter months, when a sprinkle of home-grown herbs reminds you that spring will return, the garden will wake once more, and before long you’ll be filling the freezer all over again.

Further Reading: Recipe Garden Pots: Grow a Herbal Tea Garden in One Pot, Bring Life to Your Kitchen: Grow a Winter Window Sill Herb Garden, Guide to Growing Herbs for the Home, How to Grow Herbs for Fish Recipes, How to Grow Essential Herbs for Beef Recipe Cooking, Herb Gardening for Chicken Recipes

Try our Grow your Own Herb Sets here

Follow us on InstagramThreadsBlueSkyTwitterPinterest & Facebook

Not sure where to start? Take a look at our Grow Your Own Packs with detailed step by step instructions, seeds and 1 years online support.

August Vegetable Garden

August is one of the most rewarding months in the vegetable garden. Beds that were carefully sown in spring are now overflowing with colour, fragrance and flavour. Tomatoes ripen in the warmth of the sun, beans hang heavily from their plants and courgettes seem to double in size overnight.

Although the harvest is at its peak, August isn’t simply about gathering crops. It’s also a month to keep plants productive, sow a few late-season vegetables and begin thinking ahead to autumn and winter. A little time spent in the garden now will help you make the most of every corner.

Harvest little and often

Many summer vegetables produce more generously when they’re picked regularly. Leaving crops on the plant for too long can slow production, so a daily wander around the vegetable garden often rewards you with something fresh for the kitchen.

This month you may be harvesting:

  • Tomatoes
  • Courgettes
  • Cucumbers
  • Runner beans
  • French beans
  • Beetroot
  • Carrots
  • Potatoes
  • Sweetcorn
  • Onions
  • Garlic
  • Shallots
  • Peas
  • Broad beans
  • Salad leaves
  • Chard
  • Kale
  • Spinach
  • Herbs such as basil, parsley, thyme and mint

Sweetcorn is at its sweetest when cooked soon after picking, while courgettes are best harvested when young and tender, before they become oversized.

Lift onions, garlic and shallots

Once the foliage begins to yellow and topple over, onions, garlic and shallots are ready to lift. Choose a dry day and carefully ease the bulbs from the soil. Brush away excess earth and leave them somewhere warm, airy and sheltered for a couple of weeks to dry fully.

Once cured, trim the roots and stems before storing them in mesh bags, baskets or plaiting the stems if you prefer a traditional look. Kept in a cool, dry place with good air circulation, many varieties will store well into winter.

Dig early potatoes

If you haven’t already lifted your early potatoes, August is an ideal time. Gently work through the soil with a fork to avoid damaging the tubers.

Enjoy freshly dug potatoes simply boiled with butter and herbs, or roast them alongside seasonal vegetables. Any damaged potatoes should be eaten first, while only unblemished tubers are suitable for storing.

Maincrop potatoes can remain in the ground until later in the season if the foliage is still healthy.

Keep beans coming

Runner beans and French beans crop heavily during August. Pick them every few days while they’re still young and slender to encourage more flowers and pods.

If you find yourself with more than you can eat, beans freeze well. Simply top and tail them, blanch for a few minutes, cool quickly in iced water and freeze in portions for winter meals.

Tomatoes at their best

Outdoor tomatoes often begin producing in earnest during August. Remove any lower leaves that are restricting airflow and continue pinching out side shoots on cordon varieties if needed.

If plants are carrying plenty of fruit, pinch out the growing tip towards the end of the month so the plant concentrates its energy on ripening existing tomatoes rather than producing new flowers.

Surplus tomatoes make excellent sauces, chutneys and soups, or can be slow-roasted with garlic and herbs before freezing.

Don’t forget the herbs

Herbs are at their most fragrant in summer. Pick basil before it flowers, gather mint for refreshing drinks and harvest rosemary, thyme and oregano for drying.

Tie small bunches together and hang them upside down in a warm, dry room away from direct sunlight. Once completely dry, store the leaves in airtight jars ready for use throughout the colder months.

Sow for autumn and beyond

Although it may feel like the height of summer, August is a surprisingly productive month for sowing.

You can still sow:

  • Spring cabbage
  • Spinach
  • Oriental leaves
  • Rocket
  • Lamb’s lettuce
  • Winter lettuce
  • Radishes
  • Turnips
  • Coriander
  • Parsley

These later sowings help keep the vegetable garden productive well into autumn and provide welcome fresh leaves as temperatures begin to cool.

Water wisely

Plants are often carrying their heaviest crops during August and need consistent moisture. Rather than watering little and often, give the soil a thorough soaking once or twice a week, depending on rainfall. Water early in the morning or during the evening to reduce evaporation.

Adding a mulch around thirsty crops such as beans, squash and tomatoes helps retain moisture and suppress weeds.

Save seeds

If you’ve allowed a few flowers and vegetables to mature, August is an excellent month for collecting seed. Peas, beans, lettuce, calendula and many herbs produce seed that can be dried and stored for next year’s garden.

Allow seed heads to dry fully before collecting them. Store in labelled paper envelopes somewhere cool and dry.

Make the most of your harvest

One of the pleasures of an abundant August garden is sharing the harvest. Extra courgettes, beans or tomatoes are always welcome gifts for neighbours, friends and family.

For your own kitchen, consider preserving the season by making:

  • Tomato and basil pasta sauce
  • Courgette and lemon loaf cake
  • Beetroot chutney
  • Runner bean pickle
  • Sweetcorn chowder
  • Herb butter for freezing
  • Mixed vegetable ratatouille
  • Blackberry and apple crumble, if you’re also foraging from hedgerows

Freezing, pickling and bottling a little now means you’ll still be enjoying the flavours of summer long after the growing season has ended.

Enjoy the season

August invites a slower pace in the garden. There are weeds to pull and watering to keep up with, but there’s also time to pause with a basket full of vegetables, listen to bees working among the flowers and appreciate the abundance that months of care have created.

Every harvest is a reminder that the vegetable garden changes with the seasons. By picking regularly, storing crops carefully and making a few timely sowings, you’ll continue to enjoy fresh produce well into autumn and lay the foundations for the months ahead.

Further Reading: Wonderful Ways to Use Fresh Garden PeasGrow Your Own Food: Save Money & Eat Well

Follow us on InstagramThreadsBlueSkyTwitterPinterest & Facebook

Not sure where to start? Take a look at our Grow Your Own Packs with detailed step by step instructions, seeds and 1 years online support.

From Vegetable Plot to Plate in April

A gentle harvest at the turning of the season

April draws to a close with a quiet kind of generosity. The sharpness of early spring begins to soften, and in the vegetable plot, signs of life are no longer tentative—they’re assured. Leaves unfurl with confidence, roots swell beneath the soil, and the first meaningful harvests begin to find their way into the kitchen.

There’s something deeply satisfying about this moment. After months of tending, waiting, and watching, the plot begins to give back. Not in abundance just yet, but in promise—handfuls of fresh, vibrant produce that speak of longer days to come.

Here’s what you might be gathering from a vegetable plot as April comes to a close, along with simple, seasonal ways to bring each ingredient to the table.


Spring Greens (Young Cabbage Leaves)The first tender leaves of spring greens are among the most welcome sights in the plot. Softer and sweeter than their winter counterparts, they offer a gentle introduction to the growing season.

Nutritional benefits:
Rich in vitamin C, vitamin K, and fibre—supporting digestion and immune health.

From plot to plate:
Shred finely and sauté with butter, garlic, and a splash of vegetable stock. Finish with a squeeze of lemon to lift the flavour.


Spinach

April spinach is delicate, almost silky, and far milder than later crops. Picked young, it barely needs cooking.

Nutritional benefits:
High in iron, calcium, and antioxidants—supporting energy levels and bone health.

From plot to plate:
Wilt gently in a pan with olive oil and garlic, then fold through pasta with a little cream and parmesan.


Radishes

Quick to grow and full of character, radishes are often the first true harvest for many gardeners.

Nutritional benefits:
Low in calories, high in vitamin C, and known to aid digestion.

From plot to plate:
Serve simply—sliced and scattered over buttered bread with a pinch of sea salt. Or toss into salads for a crisp, peppery bite.


Spring Onions

Pulled fresh from the soil, spring onions carry a mild sweetness with just a hint of sharpness.

Nutritional benefits:
Contain vitamin C, folate, and compounds that support heart health.

From plot to plate:
Chop finely and stir into omelettes, or grill whole and drizzle with olive oil and lemon.


Lettuce (Cut-and-Come-Again Varieties

The first loose-leaf lettuces are a quiet luxury—fresh, crisp, and far removed from anything shop-bought.

Nutritional benefits:
Hydrating and rich in vitamins A and K.

From plot to plate:
Toss gently with a simple vinaigrette of olive oil, mustard, and vinegar. Let the freshness speak for itself.


Rhubarb

Though often found in a fruit garden, rhubarb earns its place here. Its vivid stalks are one of April’s most distinctive harvests.

Nutritional benefits:
High in fibre and vitamin K, with natural digestive benefits.

From plot to plate:
Stew gently with sugar and orange zest, then spoon over yoghurt or porridge.


Early Carrots (Thinnings

When thinning rows, don’t discard the smallest carrots—they’re tender, sweet, and full of flavour.

Nutritional benefits:
Rich in beta-carotene, supporting eye health and immunity.

From plot to plate:
Roast whole with honey and thyme, or add raw to salads for a delicate crunch.


Beetroot (Young Leaves)

While the roots take time, the leaves of beetroot can be harvested early and used much like chard.

Nutritional benefits:
High in iron, magnesium, and vitamins A and C.

From plot to plate:
Sauté with garlic and olive oil, or stir into soups for added depth and nutrition.


Herbs (Parsley, Chives, Mint)

By late April, herbs begin to flourish—small but significant additions to any dish.

Nutritional benefits:
Packed with antioxidants, vitamins, and natural oils that support digestion and overall health.

From plot to plate:
Chop generously into salads, sprinkle over new potatoes, or blend into herb butter.


A Final Thought

The April harvest is not about abundance—it’s about beginnings. Each leaf, root, and stem carries with it the quiet satisfaction of having grown something yourself. It reminds us that good food doesn’t arrive all at once, but in stages, shaped by time and care.

From plot to plate, these early harvests offer something simple yet profound: a connection between effort and reward, between soil and sustenance.

And as May approaches, the promise only grows.


Further Reading: How to Start Your Own Vegetable PatchHow to Plan and Design Your Dream Vegetable PatchWhy Choose Sow It Grow It and Feast for Your Garden?How to Choose the Perfect Flower Pot for Your CropsRecipe Garden Pots: Grow a Pimm’s No.1 Garden in One Pot, Recipe Garden Pots: Grow a Green Risotto in One PotRecipe Garden Pots: Pizza in One Pot

Follow us on InstagramThreadsBlueSkyTwitterPinterest & Facebook

From Plot to Plate: The Surprising Benefits of Growing Your Own Food

There is a quiet revolution happening in back gardens, allotments, and even on windowsills across the country. It isn’t loud or flashy, but it is fundamentally changing how we connect with what we eat. We are talking, of course, about the simple act of growing your own food.

For many, the initial draw is the taste. If you have ever bitten into a sun-warmed tomato plucked straight from the vine, you will know that the supermarket equivalent simply cannot compare. However, the benefits of cultivating your own crops extend far beyond flavour. Digging for your dinner is one of the most powerful steps you can take to reduce your environmental impact, support your physical health, and improve your mental wellbeing.

Whether you are thinking of planting a few herbs in a window box or taking on a full-sized allotment, understanding the broader impact of your gardening efforts can be incredibly motivating. Let us explore why getting your hands dirty is one of the best things you can do for yourself and the planet.

Reducing Your Carbon Footprint

When we buy food from a supermarket, we are often the final step in a very long, fuel-intensive journey. By growing at home, you are effectively short-circuiting the modern industrial food system in the most sustainable way possible.

Zero Food Miles

Have you ever looked at the label on a packet of green beans and noticed they have travelled from Kenya or Peru? The concept of ‘food miles’ refers to the distance food is transported from the time of its production until it reaches the consumer. This journey often involves lorries, ships, and planes, all of which burn fossil fuels and contribute significantly to greenhouse gas emissions.

When you grow your own produce, your ‘food miles’ are measured in footsteps. The journey from the soil to your kitchen sink requires zero fossil fuels. By eating what is in season and right on your doorstep, you are drastically cutting the carbon emissions associated with your meals.

Eliminating Wasted Packaging

A stroll down the produce aisle can be a disheartening experience for the eco-conscious shopper. Cucumbers wrapped in plastic, apples on polystyrene trays, and berries in plastic clamshells—the amount of single-use waste generated by the food industry is staggering.

One of the most immediate environmental wins of home gardening is the complete elimination of this waste. Your garden does not require branding, barcodes, or protective plastic wrap. You can harvest exactly what you need for a single meal, carrying it into the house in a reusable basket or a colander. It is a liberating way to shop, free from the guilt of the recycling bin.

Growing with Nature, Not Against It

Industrial agriculture often relies heavily on synthetic fertilisers and pesticides to maximise yields. While effective for mass production, these chemicals can degrade soil health, harm local wildlife, and run off into waterways.

When you are the head gardener, you are in control. You can choose to use organic compost, natural pest control methods, and companion planting to keep your plot healthy. This approach protects local biodiversity, encouraging bees, butterflies, and other pollinators to thrive in your garden. You are not just growing food; you are creating a sanctuary for nature.

Ease the Pressure on Your Wallet

Beyond the environmental advantages, growing your own food is a practical response to the current economic climate. With the cost of living rising, many households are looking for ways to stretch their budget further without compromising on quality.

Combatting Price Hikes

We have all noticed the creeping prices at the checkout. Fresh produce, particularly organic options, can be expensive. While there is a small initial investment in seeds and tools, the return on investment can be substantial.

A single packet of lettuce seeds cost less than a bag of salad leaves and can keep you supplied with fresh greens for months. Similarly, crops like courgettes, runner beans, and chard are prolific producers; a few healthy plants can yield kilos of food over a season. By growing these staples yourself, you can insulate yourself from fluctuating market prices.

Improving Food Security

There is a profound sense of security that comes from knowing you can provide for yourself. Supply chain disruptions and empty shelves have highlighted how fragile our food systems can be. Having a garden, no matter the size, builds resilience. It reconnects you with the seasons and the cycle of production, giving you a buffer against shortages and ensuring you always have something fresh and nutritious to hand.

Nourishing Body and Mind

Perhaps the most personal benefits of gardening are the ones you feel physically and mentally. It is a hobby that nourishes you in every sense of the word.

Unbeatable Flavour and Nutrition

We mentioned the taste of home-grown tomatoes earlier, but the difference applies to almost everything you grow. This is because produce begins to lose its nutritional value the moment it is harvested. Supermarket vegetables are often picked before they are fully ripe to ensure they survive transportation, which means they never reach their full nutrient potential.

When you harvest from your garden, you are eating food at its absolute peak. It is fresher, richer in vitamins, and free from the preservatives often used to extend shelf life. This is ‘honest food’—you know exactly where it came from, how it was treated, and that it is free from unnecessary chemicals.

The ‘Green Gym’

Forget the treadmill; the garden is one of the best places to get a workout. Digging, weeding, planting, and watering are all physical activities that burn calories and improve strength and flexibility. It is functional fitness with a purpose. Rather than staring at a screen or a gym wall, you are breathing fresh air and moving your body in a natural way.

Mental Wellbeing and Connection

There is a growing body of evidence suggesting that spending time outdoors and interacting with nature significantly lowers stress levels. The slow, rhythmic nature of gardening offers a break from the rush of daily life. It requires patience and observation, grounding you in the present moment.

For many, the garden becomes a place of refuge—a quiet space to clear the head and find a sense of calm. The satisfaction of nurturing a seed into a plant and then into a meal provides a tangible sense of achievement that boosts mood and mental resilience.

Ready to Get Your Hands Dirty?

You do not need acres of land or a degree in horticulture to start experiencing these benefits. The beauty of growing your own food is that it is accessible to almost everyone. You can start with a pot of basil on the windowsill, a tomato plant on a balcony, or a small raised bed in the back garden.

Every seed you plant is a small vote for a greener, healthier, and more sustainable future. It is a way to reclaim control over what you eat, save money, and do something kind for the planet. So, why not grab a trowel and see what you can grow?

Further Reading: How to Start Your Own Vegetable PatchHow to Plan and Design Your Dream Vegetable PatchWhy Choose Sow It Grow It and Feast for Your Garden?How to Choose the Perfect Flower Pot for Your CropsRecipe Garden Pots: Grow a Pimm’s No.1 Garden in One Pot, Recipe Garden Pots: Grow a Green Risotto in One PotRecipe Garden Pots: Pizza in One Pot

Follow us on InstagramThreadsBlueSkyTwitterPinterest & Facebook

Recipe Garden Pots: Grow a Green Risotto in One Pot

There’s something deeply satisfying about stepping outside and gathering the ingredients for supper straight from the garden. Even in a small space, a single generous pot can hold a surprising abundance. This Green Risotto Recipe Garden Pot is designed to do just that – bringing together a collection of fresh summer vegetables and herbs that grow happily side by side and can be harvested for a bright, punchy risotto.

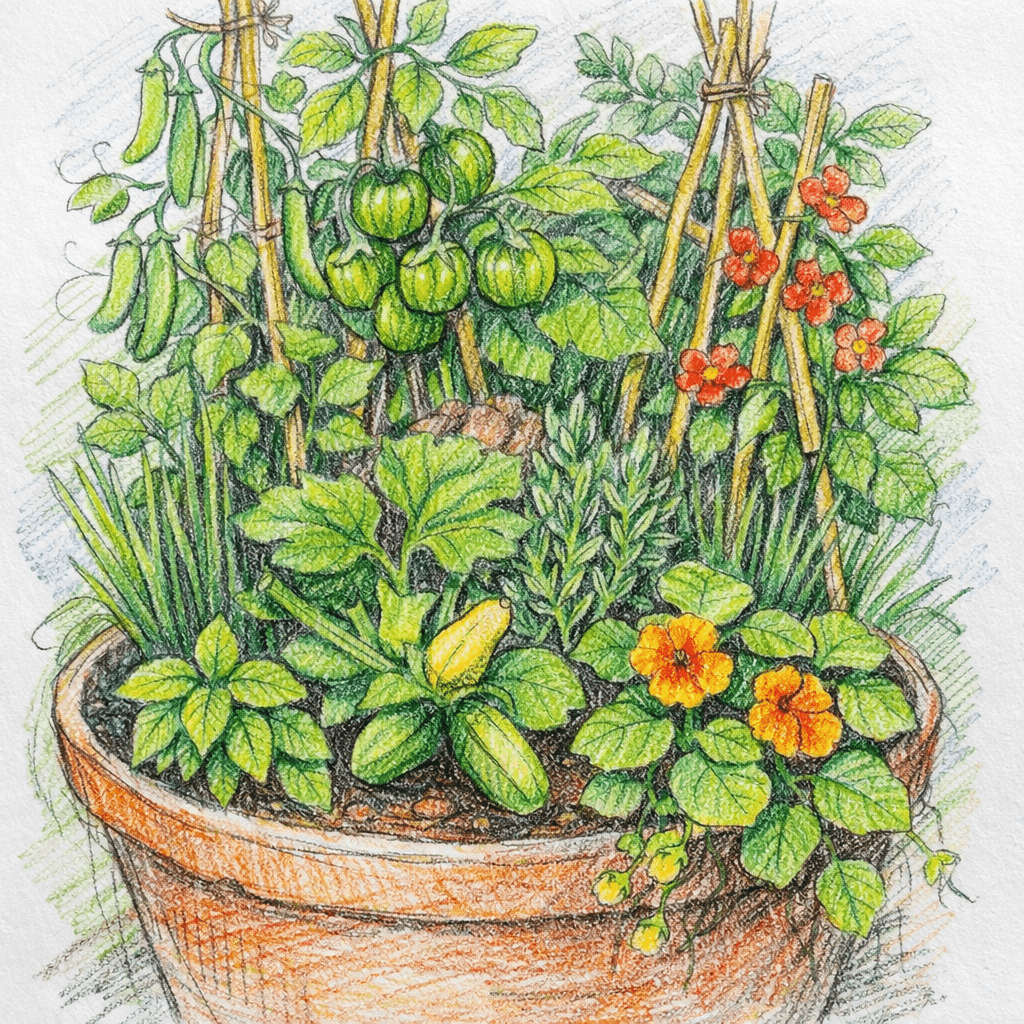
Sketch of Green Risotto in a pot.
Grow a Green Risotto in One Pot

With a little care, one container can become a miniature kitchen garden.


What you’ll need

  • 1 x 60cm pot with good drainage
  • Multi-purpose compost
  • A few bamboo canes for support

Plants

  • Basil
  • Broad bean ‘Sutton’
  • Courgette ‘Patio Star’
  • Dwarf runner bean ‘Hestia’
  • Garlic chives
  • Nasturtium Tropaeolum majus
  • Pea ‘Rondo’
  • Rosemary ‘Corsican Blue’
  • Shallot
  • Tomato ‘Green Zebra’
  • Thyme ‘Archer’s Gold’

Together these plants offer a generous mix of green vegetables, herbs and edible flowers, perfect for creating a flavourful summer risotto.


Preparing the pot

Choose a wide, sturdy pot around 60cm across. Containers of this size hold moisture well and give the plants enough room to thrive through the season.

Fill the pot with fresh multi-purpose compost, leaving a few centimetres at the top for watering. Give the compost a good soak before planting so it settles evenly.


Planting your risotto garden

The secret to a successful recipe pot is arranging plants so each has space and light.

1. Start with the centrepiece

Plant the courgette ‘Patio Star’ in the middle of the pot. This compact variety is ideal for containers and will soon produce tender courgettes perfect for slicing into risotto.

2. Add the taller crops

Around the back of the pot plant:

  • Tomato ‘Green Zebra’
  • Pea ‘Rondo’
  • Broad bean ‘Sutton’
  • Runner bean ‘Hestia’

Insert a few bamboo canes at planting time. Peas and tomatoes will need support as they grow, and it’s easier to add it now than later.

3. Fill the middle layer

Plant the shallot and garlic chives where they’ll receive plenty of sun but won’t crowd the larger plants.

4. Finish with the herbs

Tuck herbs and trailing plants around the edges:

  • Basil
  • Rosemary ‘Corsican Blue’
  • Thyme ‘Archer’s Gold’
  • Nasturtium

The nasturtium will spill gently over the side of the pot, softening the edges while adding peppery leaves and edible flowers.


Caring for the pot

Container gardens thrive with a little regular attention.

  • Water daily, especially during warm weather. Pots dry quickly and vegetables need consistent moisture.
  • Tie in peas and tomatoes as they grow to keep stems upright.
  • Harvest often, which encourages fresh growth.
  • Remove any faded leaves to keep the planting healthy.

With sunshine and steady watering, the pot will soon become a lively patchwork of greens.


Harvesting for your green risotto

As the season unfolds you’ll be able to gather an assortment of ingredients:

  • Sweet peas and broad beans
  • Tender courgettes
  • Fresh basil, thyme and rosemary
  • Fragrant garlic chives
  • Mild shallots
  • Zesty green zebra tomatoes
  • Peppery nasturtium leaves

Together they bring colour, freshness and depth of flavour to a simple risotto.


A pot full of summer

This Green Risotto Recipe Garden Pot shows how even a single container can provide a generous harvest. It’s a small garden with a purpose – herbs to pinch for cooking, vegetables to gather for supper, and flowers to brighten the edge of the pot.

Placed on a patio, balcony or doorstep, it becomes both a decorative planter and a working kitchen garden, quietly growing the makings of a summer meal.

Further Reading: How to Start Your Own Vegetable PatchHow to Plan and Design Your Dream Vegetable PatchWhy Choose Sow It Grow It and Feast for Your Garden?How to Choose the Perfect Flower Pot for Your CropsRecipe Garden Pots: Grow a Pimm’s No.1 Garden in One Pot, Recipe Garden Pots: Grow a Green Risotto in One PotRecipe Garden Pots: Pizza in One Pot

Follow us on InstagramThreadsBlueSkyTwitterPinterest & Facebook

The Three Sisters Method: Harmony in the Garden

Step into any traditional cottage garden and you may stumble across a trio of plants quietly working together in a way that feels almost magical. Tall stems, broad leaves, and dainty tendrils share the same patch of earth, creating a living tapestry of cooperation. This is the Three Sisters method—a beautifully simple, ancient technique for growing crops in partnership rather than isolation.

Beloved for generations, this approach offers a gentle reminder that nature is at its best when it works in harmony.

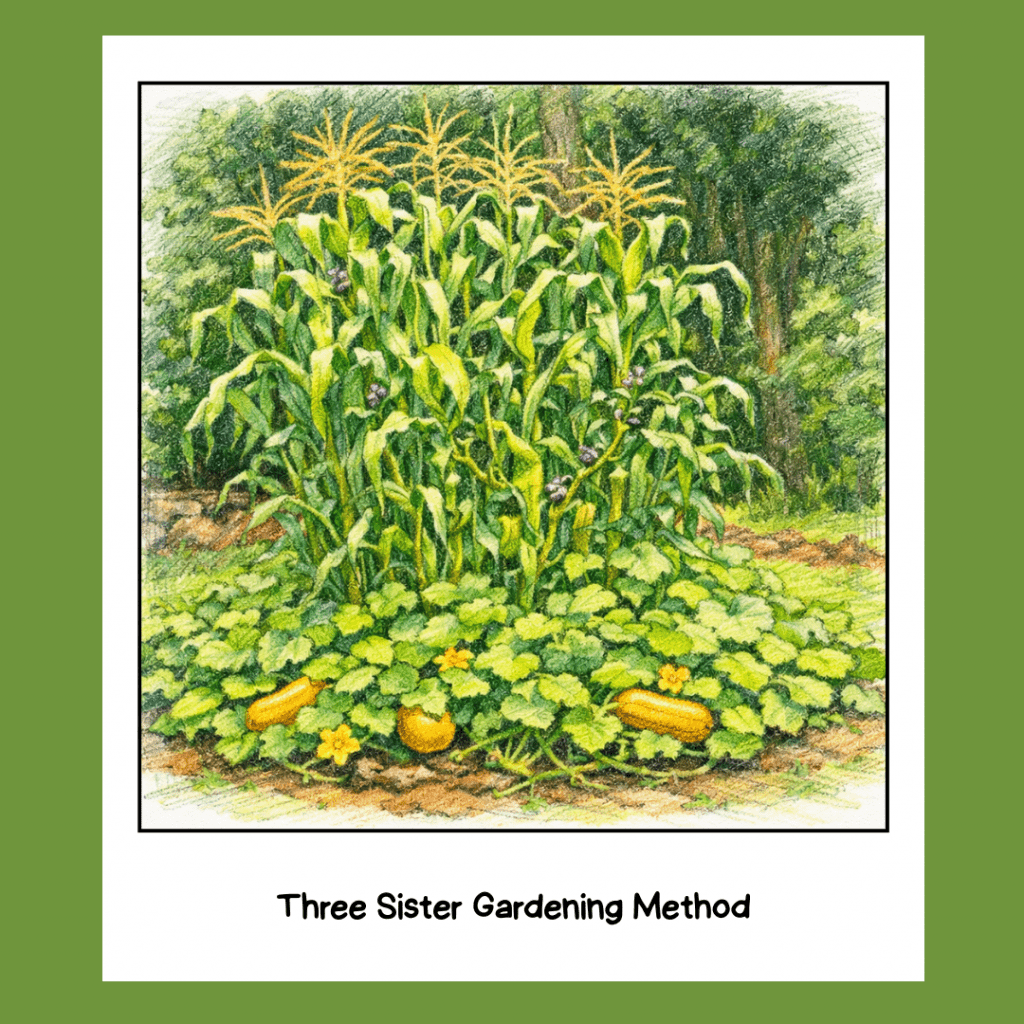
Three Sister Gardening Method.  Corn, Beans and Squash

What Is the Three Sisters Method?

The Three Sisters method is a traditional way of growing sweetcorn, climbing beans, and squash together in the same bed. Each plant plays a distinct role:

  • Sweetcorn grows tall, forming a natural support structure.
  • Climbing beans twine gracefully around the stems, fixing nitrogen into the soil.
  • Squash sprawls across the ground, shading the earth and keeping moisture where it’s needed.

Together, they create a mutually supportive ecosystem—three companions whose strengths complement one another beautifully.


How Did the Method Come About?

The method has its roots in indigenous horticultural traditions, where it developed over centuries through careful observation of how plants behaved in the wild. It offered a practical, resilient way to cultivate nourishing staples using minimal space and without the need for elaborate tools or structures.

Over time, the technique made its way into cottage gardens and kitchen plots across the world, where it was embraced for its simplicity, efficiency, and natural elegance. Today, it remains a favourite among gardeners who enjoy methods that feel both meaningful and grounded in history.


What Are the Benefits?

1. Natural Soil Health

Beans enrich the soil by adding nitrogen, supporting strong crops without extra feed.

2. Reduced Weeding and Watering

The spreading leaves of the squash act as a living mulch, helping to keep the soil damp and discouraging weeds.

3. Space-Saving and Productive

The vertical growth of the sweetcorn and climbing beans allows you to harvest generously even in smaller plots.

4. A Biodiverse Planting Style

The trio attracts a variety of wildlife—from pollinators to beneficial insects—supporting a thriving garden.

5. A Heritage Approach

It’s a method steeped in tradition, offering a sense of continuity with gardeners who have tended the land for countless generations.


Are There Any Disadvantages?

The Three Sisters method is highly rewarding, but it helps to be aware of a few practicalities:

  • Timing Matters
    Planting out of sequence can lead to beans searching in vain for support or squash overwhelming the space too early.
  • Not Ideal for Cold, Wet Summers
    Sweetcorn needs warmth to thrive, so in cooler climates, growth may be slower.
  • Squash Can Dominate
    Without a little guidance, squash plants may sprawl further than planned.
  • Requires Good Soil Preparation
    Although the plants support one another, they still benefit from a nutritious starting bed.

How to Grow Your Own: Step-by-Step

1. Prepare the Bed

Choose a sunny, sheltered spot with rich, well-drained soil. A circular or slightly mounded bed works especially well for this method.

2. Plant the Sweetcorn First

In late spring, once the soil has warmed, sow sweetcorn seeds in a small cluster—usually a circle of five to seven plants. This creates a sturdy, supportive framework.

3. Add the Climbing Beans

When the sweetcorn reaches around 15–20 cm in height, sow climbing beans around the base of each corn plant. They will begin to twist naturally up the stems.

4. Introduce the Squash

Finally, plant your squash at the outer edge of the bed. As it grows, encourage the vines to roam around the perimeter rather than through the centre, ensuring they don’t smother the sweetcorn.

5. Water Carefully

Water at the base, especially during dry spells. The squash leaves help retain moisture, but all three crops still appreciate a good drink while they establish.

6. Let Nature Take the Lead

Once the trio is settled, the system becomes remarkably low-maintenance. The sweetcorn stands tall, the beans entwine, the squash shelters the soil—and together they flourish.


A Celebration of Companionship in the Garden

There’s something genuinely uplifting about the Three Sisters method. It invites us to see gardening not as a battle against nature, but as a collaboration with it—a quiet partnership where every plant has a purpose.

Whether you’re cultivating a historic garden or simply tucking a few seeds into a raised bed at home, this time-honoured trio offers a delightful, abundant way to grow.

Further Reading: How to Start Your Own Vegetable PatchHow to Plan and Design Your Dream Vegetable PatchWhy Choose Sow It Grow It and Feast for Your Garden?How to Choose the Perfect Flower Pot for Your CropsThe Principles of Organic Gardening

Follow us on InstagramThreadsBlueSkyTwitterPinterest & Facebook

Why You Should Grow Your Own Food

Food prices are rising at a significant rate, and for many families, in order to make their money stretch, they are having to compromise on the the quality of produce on their shopping list. This situation has led many to question how they can provide healthy, affordable food for their households. One effective solution is to grow your own food. Cultivating a garden, no matter the size, offers a range of benefits that extend beyond the dinner table.

So what are the advantages of growing your own food?

Complete Control Over Your Food’s Journey

When you purchase produce from a supermarket, its journey from farm to shelf is often long and complex. It passes through various stages of harvesting, transport, storage and processing. At each stage, the food can be exposed to chemicals, preservatives and contaminants.

By growing your own fruits and vegetables, you have complete transparency. You know exactly what has gone into nurturing them, from the soil and fertilisers used to the pest control methods applied. This allows you to completely eliminate the use of synthetic pesticides and herbicides, which have been linked to various health concerns. Growing food organically becomes a straightforward choice rather than a costly supermarket option.

Fresher Produce and Superior Taste

The flavour of freshly picked produce is often superior to that of store-bought alternatives. This difference in taste is not just anecdotal; it has a scientific basis. From the moment a fruit or vegetable is harvested, its sugars begin to convert into starches, its moisture content starts to decrease, and its delicate flavour compounds begin to break down.

Supermarket produce may have been harvested days or even weeks before it reaches your kitchen. To withstand the long transit times, many varieties are picked before they are fully ripe and are sometimes artificially ripened using ethylene gas. This process compromises the development of natural sugars and aromatic compounds, resulting in a less flavourful product. When you grow your own food, you can harvest it at its peak of ripeness, ensuring maximum flavour and nutritional value.

Significant Cost Savings

While there is an initial investment required for soil, seeds and tools, growing your own food can lead to substantial long-term savings. The cost of a packet of seeds is minimal compared to the price of purchasing the resulting produce week after week. A single tomato plant, for example, can yield several kilograms of fruit over a season, far exceeding the value of its initial cost.

These savings become particularly noticeable with herbs and salad greens, which are often expensive to buy fresh but are easy and prolific to grow. By cultivating your own produce, you can reduce your grocery bills and allocate those savings to other household needs.

Access to Unique Varieties

Supermarkets typically stock a limited range of fruit and vegetable varieties, selected primarily for their ability to travel well and maintain a long shelf life. This commercial focus means that many flavourful and unique heirloom varieties are not available to the average consumer.

Growing your own food opens up a world of choice. Seed catalogues and local nurseries offer a vast selection of varieties, each with its own distinct taste, colour and texture. This allows you to cultivate produce that is tailored to your culinary preferences and to experience flavours that cannot be found in a typical grocery store.

Reducing Your Carbon Footprint

The modern food supply chain is a significant contributor to greenhouse gas emissions. Produce is often transported thousands of miles by air, sea and road, consuming large amounts of fossil fuels. This journey from farm to consumer is often referred to as “food miles.”

By growing your own food, you eliminate these food miles entirely. Your produce travels only from your garden to your kitchen, drastically reducing the carbon emissions associated with your food consumption. Furthermore, you eliminate the need for single-use plastic packaging, which is a major source of pollution.

Promoting Food Security

Food security refers to having reliable access to a sufficient quantity of affordable, nutritious food. On a household level, a garden can provide a degree of food security, offering a supplementary source of fresh produce that is independent of supply chain disruptions or price fluctuations. While a small garden may not meet all of your nutritional needs, it can provide a valuable buffer and contribute to your family’s resilience.

Stress Reduction and Mental Clarity

Gardening is widely recognised for its therapeutic qualities. Engaging in the physical tasks of planting, watering and weeding can have a meditative effect, helping to lower levels of the stress hormone cortisol. Spending time outdoors, surrounded by greenery, has been shown to improve mood and reduce feelings of anxiety. The sense of purpose and accomplishment that comes from nurturing a plant from seed to harvest can also be a powerful boost to self-esteem.

Physical Activity and Vitamin D

Gardening is a form of gentle, low-impact exercise that involves a variety of movements, such as digging, lifting and stretching. This activity can improve strength, flexibility, and cardiovascular health. Additionally, spending time in the garden exposes you to sunlight, which is essential for the body’s production of Vitamin D. This vitamin plays a crucial role in bone health and immune function.

A Rewarding Family Activity

Gardening can be a wonderful activity for the entire family. It provides an opportunity for children to learn where their food comes from and to develop an appreciation for nature. Involving them in the process of planting and harvesting can encourage them to try new fruits and vegetables, promoting healthier eating habits from a young age.

A Step Towards a Healthier Future

Growing your own food is a practical and rewarding endeavour that offers a multitude of benefits. It provides access to fresher, more nutritious produce, reduces household expenses and lessens your environmental impact. Furthermore, the act of gardening contributes positively to mental and physical wellbeing.

Whether you have a large garden, a small patio or just a sunny windowsill, you can start growing your own food. By taking this small step, you can improve the quality of your diet, gain a greater connection to your food, and contribute to a more sustainable lifestyle for you and your family.

Further Reading: How to Start Your Own Vegetable Patch, How to Plan and Design Your Dream Vegetable Patch, Why Choose Sow It Grow It and Feast for Your Garden?, How to Choose the Perfect Flower Pot for Your Crops, The Principles of Organic Gardening

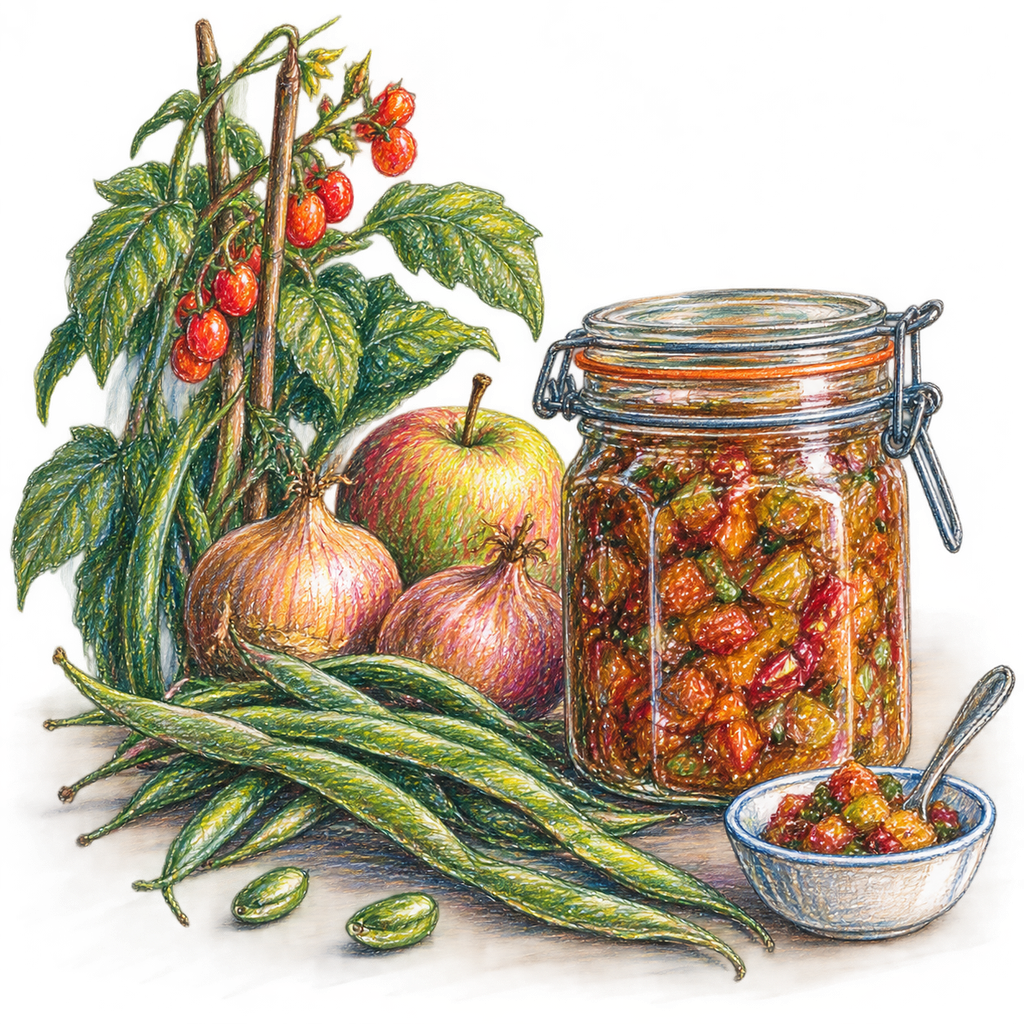
Chutney: A Taste of History in a Jar

Autumn brings with it a rich tapestry of colours and flavours. As the leaves turn golden and the air grows crisp, our kitchens fill with the comforting aromas of seasonal cooking. This is the perfect time of year for preserving the harvest’s bounty, and there is no better way to do so than by making a batch of delicious, homemade chutney.

Chutney is more than just a condiment; it’s a jar full of history, flavour and resourcefulness. It represents a tradition of turning surplus fruits and vegetables into something that can be enjoyed for months to come. A chutney is the simple joy of transforming humble ingredients into a truly special store-cupboard staple. Let’s start stirring up some history and flavour.

What is Chutney?

At its heart, chutney is a savoury condiment made from a combination of fruits, vegetables, vinegar, sugar and spices. The ingredients are slowly simmered together until they break down and thicken, creating a rich, flavourful preserve. The magic of chutney lies in its perfect balance of sweet, sour and spicy notes, which makes it an incredibly versatile partner for a wide variety of dishes.

Unlike a jam, which is typically sweet and made primarily from fruit, chutney leans towards the savoury side. The inclusion of vinegar gives it a tangy kick, while onions, garlic and an array of spices add depth and complexity. It can range in texture from a smooth purée to a chunky mixture, and its flavour profile can be anything from mild and fruity to fiery and intense.

Think of it as the ultimate accompaniment. A dollop of apple chutney can elevate a simple cheese sandwich, a spoonful of spicy tomato chutney can bring a curry to life, and a tangy plum chutney is the perfect companion for a Ploughman’s lunch. It is a testament to the art of preserving, turning everyday ingredients into something truly extraordinary.

A Brief History of Chutney

The story of chutney begins not in the British countryside, but in India, where it has been a staple for centuries. The word “chutney” comes from the Hindi word chatnī, which means “to lick.” In India, chutneys were traditionally fresh preparations, made by grinding herbs, spices and other ingredients into a paste using a stone mortar and pestle. These fresh chutneys, like mint or coriander chutney, were made to be eaten the same day, adding a burst of flavour to meals.

The journey of chutney from India to Britain is intertwined with the history of the British Empire. During the 17th and 18th centuries, British officials and traders returning from India brought back a taste for these exotic flavours. They also brought back recipes, which soon had to be adapted. The fresh, tropical ingredients available in India were not readily found in Britain, and the long sea voyages required a method of preservation.

This necessity led to the invention of the chutney we know today. British cooks began to experiment, using local fruits and vegetables like apples, plums and marrows. They added vinegar and sugar, which acted as preservatives, allowing the chutney to be stored in jars for long periods. This new, preserved style of chutney became incredibly popular during the Victorian era. Major Grey’s Chutney, a famous mango chutney, is said to have been created by a British army officer in the 19th century and remains a classic example of this Anglo-Indian culinary fusion.

Over time, chutney became a cornerstone of British preserving culture. It was a practical and delicious way to use up gluts of produce from the garden or allotment, ensuring nothing went to waste. Today, it stands as a delicious symbol of our culinary history—a flavour born in India and lovingly adopted and adapted in British kitchens.

The Art of Preserving

Making chutney is a wonderful way to connect with the seasons and practice the age-old tradition of preserving food. At its core, preserving is about extending the life of fresh produce, allowing us to enjoy the flavours of the harvest long after the season has passed. Chutney accomplishes this through a simple yet effective scientific process.

The two key ingredients responsible for preserving chutney are vinegar and sugar.

  • Vinegar: The high acidity of vinegar creates an environment where most bacteria, yeasts and moulds cannot survive. This process, known as pickling, is one of the oldest methods of food preservation.
  • Sugar: Sugar acts as a preservative by drawing water out of the food’s cells through a process called osmosis. This reduces the amount of available water, which microorganisms need to grow.

When combined and heated, the sugar and vinegar work together to create a safe, long-lasting preserve. The slow simmering process not only develops the chutney’s flavour but also ensures that all the ingredients are heated sufficiently to destroy any harmful microorganisms. Finally, sealing the hot chutney in sterilised jars creates a vacuum seal, which prevents new contaminants from entering and spoiling the contents.

This clever combination of science and cookery means that a well-made chutney can be stored in a cool, dark place for a year or even longer, with its flavour often improving and mellowing over time. It’s a sustainable and satisfying way to reduce food waste and enjoy homemade goodness all year round.

Autumnal Chutney Recipes

Autumn is arguably the best season for chutney-making. The harvest provides a wonderful abundance of apples, pears, plums and late-season vegetables, all begging to be turned into something delicious. Here are a few recipes to get you started.

Before you begin, remember the basic principle of chutney making: chop your ingredients, place them in a large, heavy-bottomed pan and simmer gently until thick and glossy. The exact cooking time will vary, but patience is key. A good test for readiness is to drag a wooden spoon across the bottom of the pan—if the channel it creates remains for a few seconds before filling up, the chutney is likely ready.

1. Classic Apple and Date Chutney

This is a timeless recipe that pairs beautifully with cheese and cold meats. It’s sweet, tangy and wonderfully warming.

Ingredients:

  • 1 kg cooking apples (like Bramley), peeled, cored and chopped
  • 500g onions, chopped
  • 250g dates, chopped
  • 500g demerara sugar
  • 500ml cider vinegar
  • 1 tsp ground ginger
  • 1 tsp mixed spice
  • 1 tsp salt

Method:

  1. Place all the ingredients into a large, heavy-bottomed pan.
  2. Heat gently, stirring occasionally, until the sugar has completely dissolved.
  3. Bring the mixture to a simmer and cook for 1.5 to 2 hours, stirring from time to time to prevent it from catching on the bottom of the pan.
  4. The chutney is ready when it has thickened and has a rich, pulpy consistency.
  5. Carefully spoon the hot chutney into warm, sterilised jars, seal immediately, and label.

Nutritional Value (per tbsp): Approx. 35 kcal, 9g carbohydrates (8.5g sugars).
Storage: Store in a cool, dark place. It will be ready to eat in about 4 weeks, but the flavour improves if left for a couple of months. Once opened, keep it in the fridge and use it within 6-8 weeks.

2. Spiced Plum and Walnut Chutney

This chutney has a deep, rich flavour and a lovely texture from the walnuts. It’s a perfect addition to a festive cheeseboard.

Ingredients:

  • 1 kg plums, halved and stoned
  • 400g onions, chopped
  • 200g raisins
  • 100g walnuts, roughly chopped
  • 400g soft brown sugar
  • 500ml red wine vinegar
  • 1 cinnamon stick
  • 1 tsp ground cloves
  • 1 tsp salt

Method:

  1. Put the plums, onions, raisins, sugar, and vinegar into a large pan.
  2. Add the cinnamon stick, ground cloves, and salt, and stir well.
  3. Heat gently until the sugar dissolves, then bring to a simmer.
  4. Cook for about 1.5 hours, stirring occasionally, until the plums have broken down and the mixture is thick.
  5. Remove the cinnamon stick and stir in the chopped walnuts.
  6. Cook for another 5 minutes.
  7. Spoon the hot chutney into warm, sterilised jars, seal and label.

Nutritional Value (per tbsp): Approx. 45 kcal, 1g fat, 9g carbohydrates (8g sugars).
Storage: Store in a cool, dark place for at least a month before eating. Once opened, refrigerate and consume within a month.

3. Green Tomato and Chilli Chutney

A great way to use up unripe tomatoes at the end of the season. This chutney has a lovely tang with a gentle kick of heat.

Ingredients:

  • 1 kg green tomatoes, chopped
  • 500g cooking apples, peeled, cored, and chopped
  • 500g onions, chopped
  • 2-3 red chillies, finely chopped (adjust to your taste)
  • 250g sultanas
  • 500g light muscovado sugar
  • 600ml malt vinegar
  • 1 tbsp mustard seeds
  • 1 tsp salt

Method:

  1. Combine all the ingredients in a large, heavy-bottomed pan.
  2. Stir over low heat until the sugar has dissolved.
  3. Bring to a gentle boil, then reduce the heat and let it simmer for 2-3 hours, or until thick and reduced. Stir regularly to prevent sticking.
  4. Ladle the hot chutney into warm, sterilised jars. Seal tightly and label with the date.

Nutritional Value (per tbsp): Approx. 30 kcal, 7g carbohydrates (7g sugars).
Storage: Allow to mature for at least 4-6 weeks in a cool, dark place. After opening, store in the fridge and use within 2 months.

A Taste for Everyone, For Ever

Making chutney is more than just a cooking project; it’s an opportunity to connect with the past, embrace the seasons, and create something truly special with your own hands. The gentle simmering of fruits and spices fills the home with an aroma that is uniquely comforting, a promise of delicious things to come.

Whether you are an experienced preserver or a curious beginner, we encourage you to try making a batch of chutney this autumn. It is a rewarding and simple pleasure that yields delicious results. Share it with friends and family, or simply savour the satisfaction of a well-stocked pantry.

Plan your chutney-making day, gather your seasonal produce, and get ready to create a taste of history in a jar. You’ll be helping to keep a wonderful tradition alive, for everyone, for ever.

Further Reading: Warming Autumn Soups to Soothe the Soul, From Garden to Oven: Autumn Vegetable Bakes for the Family, Transform Leftover Veggies into Delicious House Pickles, Save Time and Money with Batch Cooking

From Garden to Oven: Autumn Vegetable Bakes for the Family

There’s something magical about stepping into your garden on a crisp autumn morning and gathering vegetables you’ve nurtured from seed. The satisfaction of transforming these homegrown treasures into warming, nourishing meals for your family creates memories that last far beyond the season. Autumn vegetables bring robust flavours and incredible nutritional value to your kitchen table, perfect for creating the kind of hearty bakes that bring everyone together.

Your autumn vegetable garden offers a bounty of possibilities for family cooking. Root vegetables like carrots, parsnips, and beetroot develop their sweetest flavours after the first frost. Brassicas such as Brussels sprouts, cauliflower, and kale reach their peak condition. Squashes and pumpkins store beautifully, providing months of cooking opportunities ahead.

These vegetables aren’t just delicious—they’re nutritional powerhouses. Packed with vitamins, minerals, and antioxidants, they support your family’s health during the cooler months when fresh produce becomes more precious. Creating warming bakes with your homegrown harvest transforms simple ingredients into comforting meals that nourish both body and soul.

The Art of Autumn Vegetable Baking

Baking autumn vegetables intensifies their natural sweetness whilst creating tender textures that even the fussiest eaters will enjoy. The gentle heat of the oven caramelises natural sugars, developing complex flavours that make vegetables irresistible. Root vegetables become creamy and golden, whilst brassicas develop nutty undertones that complement their earthy characteristics.

Understanding how different vegetables behave in the oven helps you create perfectly balanced bakes. Dense vegetables like potatoes and swede need longer cooking times and higher temperatures to become tender. Delicate vegetables such as courgettes and tomatoes require gentler treatment to prevent them becoming watery or overcooked.

The key to successful vegetable baking lies in preparation and timing. Cut vegetables into similar-sized pieces to ensure even cooking. Parboiling harder vegetables before baking saves time and guarantees tenderness. Adding vegetables in stages during cooking prevents some from becoming mushy whilst others remain undercooked.

Root Vegetable Gratin with Garden Herbs

This luxurious gratin transforms humble root vegetables into an elegant family dish that celebrates the best of your autumn harvest. The creamy texture and golden top make it perfect for Sunday lunches or special occasions.

Ingredients:

  • 500g potatoes, thinly sliced
  • 300g parsnips, thinly sliced
  • 200g carrots, thinly sliced
  • 300ml double cream
  • 100ml whole milk
  • 2 garlic cloves, minced
  • Fresh thyme and rosemary from your garden
  • 100g mature cheddar, grated
  • Salt and white pepper

Layer the sliced vegetables in a buttered baking dish, seasoning each layer. Combine cream, milk, garlic, and herbs in a saucepan and warm gently. Pour over vegetables and top with cheese. Bake at 180°C for 45-50 minutes until golden and bubbling.

This gratin provides excellent nutritional value for growing families. Potatoes offer vitamin C and potassium, whilst parsnips contribute folate and fibre. Carrots deliver beta-carotene for healthy vision, and the dairy ingredients provide calcium for strong bones and teeth.

Butternut Squash and Sage Bake

The sweet, nutty flavour of butternut squash pairs beautifully with earthy sage in this simple yet sophisticated bake. Perfect for using up those magnificent squashes that have been storing in your pantry since harvest.

Ingredients:

  • 1 large butternut squash, peeled and cubed
  • 12 fresh sage leaves
  • 3 tablespoons olive oil
  • 1 red onion, sliced
  • 100g feta cheese, crumbled
  • 50g pine nuts
  • Salt and black pepper

Toss cubed squash with olive oil, salt, and pepper. Roast at 200°C for 20 minutes. Add onion slices and sage leaves, roasting for another 15 minutes. Scatter with feta and pine nuts for the final 5 minutes of cooking.

Butternut squash is exceptionally rich in vitamin A, supporting immune function and healthy skin. The combination of healthy fats from olive oil and pine nuts helps your body absorb the fat-soluble vitamins more effectively.

Brussels Sprouts and Bacon Bake

Transform Brussels sprouts from a dreaded vegetable into a family favourite with this indulgent bake that combines smoky bacon with creamy cheese sauce.

Ingredients:

  • 750g Brussels sprouts, halved
  • 150g smoked bacon, chopped
  • 300ml cheese sauce
  • 50g breadcrumbs
  • 25g butter, melted
  • Freshly ground black pepper

Blanch Brussels sprouts for 3 minutes, then drain thoroughly. Mix with bacon and arrange in a baking dish. Pour over cheese sauce and top with buttered breadcrumbs. Bake at 190°C for 25 minutes until golden.

Brussels sprouts are nutritional superstars, containing more vitamin C than oranges and providing excellent levels of vitamin K for bone health. The addition of bacon makes this dish appealing to reluctant vegetable eaters whilst still delivering impressive nutritional benefits.

Mixed Vegetable and Lentil Bake

This hearty protein-rich bake combines your garden vegetables with nutritious lentils to create a complete meal that satisfies even the hungriest family members.

Ingredients:

  • 200g red lentils, rinsed
  • 2 large carrots, diced
  • 1 large courgette, sliced
  • 200g cherry tomatoes
  • 1 aubergine, cubed
  • 500ml vegetable stock
  • 2 tablespoons tomato purée
  • Mixed herbs from your garden
  • 100g mozzarella, torn

Layer vegetables in a deep baking dish. Mix lentils with stock and tomato purée, then pour over vegetables. Cover with foil and bake at 180°C for 40 minutes. Remove foil, add mozzarella, and bake uncovered for 15 minutes.

This bake provides complete protein from the lentil and cheese combination, making it perfect for vegetarian family members. The variety of vegetables ensures a wide range of vitamins and minerals in every serving.

Cauliflower Cheese with a Twist

Elevate traditional cauliflower cheese by adding autumn vegetables and a crunchy topping that transforms this classic into something special.

Ingredients:

  • 1 large cauliflower, broken into florets
  • 200g leeks, sliced
  • 100g mushrooms, quartered
  • 400ml cheese sauce
  • 75g mature cheddar, grated
  • 50g oats
  • 25g pumpkin seeds
  • Fresh chives, chopped

Steam cauliflower until just tender, adding leeks and mushrooms for the final 5 minutes. Arrange in a baking dish and pour over cheese sauce. Mix remaining ingredients for the topping and scatter over. Bake at 200°C for 20 minutes until golden and bubbling.

The addition of oats and pumpkin seeds provides extra fibre and healthy fats, whilst the mushrooms contribute umami flavours and B vitamins essential for energy metabolism.

Sweet Potato and Black Bean Enchilada Bake

Bring international flavours to your autumn vegetables with this Mexican-inspired bake that combines sweet potatoes with protein-rich black beans.

Ingredients:

  • 600g sweet potatoes, cubed
  • 400g tin black beans, drained
  • 8 corn tortillas
  • 300ml enchilada sauce
  • 150g cheese, grated
  • 1 red pepper, diced
  • Fresh coriander and lime

Roast sweet potato cubes until tender. Mix with black beans and peppers. Fill tortillas with mixture and arrange in a baking dish. Pour over sauce and top with cheese. Bake at 190°C for 25 minutes.

Sweet potatoes are exceptional sources of beta-carotene and fibre, whilst black beans provide protein and iron. This combination creates a nutritionally complete meal that appeals to all ages.

Tips for Perfect Vegetable Bakes

Success with vegetable bakes comes from understanding your ingredients and using proper techniques. Always preheat your oven to ensure even cooking from the start. Don’t overcrowd baking dishes, as this creates steam rather than the dry heat needed for caramelisation.

Season vegetables generously before cooking, as this helps draw out moisture and concentrates flavours. Use a variety of textures in your bakes by combining soft vegetables like courgettes with firmer ones like potatoes. This creates more interesting eating experiences for your family.

Fresh herbs from your garden make enormous differences to finished dishes. Add hardy herbs like rosemary and thyme at the beginning of cooking, but save delicate herbs such as basil and parsley for the final few minutes to preserve their fresh flavours.

Making the Most of Your Harvest

Plan your vegetable bakes around what’s ready in your garden rather than forcing specific recipes. This approach ensures you’re using vegetables at their peak flavour and nutritional value. Keep notes about which combinations work well together, creating your own family recipe collection over time.

Prepare vegetables in advance by washing, peeling, and chopping them when you have time. Store prepared vegetables in the refrigerator for up to two days, making weeknight cooking much simpler. Many bakes can be assembled ahead of time and refrigerated until ready to cook.

Consider doubling recipes and freezing portions for busy weeks ahead. Most vegetable bakes freeze beautifully, providing homemade convenience foods that are far superior to shop-bought alternatives.

Bringing Families Together Through Food

Cooking with homegrown vegetables creates opportunities for family involvement that builds lifelong memories. Children who help prepare meals are more likely to try new vegetables and develop healthy eating habits. Involve them in every step from garden to table, teaching valuable life skills along the way.

Share stories about how vegetables grow whilst you cook together. Explain seasonal eating and why autumn vegetables taste different from summer ones. These conversations create deeper connections to food and nature that influence eating habits throughout life.

Create family traditions around your vegetable bakes. Perhaps Sunday afternoon becomes baking time, with everyone contributing to meal preparation. These shared experiences strengthen family bonds whilst ensuring everyone enjoys nutritious, homemade meals.

Nurturing Health Through Homegrown Goodness

Transform your autumn garden harvest into nourishing family meals that warm hearts and homes throughout the season. Each bake you create celebrates the vegetables you’ve grown with care, providing wholesome nutrition that supports your family’s health and wellbeing.

Start planning your next vegetable bake by surveying your garden and storing areas. Choose vegetables that need using soon and experiment with new flavour combinations. Remember that the best family meals come from love, fresh ingredients, and the joy of sharing homegrown goodness around your table.

Visit your local garden centre for inspiration on extending your growing season, ensuring fresh vegetables for your family bakes well into winter. Pack your enthusiasm for homegrown cooking and discover how rewarding it feels to nourish your family with vegetables grown by your own hands.

Further Reading: Warming Autumn Soups to Soothe the Soul, Autumn Foraging: Your Complete Guide to Nature’s Harvest, English Pudding Season

Warming Autumn Soups to Soothe the Soul

As the days grow shorter and a crisp chill fills the air, there’s nothing quite like a bowl of warm, comforting soup. Autumn offers a wonderful harvest of flavourful vegetables, perfect for creating hearty and nourishing meals. Making soup from seasonal produce is not only a delicious way to celebrate the flavours of the season, but it’s also a fantastic way to create healthy, filling, and deeply satisfying dishes.

This guide will walk you through the best vegetables autumn has to offer for soup-making. We’ll explore why using seasonal ingredients is so beneficial and provide you with some wonderful recipe ideas to get you started. Get ready to fill your kitchen with the rich aromas of autumn and discover the simple joy of a homemade seasonal soup.

The Beauty of Autumn’s Bounty

Why choose seasonal vegetables for your soups? When you cook with produce that’s in season, you’re using ingredients at their peak. They are fresher, more flavourful, and packed with a higher concentration of nutrients. Seasonal vegetables are often more affordable and widely available at local farmers’ markets and grocery stores.

This autumn, look for these wonderful vegetables, each ready to bring its unique character to your soup pot:

  • Squashes (Butternut, Acorn, Kabocha): With their sweet, nutty flavours and vibrant orange flesh, winter squashes are the stars of autumn. They are rich in vitamins A and C, potassium and fibre.
  • Root Vegetables (Carrots, Parsnips, Swede): These earthy, sweet vegetables form the flavourful base of many classic soups. Carrots are an excellent source of beta-carotene, while parsnips offer a unique sweet and slightly spicy note.
  • Pumpkins: Beyond Halloween decorations, pumpkins are a versatile and delicious ingredient for soups. Their mild, sweet flesh is packed with vitamin A and antioxidants.
  • Leeks: A member of the onion family, leeks have a milder, sweeter flavour than their pungent cousins. They add a delicate, savoury depth to soups and pair beautifully with potatoes.
  • Mushrooms: Autumn is the prime season for wild mushrooms. Their earthy, umami-rich flavour can transform a simple soup into a gourmet experience. They are also a good source of B vitamins and selenium.
  • Celeriac: This unsung hero of the vegetable world has a subtle, nutty flavour reminiscent of celery and parsley. It adds a wonderful creaminess to soups when puréed.

Embracing these ingredients allows you to connect with the rhythm of the seasons and create meals that are both comforting and incredibly fresh.

Warming Autumn Soup Recipes

Ready to start cooking? Here are three recipes that celebrate the best of autumn’s produce. Each one is designed to be simple, nutritious, and full of comforting flavour.

Classic Butternut Squash and Sage Soup

This soup is the essence of autumn in a bowl. It’s velvety, rich, and wonderfully aromatic, with the sweet flavour of butternut squash perfectly complemented by the earthy notes of fresh sage.

Ingredients:

  • 1 large butternut squash (about 1.2kg), peeled, deseeded, and chopped
  • 2 tbsp olive oil
  • 1 large onion, chopped
  • 2 carrots, chopped
  • 2 celery stalks, chopped
  • 4 cloves garlic, minced
  • 1.5 litres vegetable or chicken stock
  • A small bunch of fresh sage leaves (about 10-12 leaves)
  • 150ml double cream or coconut milk (for a vegan option)
  • Salt and freshly ground black pepper to taste
  • Toasted pumpkin seeds and a swirl of cream, to serve

Method:

  1. Preheat your oven to 200°C (180°C fan). Toss the chopped butternut squash with 1 tablespoon of olive oil, salt, and pepper on a baking tray. Roast for 25-30 minutes, or until tender and lightly caramelised. This step deepens the squash’s natural sweetness.
  2. While the squash is roasting, heat the remaining tablespoon of olive oil in a large pot or Dutch oven over medium heat. Add the chopped onion, carrots, and celery. Cook for 8-10 minutes, stirring occasionally, until softened.
  3. Add the minced garlic and most of the sage leaves (reserving a few for garnish) to the pot. Cook for another minute until fragrant.
  4. Once the squash is roasted, add it to the pot with the other vegetables. Pour in the vegetable stock and bring the mixture to a boil. Then, reduce the heat, cover, and let it simmer for 15-20 minutes to allow the flavours to meld together.
  5. Remove the pot from the heat. Use an immersion blender to blend the soup until it is completely smooth and velvety. Alternatively, you can carefully transfer the soup in batches to a stand blender.
  6. Return the soup to the pot over low heat. Stir in the double cream or coconut milk and season with salt and pepper to your liking. Gently heat through, but do not let it boil.
  7. To serve, ladle the soup into bowls. Garnish with a swirl of cream, a sprinkle of toasted pumpkin seeds, and the remaining fresh sage leaves.

Nutritional Insight: Butternut squash is a fantastic source of Vitamin A, crucial for vision and immune health. It also provides a significant amount of Vitamin C and dietary fibre, which aids digestion. Sage contains antioxidants and has anti-inflammatory properties.

Hearty Lentil, Mushroom and Swede Soup

This soup is a wonderfully rustic and filling meal, perfect for a chilly evening. The earthy mushrooms, sweet swede, and protein-packed lentils create a robust and deeply savoury flavour profile. It’s a true one-pot wonder.

Ingredients:

  • 2 tbsp olive oil
  • 1 large onion, finely chopped
  • 2 cloves garlic, crushed
  • 250g mushrooms (chestnut or mixed wild), sliced
  • 1 medium swede (about 400g), peeled and diced
  • 2 large carrots, diced
  • 200g brown or green lentils, rinsed
  • 2 litres vegetable stock
  • 1 tsp dried thyme
  • 2 bay leaves
  • A splash of soy sauce or tamari (optional, for extra umami)
  • A large handful of fresh parsley, chopped
  • Salt and freshly ground black pepper to taste

Method:

  1. Heat the olive oil in a large, heavy-bottomed pot over medium heat. Add the onion and cook for 5-7 minutes until soft and translucent. Add the garlic and cook for another minute.
  2. Increase the heat slightly and add the sliced mushrooms. Cook for 5-8 minutes, stirring occasionally, until they have released their liquid and started to brown. This process develops their rich, earthy flavour.
  3. Add the diced swede and carrots to the pot and cook for another 5 minutes, stirring to combine everything.
  4. Stir in the rinsed lentils, vegetable stock, dried thyme, and bay leaves. Bring the soup to a boil.
  5. Once boiling, reduce the heat to low, cover the pot, and let it simmer gently for 45-50 minutes, or until the lentils and vegetables are tender. Stir occasionally to prevent sticking.
  6. Remove the bay leaves. If you like, you can blend a small portion of the soup (about a quarter) and stir it back in to create a thicker, creamier consistency.
  7. Stir in the splash of soy sauce (if using) and the chopped fresh parsley. Season generously with salt and pepper.
  8. Serve hot with a slice of crusty wholemeal bread for a complete and satisfying meal.

Nutritional Insight: Lentils are an excellent source of plant-based protein, dietary fibre, and iron, making this soup incredibly sustaining. Mushrooms provide B vitamins, while swede and carrots are rich in vitamins C and A.

Creamy Leek and Celeriac Soup with a Hint of Nutmeg

This elegant soup is creamy, comforting, and surprisingly light. The delicate sweetness of the leeks combines beautifully with the nutty, celery-like flavour of the celeriac. A touch of nutmeg adds a warm, aromatic finish.

Ingredients:

  • 3 large leeks (about 500g), white and light green parts only, washed and sliced
  • 1 medium celeriac (about 600g), peeled and chopped
  • 2 tbsp butter or olive oil
  • 1 onion, chopped
  • 1.2 litres vegetable stock
  • 100ml single cream or oat cream
  • A pinch of freshly grated nutmeg
  • Salt and white pepper to taste
  • Chopped chives or parsley, for garnish

Method:

  1. Melt the butter or heat the olive oil in a large saucepan over medium-low heat. Add the chopped onion and sliced leeks. Cook gently for 10-12 minutes, stirring often, until they are very soft but not browned. This slow cooking method is called ‘sweating’ and it brings out their natural sweetness.
  2. Add the chopped celeriac to the pan and stir to combine. Cook for another 5 minutes.
  3. Pour in the vegetable stock, bring to a simmer, then cover and cook for 20-25 minutes, or until the celeriac is completely tender when pierced with a knife.
  4. Remove the pan from the heat. Use an immersion blender to purée the soup until it’s silky smooth. For an even finer texture, pass it through a sieve.
  5. Return the soup to the pan over a very low heat. Stir in the cream and the pinch of freshly grated nutmeg.
  6. Season carefully with salt and white pepper. White pepper is ideal here as it won’t leave black flecks in the pale soup.
  7. Warm the soup gently, being careful not to let it boil after adding the cream.
  8. Ladle into warm bowls and garnish with a sprinkle of chopped chives or fresh parsley before serving.

Nutritional Insight: Leeks are a great source of flavonoids and vitamins A, C, and K. Celeriac is low in calories but high in fibre, vitamin K, and phosphorus. It supports bone health and digestion.

Plan Your Autumn Cooking

Making a simple pot of soup is one of the most rewarding ways to enjoy the autumn season. It’s a chance to slow down, connect with the food you eat, and create something truly nourishing for yourself and your loved ones. With a few fresh ingredients and a little time, you can create a bowl of comfort that will warm you from the inside out.

Further Reading: What to Do in Your Vegetable Garden in September, The Incredible Benefits of Growing Your Own Food