
There comes a moment in late summer when the onion bed begins to look as though it has simply given up.
The upright green leaves that stood so neatly through spring begin to yellow. One by one, they bend towards the soil until the whole row has taken on the tired, untidy look of a crop reaching the end of its season.
It can be tempting to straighten them.
Don’t.
The collapsing foliage is part of the natural rhythm of the plant and one of the clearest signs that your onions are approaching harvest.
Beneath those fading leaves are bulbs that have spent months swelling quietly underground. Lift them carefully, dry them properly and store them in the right conditions, and that summer harvest can continue feeding the kitchen long after the vegetable garden has moved into winter.
A good crop of onions is worth looking after.
After all, few vegetables work harder in the kitchen.
They begin soups and stews, disappear beneath roast dinners, soften into curries, become chutneys and gravies and sit quietly beneath almost every comforting meal we cook through autumn and winter.
So when the time comes to lift them, don’t hurry the final stage.
Growing the onion is only half the job.
The other half is learning how to store your home-grown onion harvest properly.
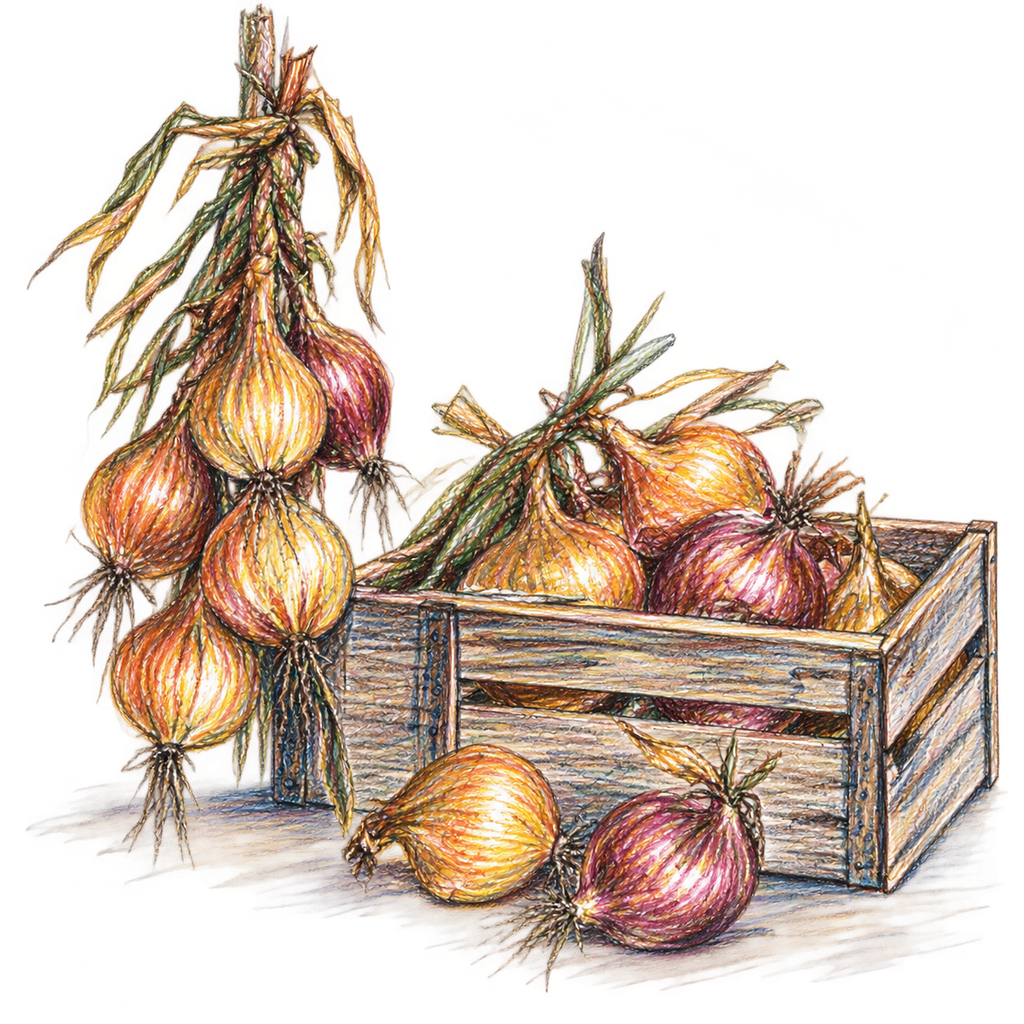
When are onions ready to harvest?
Onions are generally ready to lift when their foliage begins to yellow and flop over naturally.
Depending on when they were planted and the variety you are growing, this can happen from summer into early autumn.
Autumn-planted sets are usually harvested earlier, while onions planted in spring or grown from seed may remain in the ground later.
The important word here is naturally.
There was once a common gardening practice of deliberately bending onion leaves over to encourage bulbs to mature.
That is no longer recommended.
Let the plant decide when it has reached the end of its growing cycle.
When most of the foliage has yellowed and fallen over, the bulb is telling you that growth is coming to an end and it is preparing for dormancy.
That is the stage we want for storage.
Don’t leave ripe onions in wet ground indefinitely
Once onions are mature, don’t forget about them.
A spell of fine late-summer weather is useful for harvesting, but prolonged wet conditions can create problems if ripe bulbs remain sitting in damp soil.
Choose a dry day if you can.
If your soil is loose, some onions may lift fairly easily by hand, but using a fork to loosen the soil around them is usually safer.
Push the fork into the earth a little distance away from the bulbs.
Lift gently.
The aim is to loosen the soil rather than spear the onion.
A fork wound that seems insignificant on harvest day can later become the place where rot begins.
Handle onions gently when harvesting
An onion looks solid enough to survive almost anything.
Its storage skin suggests armour.
Yet freshly harvested bulbs bruise surprisingly easily.
Handle them carefully.
Don’t knock bulbs together to remove soil and don’t throw them into a bucket or wheelbarrow.
If loose earth remains around the roots, gently shake or brush it away.
Any onion that is badly damaged should be separated from the storing crop and used first.
There is nothing wrong with eating a bruised or nicked onion if the sound parts are perfectly good.
It simply isn’t a candidate for spending the next several months hanging in the shed.
What does curing onions mean?
Before onions can be stored successfully, they need to be cured.
Despite the rather technical name, curing simply means allowing the bulbs, skins, necks and remaining foliage to dry thoroughly after harvest.
This is an essential stage.
Freshly lifted onions still contain plenty of moisture.
Their outer skins may be soft, the necks succulent and the foliage partially green.
Put them straight into a storage sack and you create ideal conditions for trouble.
Curing allows the outer layers to become dry and papery and helps the neck of the onion close down.
Only then is the bulb ready for longer-term storage.
How to cure home-grown onions
If the weather is warm and dry, lay the freshly harvested onions out somewhere they can dry with good airflow around them.
Wire racks or slatted trays are particularly useful because air can move beneath the bulbs as well as above them.
A greenhouse, covered porch or well-ventilated shed can be invaluable if the British weather refuses to cooperate.
Allow roughly two weeks for onions to dry thoroughly, although conditions matter more than an exact number of days.
Warm, breezy weather may speed things along.
Cool, damp conditions may require longer.
Don’t store the bulbs until they genuinely feel ready.
How do you know when onions are properly cured?
A properly dried onion looks very different from one that has just left the soil.
The outside should feel papery.
The neck should be dry rather than fleshy.
The remaining leaves should have lost their green colour and become crisp and dry.
The roots should also be dry.
Pick up a bulb and turn it in your hand.
It should feel like an onion from the store rather than something freshly pulled from damp earth.
If the neck still feels thick, moist or succulent, give it longer.
Patience now is considerably less frustrating than finding a box of rotting onions later.
What if it rains while onions are drying?
This is Britain.
At some point, it probably will.
If you are drying onions outdoors and rain threatens, move them under cover.
A greenhouse can work well, provided it is ventilated and doesn’t become excessively humid.
An airy shed, carport or other sheltered structure can also work.
The important combination is dry conditions and moving air.
Don’t pile wet onions into a heap simply to get them out of the rain.
Spread them out again as soon as possible so moisture doesn’t become trapped between bulbs.
Should you wash onions before storing them?
No.
Onions intended for storage shouldn’t be washed.
There is no need to make them kitchen-clean before putting them away.
Once the soil has dried, loose dirt can usually be brushed away gently.
Washing introduces unnecessary moisture at exactly the stage when you have spent time trying to remove it.
Leave the dry outer skins in place.
They are part of the bulb’s natural protection.
Wash or peel the onion when it comes into the kitchen for cooking.
Until then, a little earth does no harm.
Which onions should you store?
Once the harvest is thoroughly dried, sort it carefully.
This is where being selective pays off.
Choose your healthiest bulbs for storage.
They should be:
- firm
- properly dried
- free from cuts
- free from bruising
- without signs of mould or rot
- undamaged by pests
- without unusually thick, soft necks
Anything questionable goes into the use first pile.
The RHS specifically advises against storing damaged or thick-necked onions because they are more susceptible to decay.
It may feel wasteful to reject an otherwise impressive onion from storage, but you aren’t throwing it away.
You are simply eating it sooner.
Use damaged onions first
Every harvest has casualties.
One onion will have met the garden fork.
Another may have split.
A third will have a soft patch that makes you suspicious.
Keep these away from your best storing bulbs.
Bring usable damaged onions into the kitchen and work through them first.
They can become:
- onion soup
- chutney
- curry
- tomato sauce
- gravy
- caramelised onions
- savoury tarts
- stews
- casseroles
You can also chop and freeze sound onion flesh for future cooked dishes.
A damaged onion does not have to become a wasted onion.
It simply needs a different plan.
Should you cut the tops off onions?
Once onions are completely dry, you can trim the foliage if you plan to store them in trays or net bags.
Leave a little dry neck rather than cutting hard against the bulb.
If you want to make onion strings or plaits, keep the dried foliage attached.
The roots can also be trimmed once they are dry.
What matters most is that everything is thoroughly cured before you start cutting and packing.
Never trim away moist foliage and then immediately place the bulbs into storage.
Give them time first.
How to store onions in trays
Slatted trays are one of the simplest ways to store a home-grown onion harvest.
Arrange the bulbs in a single layer where possible so air can circulate around them.
Avoid making a deep heap.
Single-layer storage makes inspection easy.
You can see immediately if a bulb is beginning to soften or sprout, rather than discovering it weeks later at the bottom of a sack.
Wooden slatted trays, wire racks or suitable vegetable storage trays can all work well.
They are particularly useful if you grow several onion varieties and want to keep them separate.
How to store onions in net bags
Net bags are another excellent option.
The holes allow plenty of air circulation while keeping the harvest together.
Don’t overfill them.
Several smaller bags are better than one enormous, tightly packed bag.
Hang the bags somewhere dry and well ventilated where they are protected from frost.
Net bags also make it easy to label different varieties.
And there is something reassuringly traditional about seeing a row of home-grown onions hanging after harvest.
It is a small visual reminder that the garden has filled the pantry.
How to plait onions for storage
Onion plaits are both practical and beautiful.
They work best when the foliage has dried but remains sufficiently flexible to handle without completely disintegrating.
Begin with several onions and arrange their dried stems together.
Secure the first bulbs firmly, then begin plaiting the foliage.
As you work upwards, add another onion at intervals, incorporating its stem into the plait.
Continue until you have a manageable string rather than an enormous rope that becomes difficult to lift.
Secure the top and create a loop for hanging.
The exact technique matters less than making sure the onions are held securely and aren’t packed so tightly that air cannot move around them.
A well-made onion string hanging in a shed or pantry is one of those useful garden traditions that earns its keep.
Where is the best place to store onions?
Stored onions need conditions that are:
cool, dry, airy and frost-free.
But there is an important difference between onions and potatoes.
Onions are best stored somewhere with some light rather than in complete darkness.
The RHS recommends a light, cool, dry and well-ventilated position and notes that storing onions in the dark can encourage sprouting.
A suitable shed, garage, airy pantry or other cool storage area may work.
The exact location is less important than the conditions.
Don’t place onions somewhere warm and steamy.
Don’t keep them beside a boiler.
And don’t seal them into an airless cupboard where moisture can accumulate.
Think airy storeroom rather than kitchen drawer.
Should onions be kept in the dark?
Not completely.
This is one of the easiest mistakes to make because we often talk about storing home-grown vegetables as though they all need the same conditions.
They don’t.
Potatoes need darkness to prevent greening.
Onions are different.
Once cured, they benefit from a light, cool, dry and ventilated storage place, and complete darkness can encourage sprouting.
That doesn’t mean placing them on a sunny windowsill.
Strong heat and direct sunshine aren’t desirable either.
Think light but cool, rather than either blazing sunshine or a sealed black cupboard.
Keep stored onions dry
Moisture is one of the greatest threats to stored onions.
The bulbs have spent weeks drying for a reason.
Keep them away from leaks, condensation and damp walls.
Good ventilation matters because it prevents stale, humid air from building up around the bulbs.
This is also why plastic bags are unsuitable for long-term onion storage.
They can trap humidity and restrict airflow.
Breathable storage is far better.
An onion wants to be cool and dry.
It does not want to perspire inside a carrier bag.
Protect onions from frost
Stored onions should also be protected from freezing temperatures.
An unheated shed may be perfectly suitable through much of autumn but become extremely cold during a severe winter spell.
If temperatures are expected to fall sharply, check your storage area.
Move the onions if necessary or provide additional protection around the storage space without restricting ventilation around the bulbs themselves.
Garden Organic advises protecting stored vegetables from freezing conditions, while emphasising that well-cured alliums need cool, airy storage.
The aim is coolness.
Not refrigeration by February weather.
How often should you check stored onions?
Regularly.
Don’t hang an onion string in September and forget about it until February.
Every couple of weeks, take a look at the crop.
Feel suspicious bulbs.
Look for:
- soft spots
- mould
- wet necks
- unpleasant smells
- premature sprouting
- signs of rot
Remove deteriorating onions immediately.
One bad onion isn’t guaranteed to destroy everything around it, but leaving rotting material among healthy bulbs certainly doesn’t improve your chances.
Checking the crop takes only a few minutes.
It is one of the easiest winter garden jobs you can do.
Why are my stored onions rotting?
There are several possible reasons.
The bulbs may not have been dried thoroughly before storage.
They may have been bruised during harvesting.
The storage area may be too damp or poorly ventilated.
Or disease may already have been present in the bulbs before they were lifted.
Neck rot, for example, can become particularly obvious during storage.
Good harvesting and curing practices help reduce losses: keep bulbs dry, allow necks to cure properly and don’t store damaged or thick-necked specimens.
If you find a rotten onion, remove it promptly and inspect those nearby.
Why are my onions sprouting in storage?
Eventually, onions want to grow again.
That is what bulbs are designed to do.
Warmth can encourage them out of dormancy, while unsuitable storage conditions can shorten their keeping life.
Complete darkness may also encourage sprouting, which is another reason to keep onions in suitable light, airy conditions rather than treating them like potatoes.
If one or two begin producing green shoots, use them soon.
Sprouting isn’t necessarily an immediate disaster, but the quality of the bulb will gradually decline as stored energy is transferred into new growth.
The onion is preparing for its next season.
You are trying to make dinner.
At that point, dinner should probably win.
How long do home-grown onions keep?
Storage life varies enormously.
The variety matters.
So does planting time, how well the bulbs matured and how carefully they were harvested and cured.
The RHS notes that autumn-planted onions typically store until early winter, whereas spring-planted or seed-raised onions can often keep well into the following spring.
Some varieties are bred specifically for good storage.
Others are better appreciated fresh.
If keeping onions through winter is important to you, choose varieties with storage in mind when ordering seed or sets.
As with potatoes, the pantry begins with the seed catalogue.
Which onion varieties store best?
In general, firm maincrop onions bred for storage will keep better than particularly mild or juicy varieties intended mainly for fresh eating.
When choosing onions for the coming year, look beyond colour and size.
Check the variety description for:
- storage ability
- resistance to bolting
- expected harvest time
- disease resistance
- suitability for your planting season
If you have enough space, growing more than one variety gives you flexibility.
One can be used fresh through summer.
Another can become the backbone of the winter store.
After a few seasons, you will begin to discover which varieties perform best in your own soil and climate.
Keep a note of how well each variety stores
Gardeners are very good at remembering the enormous onion harvested in July.
We are slightly less reliable at remembering which variety was still perfect in February.
Write it down.
A simple label on each tray might include:
Variety
Harvest date
Storage location
Then make a note later in winter if one variety begins sprouting or softening earlier than the others.
This small amount of information can be incredibly useful when choosing next year’s onions.
Yield is important.
But a slightly smaller crop that keeps beautifully until spring may be far more valuable than enormous bulbs that deteriorate before Christmas.
Can you store red onions?
Yes, although storage life depends on the particular variety.
Red onions should be harvested, cured and sorted in much the same way as other bulb onions.
Dry them thoroughly and keep only healthy, firm specimens.
Some red varieties keep very well, while others are better used sooner.
If you grow both red and yellow onions, store them separately and label them.
That way you can quickly learn which gives you the longest winter supply.
And more importantly, you won’t have to dismantle an entire onion string just because you want one red onion for a salad.
Can you store onions that have flowered?
An onion that sends up a flower stalk has bolted.
This usually results in a thick, firm central stem running through the bulb.
Bolted onions are generally poorer candidates for long storage.
Use them first.
The same applies to onions with unusually thick necks.
They may look perfectly substantial at harvest time, but their structure makes reliable drying and storage more difficult.
Put the best, firmest bulbs into storage and enjoy the rest in the kitchen now.
Can small onions be stored?
Certainly, provided they are mature, sound and fully cured.
Size isn’t the deciding factor.
Condition is.
In fact, smaller onions can be very useful in the kitchen because a whole bulb may be just the right amount for a meal.
If you have a crop containing a mixture of sizes, don’t automatically use the smallest first.
Instead, prioritise any bulbs with damage, thick necks or other signs that they won’t keep.
A small perfect onion is a much better storage candidate than a huge bruised one.
Should onions and potatoes be stored together?
It is better to give them separate storage spaces.
For one thing, their requirements are different.
Potatoes need darkness.
Onions prefer a light, cool and ventilated environment.
They therefore aren’t natural storage companions.
Keeping crops separately also makes inspection easier and reduces the chance that a problem in one group will be overlooked.
Your home vegetable store doesn’t need to be enormous or sophisticated.
Sometimes separate shelves are enough.
Potatoes in their dark sacks.
Onions in airy trays or hanging nets.
Apples arranged elsewhere.
Each crop stored according to what it needs.
What can you do if you don’t have a shed?
You can still store a modest onion crop successfully.
Look for the coolest, driest and best ventilated part of your home.
A cool utility room, unheated spare space or airy pantry may work, depending on conditions.
Avoid warm kitchens and humid areas.
For a small harvest, a wire vegetable rack can be useful because it allows air to circulate around the bulbs.
The basic principles remain the same:
Dry them thoroughly.
Give them air.
Keep them cool.
Keep them away from excessive moisture and frost.
You don’t need an old brick potting shed to store onions.
Though it would admittedly look rather nice.
What if you have too many onions to store?
A successful onion harvest can become surprisingly large.
One row doesn’t look especially dramatic while it is growing.
Then suddenly there are baskets everywhere.
If you have more sound bulbs than you can store properly, preserving some of the crop is a better option than crowding everything into unsuitable conditions.
You might:
- make onion chutney
- pickle small onions
- caramelise and freeze onions in portions
- chop and freeze them for cooked dishes
- make batches of soup or sauce
- share some with friends and neighbours
A glut is only a problem if it is allowed to become waste.
The purpose of growing food isn’t to keep every vegetable until March.
It is to make good use of the harvest.
What to do with onions that won’t store
The sorting table after harvest is often the beginning of several meals.
The perfect bulbs go into storage.
The damaged ones come inside.
Perhaps there are three with fork marks.
One with a thick neck.
Another that split during growing.
Suddenly the evening meal has suggested itself.
Slowly cooked onions can form the base of French onion soup.
They can be caramelised and spooned into a tart.
Combined with tomatoes and courgettes, they become a late-summer sauce.
Mixed with apples and spices, they can become chutney.
Even the less-than-perfect part of the harvest has value.
It just has a shorter journey.
Save your best onions for winter cooking
There is a particular pleasure in using a home-grown onion in January.
By then, the vegetable bed where it grew may look completely different.
Perhaps garlic is pushing thin green shoots through the soil.
Perhaps the bed is covered with compost.
Perhaps frost is sitting silver across the whole plot.
Yet the onion you chop for supper began its life there months earlier.
This is why storing food changes the way a vegetable garden feeds you.
Without storage, the harvest is tied closely to the moment it is picked.
With storage, the seasons overlap.
August onions become December gravy.
September potatoes become January mash.
Autumn apples reappear in winter puddings.
The garden travels into the kitchen long after the plants themselves have disappeared.
How to store home-grown onions: a quick guide
For a successful winter onion store:
Harvest when the foliage naturally yellows and falls over.
Choose a dry day if possible.
Lift bulbs carefully without bruising them.
Dry or cure them thoroughly for around two weeks, allowing plenty of air circulation.
Wait until the skins, necks and foliage are dry and papery.
Don’t wash onions before storage.
Use damaged, soft or thick-necked onions first.
Store only healthy, firm bulbs.
Keep them in trays, net bags or plaits.
Choose somewhere cool, dry, ventilated and protected from frost.
Unlike potatoes, don’t keep stored onions in complete darkness.
Inspect the crop regularly and remove any bulb that begins to deteriorate.
Simple as that.
Most successful vegetable storage isn’t about clever equipment.
It is about harvesting at the right moment and giving the crop the conditions it naturally needs.
From the garden to the winter pantry
Onion harvest day doesn’t have the drama of strawberries or the immediate sweetness of peas eaten straight from the pod.
It is a quieter sort of harvest.
The foliage has faded.
The soil is dry.
You work your way along the row, loosening each bulb and laying it gently down.
At first, the onions still look very much like something that belongs to the garden.
Roots attached.
Dry earth clinging to them.
Long leaves trailing behind.
Then time and air change them.
The skins become crisp and golden. The leaves turn papery. A few are woven into plaits; others settle into trays.
Eventually the harvest is carried indoors or hung beneath the roof of a cool shed.
And there it waits.
Weeks later, perhaps on a wet November evening, you take one down.
The garden outside is dark.
Summer feels a very long way away.
But the knife cuts through the papery skin and releases that unmistakable onion scent.
Into the pan it goes with a little oil.
Then perhaps garlic.
Carrots.
Potatoes.
Stock.
Something warm begins to simmer.
And without making much fuss about it, the vegetable garden has fed you again.
That is what a well-stored harvest gives you.
Not merely onions on a shelf.
But a little piece of summer kept safely for winter.
Further Reading: Grow Your Own Food: Save Money & Eat Well, How to Keep Your Vegetable Garden Productive into Autumn, What to Sow in September: Vegetables, Salads & Herbs, Runner Bean Chutney: A Taste of the September Garden, How to Store Potatoes for Winter
Follow us on Instagram, Threads, BlueSky, Twitter, Pinterest & Facebook
Not sure where to start? Take a look at our Grow Your Own Packs with detailed step by step instructions, seeds and 1 years online support.