Recipe Garden Pots: Grow a Mediterranean Roast in One Pot

Few dishes celebrate summer quite like a tray of roasted Mediterranean vegetables. Sweet peppers, tender courgettes, fragrant basil and golden garlic come together in the oven to create something simple yet deeply satisfying.

With a single generous container, you can grow many of these ingredients together. This Mediterranean Roast Recipe Garden Pot is planted with compact, dwarf vegetables chosen especially for container growing, bringing the flavours of the Mediterranean to a patio, balcony or sunny corner of the garden.


What you’ll need

  • 1 large pot (60cm or larger) with drainage
  • Multi-purpose compost
  • A warm, sunny spot

Plants

  • Aubergine ‘Baby Belle’
  • Basil Italiano Classico
  • Courgette ‘Patio Star’
  • Garlic
  • Onion ‘Red Baron’
  • Sweet pepper ‘Enorma Ibrido’

These dwarf cultivars are well suited to containers and produce a wonderful mix of vegetables and herbs that roast beautifully together.

Roast Vegetable Planter. 

Aubergine ‘Baby Belle’

Basil Italiano Classico

Courgette ‘Patio Star’

Garlic

Onion ‘Red Baron’

Sweet pepper ‘Enorma Ibrido’
Grow a Mediterranean Roast Garden in One Pot

Preparing the pot

Choose a wide container around 60cm across. Larger pots hold moisture more evenly and allow several vegetables to grow comfortably side by side.

Fill the pot with fresh compost, leaving a few centimetres at the top so watering is easy and doesn’t spill over.

Place the pot in a warm, sunny position. Mediterranean vegetables thrive in heat and light, so a sheltered patio or south-facing spot is ideal.


Planting your Mediterranean garden

The aim is to create a small but productive mix of plants that grow well together.

1. Start with the main crops

Plant the courgette ‘Patio Star’ slightly off-centre. This compact variety forms a tidy mound and produces plenty of tender courgettes.

Add the aubergine ‘Baby Belle’ and the sweet pepper ‘Enorma Ibrido’ nearby. Both enjoy warmth and sunshine and will soon produce glossy fruits perfect for roasting.

2. Add the onions and garlic

Tuck the red onion ‘Red Baron’ and a few garlic cloves into the spaces around the larger plants. These grow upright and take very little room while adding depth of flavour to the harvest.

3. Finish with basil

Plant basil Italiano Classico around the edge of the pot. Its soft, fragrant leaves spill gently outward and are easy to harvest when cooking.


Caring for the pot

Mediterranean vegetables are generous growers when given warmth and regular care.

  • Water daily, especially during warm weather
  • Place the pot in a sunny, sheltered position
  • Feed occasionally with a liquid tomato feed once flowering begins
  • Harvest vegetables regularly to encourage continued production

With warmth and steady watering, the container soon becomes a lush collection of edible plants.


Harvesting your Mediterranean vegetables

By mid to late summer the pot will begin to offer a generous harvest:

  • Tender courgettes
  • Glossy aubergines
  • Sweet peppers
  • Fresh basil leaves
  • Fragrant garlic
  • Mild red onions

Together they form the perfect base for a simple roasted vegetable dish.


Mediterranean roasted vegetable recipe

A tray of roasted vegetables is one of the easiest and most satisfying ways to enjoy your harvest.

Ingredients

  • 1 aubergine
  • 1–2 courgettes
  • 1 sweet pepper
  • 1 red onion
  • 2 cloves garlic
  • A handful of fresh basil leaves
  • Olive oil
  • Sea salt and black pepper

Method

  1. Preheat the oven to 200°C.
  2. Slice the aubergine, courgette and pepper into generous chunks.
  3. Cut the onion into wedges and lightly crush the garlic cloves.
  4. Place everything in a roasting tray and drizzle with olive oil.
  5. Season with salt and black pepper, then toss gently.
  6. Roast for 25–30 minutes until the vegetables are soft and lightly caramelised.
  7. Scatter fresh basil leaves over the top just before serving.

Serve warm with crusty bread, pasta or grilled meat.


A small garden with Mediterranean flavour

This Mediterranean Roast Recipe Garden Pot shows how a single container can deliver a generous summer harvest. Filled with dwarf vegetables and fragrant herbs, it becomes a miniature kitchen garden devoted to one delicious purpose.

Placed in a warm sunny spot and watered daily, it quietly grows the ingredients for a tray of roasted vegetables that tastes of sunshine and summer.

Further Reading: How to Start Your Own Vegetable PatchHow to Plan and Design Your Dream Vegetable PatchWhy Choose Sow It Grow It and Feast for Your Garden?How to Choose the Perfect Flower Pot for Your CropsRecipe Garden Pots: Grow a Pimm’s No.1 Garden in One Pot, Recipe Garden Pots: Grow a Green Risotto in One Pot, Recipe Garden Pots: Pizza in One Pot

Follow us on InstagramThreadsBlueSkyTwitterPinterest & Facebook

Recipe Garden Pots: Grow a Herbal Tea Garden in One Pot

There is something quietly comforting about a cup of herbal tea made from freshly picked leaves. Fragrant, gentle and full of character, these garden herbs bring a soothing pause to the day. With a single container planted thoughtfully, you can grow a small collection of aromatic herbs perfectly suited to brewing your own teas.

This Herbal Tea Recipe Garden Pot gathers together a range of traditional tea herbs, each offering its own flavour and aroma. From cooling mints to citrus-scented leaves and the warm sweetness of basil, the pot becomes a small, living tea garden ready for daily harvesting.


What you’ll need

  • 1 large pot (60cm or larger) with drainage holes
  • Multi-purpose compost
  • A warm, sunny position

Plants

  • Basil — Ocimum basilicum
  • Black peppermint — Mentha × piperita
  • Curled spearmint — Mentha spicata
  • Hyssop — Hyssopus officinalis
  • Lemon balm — Melissa officinalis
  • Lemon grass — Cymbopogon citratus
  • Lemon verbena — Aloysia citrodora

Together these plants provide a beautifully balanced range of flavours — fresh mint, bright citrus, gentle herbal notes and soft sweetness.

Herbal Tea Planter - Plants

Basil — Ocimum basilicum

Black peppermint — Mentha × piperita

Curled spearmint — Mentha spicata

Hyssop — Hyssopus officinalis

Lemon balm — Melissa officinalis

Lemon grass — Cymbopogon citratus

Lemon verbena — Aloysia citrodora
Herbal Tea Planter

Preparing the container

Choose a large container around 60cm across so each herb has room to grow comfortably.

Fill the pot with fresh multi-purpose compost, leaving a small gap at the top to allow for easy watering.

Place the container in a sunny, sheltered position. The warmth encourages strong growth, particularly for the heat-loving basil and lemon verbena, which flourish with plenty of light and warmth.


Planting your herbal tea garden

Arrange the herbs so the larger plants have space while smaller herbs fill the edges.

1. Position the taller herbs

Plant lemon grass and lemon verbena towards the back or centre of the container. Their upright growth adds height and structure to the pot.

2. Add the mid-sized herbs

Plant hyssop and lemon balm nearby. Both grow into soft, bushy plants that blend well with the taller herbs.

3. Place the mints

Plant black peppermint and curled spearmint towards the sides of the container where their fresh leaves are easy to harvest.

4. Finish with basil

Add basil around the edges where it receives plenty of sunshine and warmth.

As the plants mature, the pot becomes a fragrant mix of textures, colours and scents.


Caring for the pot

Herbs are generally easy to grow and reward regular harvesting.

  • Place the container in a sunny spot
  • Water when the compost becomes dry, especially during warm weather
  • Harvest leaves regularly to encourage fresh growth
  • Remove any tired or woody stems to keep plants healthy

With warmth and light, the herbs will grow quickly through the season.


Harvesting herbs for tea

You can begin picking leaves once the plants are well established.

Harvest small sprigs of:

  • Peppermint or spearmint for a refreshing tea
  • Lemon balm or lemon verbena for bright citrus notes
  • Hyssop for a lightly aromatic flavour
  • Basil for a gentle sweetness
  • Lemon grass for a warm citrus depth

Fresh leaves produce the most fragrant infusions.


How to make herbal tea from your garden

Making herbal tea is wonderfully simple and allows the flavours of the garden to shine.

Ingredients

  • A small handful of fresh herb leaves
  • Freshly boiled water

Method

  1. Lightly rinse the herbs if needed.
  2. Place the leaves in a teapot or mug.
  3. Pour over freshly boiled water.
  4. Leave to infuse for 5–8 minutes.
  5. Strain if desired and enjoy.

You can combine herbs for different flavours. A few lovely combinations include:

  • Peppermint and lemon balm
  • Lemon verbena and basil
  • Spearmint and lemon grass

Each cup carries the aroma and freshness of the garden.


A pot full of calm and fragrance

This Herbal Tea Recipe Garden Pot brings together some of the most aromatic herbs you can grow. Set in a sunny corner of the garden or on a warm patio, it quietly offers leaves for soothing infusions throughout the season.

With a few snips of fresh herbs and a kettle of boiling water, the garden becomes part of a daily ritual — simple, fragrant and deeply restorative.

Further Reading: How to Start Your Own Vegetable PatchHow to Plan and Design Your Dream Vegetable PatchWhy Choose Sow It Grow It and Feast for Your Garden?How to Choose the Perfect Flower Pot for Your CropsRecipe Garden Pots: Grow a Pimm’s No.1 Garden in One Pot, Recipe Garden Pots: Grow a Green Risotto in One Pot

Follow us on InstagramThreadsBlueSkyTwitterPinterest & Facebook

Grow Your Own Grazing Nibbles

Some of the most enjoyable moments in the garden come from simply picking something fresh and eating it straight away. A sweet strawberry, a crisp pea pod or a sun-warmed tomato can turn an ordinary walk through the garden into a small but satisfying harvest.

Creating a grazing nibbles planter is a simple and rewarding way to grow vegetables and fruit that can be picked little and often. With just a few carefully chosen plants, it is possible to create a container or raised bed filled with easy snacks throughout the summer months.

Grazing Nibbles Planter.
Grazing Nibble Planter

Four particularly good plants for this purpose are:

  • Alpine strawberry
  • Sugar snap pea
  • Sunflower ‘Waooh’
  • Tomato ‘Tumbling Tom’

These plants grow well together and provide a steady supply of small harvests that can be enjoyed straight from the garden.


Planting in April

April is a good time to plant up a grazing container or small bed as the weather begins to warm and young plants start to establish themselves.

Choose a sunny spot where the plants will receive plenty of light throughout the day.

Preparing the Container or Bed

  1. Fill the container with fresh compost or well-prepared garden soil.
  2. Ensure the container has good drainage.
  3. Water the compost lightly before planting.

Alpine Strawberries

Alpine strawberries are perfect for grazing. Unlike larger strawberry varieties, they produce small but intensely flavoured fruits over a long period.

Plant them around the edges of the container so the fruit can spill gently over the sides. Their low growing habit makes them ideal for easy picking.

Because other plants in the container may grow taller, it is helpful to trim nearby stems occasionally so the strawberries are not shaded out. This allows the plants to continue producing fruit throughout the season.


Sugar Snap Peas

Sugar snap peas bring both height and fresh flavour to the planter. Their crisp pods can be eaten whole and are especially enjoyable when picked young.

Sow the seeds directly into the compost and provide a small support such as canes or a trellis for the plants to climb. As they grow, delicate tendrils will attach themselves naturally.

Pods can be picked as soon as they are plump and sweet.


Sunflower ‘Waooh’

Sunflower ‘Waooh’ adds colour and structure to the container while also attracting pollinators to the garden.

Sow the seeds directly into the compost and allow the plants to grow upward through the centre of the container. Their cheerful yellow flowers bring height and brightness while helping to create a lively summer display.


Tomato ‘Tumbling Tom’

Tumbling Tom tomatoes are ideal for containers as their stems cascade gently over the sides. The small cherry tomatoes develop throughout the summer and are perfect for snacking straight from the plant.

Plant the young tomato plant into the centre or edge of the container and water regularly as it grows.


A Garden for Grazing

One of the pleasures of this small planting scheme is its simplicity. There is no need to wait for a large harvest. Instead, the garden offers small rewards day by day — a strawberry here, a pea pod there, a handful of sweet tomatoes in the sunshine.

With a little care and occasional trimming to keep the strawberries in the light, this small container can become a delightful source of fresh garden nibbles throughout the season.

And sometimes the best harvest is the one enjoyed immediately, straight from the plant, while standing quietly in the garden.

Further Reading: How to Start Your Own Vegetable PatchHow to Plan and Design Your Dream Vegetable PatchWhy Choose Sow It Grow It and Feast for Your Garden?How to Choose the Perfect Flower Pot for Your CropsRecipe Garden Pots: Grow a Pimm’s No.1 Garden in One Pot, Recipe Garden Pots: Grow a Green Risotto in One Pot, Recipe Garden Pots: Pizza in One Pot

Follow us on InstagramThreadsBlueSkyTwitterPinterest & Facebook

Recipe Garden Pots: Pizza in One Pot

Few dishes are as universally loved as pizza. Simple ingredients, gathered fresh and brought together with care, create something wonderfully satisfying. With a single container planted thoughtfully, you can grow several of the key flavours that make a pizza truly memorable.

This Perfect Pizza Recipe Garden Pot brings together fragrant herbs and sweet tomatoes – the heart of many classic pizza sauces and toppings. Planted in one generous container, it becomes a small kitchen garden devoted to flavour.


What you’ll need

  • 1 container at least 45cm wide with good drainage
  • Multi-purpose compost
  • A warm, sunny position

Plants

  • Basil — Ocimum basilicum
  • Garlic — Allium sativum
  • Oregano — Origanum vulgare
  • Tomato ‘Red Robin’

These plants offer the classic Mediterranean flavours associated with pizza – sweet tomatoes, aromatic herbs and the gentle warmth of garlic.

Garden Planter with Pizza Ingredient Plants
Recipe in a Pot – Pizza

Preparing the container

Choose a pot at least 45cm across. A container of this size allows the plants to grow comfortably while holding enough compost to retain moisture during warm weather.

Fill the pot with fresh multi-purpose compost, leaving a few centimetres at the top so watering is easy.

Place the container in a sunny, sheltered position, as tomatoes and Mediterranean herbs thrive in warmth and light.


Planting your pizza garden

Plant young plants so they establish quickly and begin producing through the summer.

1. Start with the tomato

Place the tomato ‘Red Robin’ in the centre of the container. This compact variety is ideal for pots and produces clusters of sweet cherry tomatoes perfect for sauces and toppings.

2. Add the garlic

Plant a few garlic cloves around the tomato, spacing them evenly in the compost. As they grow, their slender leaves take up very little room.

3. Position the herbs

Tuck basil and oregano around the edges of the container where they will receive plenty of sun and be easy to harvest when cooking.

The herbs soften the edge of the pot while filling the air with their unmistakable Mediterranean fragrance.


Caring for the pot

These plants thrive with warmth and a little regular attention.

  • Place the pot in a sunny position
  • Water regularly, especially in warm weather
  • Feed the tomato occasionally with a liquid tomato feed once flowers appear
  • Harvest herbs often to encourage fresh growth

As the season progresses, the pot will become a lush and fragrant mix of herbs and fruit.


Harvesting your pizza ingredients

Before long you’ll be able to gather fresh ingredients straight from the pot:

  • Sweet Red Robin tomatoes
  • Fragrant basil leaves
  • Aromatic oregano
  • Fresh garlic

Together they form the classic base flavours of a traditional pizza.


A simple pizza sauce from the garden

When your tomatoes begin to ripen, try making a fresh sauce using your harvest.

Ingredients

  • A handful of Red Robin tomatoes
  • 1 clove garlic
  • A few basil leaves
  • A pinch of oregano
  • Olive oil
  • Salt and black pepper

Method

  1. Chop the tomatoes finely.
  2. Gently crush the garlic and add to the tomatoes.
  3. Stir in torn basil leaves and a pinch of oregano.
  4. Drizzle with a little olive oil and season lightly.
  5. Spread over pizza dough before adding your favourite toppings.

The result is fresh, fragrant and full of garden flavour.


A pot dedicated to pizza

This Perfect Pizza Recipe Garden Pot shows how a single container can grow the essential flavours of one much-loved dish. Placed in a warm sunny corner of the garden, it becomes both a decorative planter and a practical kitchen garden.

With a few leaves, a handful of tomatoes and the scent of herbs in the air, the pot quietly grows the ingredients for the perfect homemade pizza.

Further Reading: How to Start Your Own Vegetable PatchHow to Plan and Design Your Dream Vegetable PatchWhy Choose Sow It Grow It and Feast for Your Garden?How to Choose the Perfect Flower Pot for Your CropsRecipe Garden Pots: Grow a Pimm’s No.1 Garden in One PotRecipe Garden Pots: Grow a Green Risotto in One Pot

Follow us on InstagramThreadsBlueSkyTwitterPinterest & Facebook

Recipe Garden Pots: Grow Your Own Vegetable Stir Fry

There is something particularly satisfying about cooking a meal made from vegetables grown just outside the door. A simple stir fry is one of the easiest ways to enjoy fresh produce, especially when the ingredients have been picked only moments before they reach the kitchen.

Many stir fry vegetables are surprisingly quick and easy to grow. Even a small garden bed, a raised planter or a few containers can provide a steady supply of tender leaves, shoots and peppers throughout the growing season.

The following plants are ideal for creating a fresh garden stir fry mix:

  • Leaf Salad Stir Fry Mix
  • Pak Choi ‘Chu Choi’
  • Pak Choi ‘Rubi’
  • Pea ‘Exzellenz’
  • Sweet Pepper ‘Bullhorn’
Stir Fry Garden Planter
Stir Fry Vegetable Planter

Most of these crops grow quickly and can be harvested several times, making them both practical and rewarding for home gardeners.


Sowing the Stir Fry Leaves

The leaf salad mix, pak choi and pea shoots can all be sown directly onto the surface of compost. This method is simple and works well in shallow trays, containers or small garden beds.

How to Sow

  1. Fill a tray or container with fresh compost and gently level the surface.
  2. Lightly water the compost so that it is evenly moist.
  3. Scatter the seeds across the surface. They can be sown fairly closely together as they will be harvested young.
  4. Press the seeds gently into the compost with your hand or a flat board.
  5. Cover very lightly with a thin dusting of compost or vermiculite.
  6. Water gently using a fine spray.

Place the container in a bright position and keep the compost lightly moist. Within a short time, small green shoots will begin to appear.

These tender leaves grow quickly and can be ready to harvest in only a few weeks.


Growing Pea ‘Exzellenz’ for Shoots

Peas grown for shoots are one of the easiest crops to raise. When sown densely in a tray, the young stems and leaves can be harvested as a sweet and delicate addition to stir fry dishes.

Allow the shoots to grow until they are around 10–15 centimetres tall before cutting.


Starting Sweet Pepper ‘Bullhorn’

Unlike the leafy crops, sweet peppers benefit from being started indoors.

Sowing Peppers

  1. Fill small pots with compost.
  2. Sow the seeds about 1cm deep.
  3. Place the pots in a warm, bright location such as a windowsill or greenhouse.
  4. Keep the compost lightly moist.

Once the seedlings have grown into young plants and the weather has warmed, they can be planted into larger containers or a sunny garden bed.

Peppers will take longer to mature than the leafy crops but reward patience with colourful, sweet fruits that bring both flavour and colour to a stir fry.


Harvesting Your Stir Fry Vegetables

One of the joys of growing leafy stir fry vegetables is how easily they regrow.

When harvesting:

  • Use scissors or snips to cut the leaves at the base of the stems.
  • Avoid pulling the whole plant from the soil.
  • Leave the roots in place so the plants can produce fresh growth.

With regular watering and good light, many of these crops will reshoot and provide several harvests.


A Simple Garden Stir Fry

Once your vegetables are ready, preparing a quick stir fry takes only a few minutes.

Ingredients

  • A handful of stir fry salad leaves
  • Pak choi leaves and stems
  • Pea shoots
  • 1 sweet pepper, sliced
  • A little garlic and ginger
  • Soy sauce or a splash of sesame oil

Method

  1. Heat a little oil in a pan or wok.
  2. Add garlic and ginger and cook briefly.
  3. Add the pepper and cook for a minute.
  4. Stir in the pak choi and pea shoots.
  5. Finish with the leafy greens and a splash of soy sauce.

Cook quickly so the vegetables remain bright and crisp.


A Garden Harvest Worth Savouring

Growing vegetables for a stir fry is wonderfully rewarding. With only a few trays of compost and a sunny corner, it is possible to enjoy fresh harvests again and again.

From the first tender shoots to the final peppers of the season, these crops bring both colour and flavour to the kitchen.

And when the vegetables have travelled only a few steps from garden to pan, the meal somehow tastes even better.

Further Reading: How to Start Your Own Vegetable PatchHow to Plan and Design Your Dream Vegetable PatchWhy Choose Sow It Grow It and Feast for Your Garden?How to Choose the Perfect Flower Pot for Your CropsRecipe Garden Pots: Grow a Pimm’s No.1 Garden in One Pot, Recipe Garden Pots: Grow a Green Risotto in One PotRecipe Garden Pots: Pizza in One Pot

Follow us on InstagramThreadsBlueSkyTwitterPinterest & Facebook

Recipe Garden Pots: Grow a Pimm’s No.1 Garden in One Pot

There are few drinks that capture the feeling of an English summer quite like a glass of Pimm’s. Light, refreshing and filled with garden flavours, it’s the perfect companion to long afternoons outdoors. With a little planning, you can grow many of the ingredients yourself in a single generous container.

Sketch of Pimms in a Pot
Pimms in a Pot

This Pimm’s No.1 Recipe Garden Pot brings together fragrant herbs, fresh fruit and edible flowers – all ready to harvest for a classic summer jug.


What you’ll need

  • 1 large pot (60cm or larger) with good drainage
  • Multi-purpose compost
  • A smaller pot for the mint
  • A warm, sunny position

Plants

  • Alpine strawberry Fragaria vesca
  • Borage Borago officinalis
  • Lemon tree Citrus × limon
  • Mint Mentha spicata
  • Cucumber ‘Bush Champion’ Cucumis sativus

Together these plants provide the fresh, aromatic flavours that bring a jug of Pimm’s to life – cooling mint, crisp cucumber, citrusy lemon and sweet strawberries, finished with the delicate blue flowers of borage.


Preparing the container

Choose a large container around 60cm across, deep enough to support the small lemon tree while leaving space for companion plants around the edges.

Fill the pot with fresh compost, leaving a small gap at the top to make watering easier.

This planting works best in a warm, sheltered spot with plenty of sunshine. The lemon tree in particular benefits from warmth, which helps the fruit ripen properly.


Planting your Pimm’s garden

Arrange the plants so each has room to grow while creating a lush, abundant display.

1. Start with the lemon tree

Place the lemon tree slightly off-centre towards the back of the pot. This gives the taller plant room while allowing the rest of the container to fill out around it.

2. Add the cucumber

Plant the bush cucumber ‘Champion’ nearby. This compact variety is well suited to container growing and will soon produce crisp cucumbers ideal for slicing into drinks.

3. Position the strawberries

Tuck the alpine strawberries around the edges of the pot. They’ll form a soft carpet of foliage and produce small, intensely flavoured berries through summer.

4. Plant the borage

Add a borage plant where it has space to grow upwards. Its star-shaped blue flowers are not only beautiful but make a traditional garnish for summer drinks.

5. Contain the mint

Mint is wonderfully fragrant but vigorous in growth. To prevent it from taking over the whole container, plant it inside a small pot first, then sink that pot into the compost.

This simple trick keeps the roots contained while still allowing you to harvest plenty of leaves.


Caring for the pot

A recipe garden thrives with steady care.

  • Water regularly, especially during warm weather
  • Place the container in a warm, sunny position
  • Feed occasionally with a liquid feed suitable for fruiting plants
  • Harvest herbs and fruit often to encourage fresh growth

The lemon tree will benefit from warmth and shelter, helping its fruit ripen fully through the season.


Harvesting your Pimm’s ingredients

As summer progresses, the pot will begin to offer a generous selection of ingredients:

  • Fresh mint leaves
  • Sweet alpine strawberries
  • Crisp cucumbers
  • Fragrant lemon slices
  • Decorative borage flowers

Each brings something distinctive to a refreshing glass of Pimm’s.


Classic Pimm’s No.1 recipe

Once your garden begins to produce, you’ll have everything you need for the perfect summer jug.

Ingredients

  • 1 part Pimm’s No.1
  • 3 parts lemonade
  • Sliced cucumber
  • Strawberries, halved
  • Lemon slices
  • A handful of mint leaves
  • A few borage flowers
  • Ice

Method

Fill a large jug with ice. Add the sliced cucumber, strawberries, lemon and mint leaves. Pour in the Pimm’s and top up with chilled lemonade. Stir gently and finish with a scattering of borage flowers.

Serve in tall glasses and enjoy slowly.


A pot that tastes like summer

This Pimm’s No.1 Recipe Garden Pot turns a single container into a small celebration of summer flavours. It’s decorative, productive and wonderfully practical – offering herbs, fruit and flowers just a few steps from the kitchen door.

Set in a sunny corner of the garden or on a warm patio, it quietly grows the makings of a perfect summer drink.

Further Reading: How to Start Your Own Vegetable PatchHow to Plan and Design Your Dream Vegetable PatchWhy Choose Sow It Grow It and Feast for Your Garden?How to Choose the Perfect Flower Pot for Your CropsRecipe Garden Pots: Grow a Pimm’s No.1 Garden in One Pot, Recipe Garden Pots: Grow a Green Risotto in One PotRecipe Garden Pots: Pizza in One Pot

Follow us on InstagramThreadsBlueSkyTwitterPinterest & Facebook

Recipe Garden Pots: Grow a Green Risotto in One Pot

There’s something deeply satisfying about stepping outside and gathering the ingredients for supper straight from the garden. Even in a small space, a single generous pot can hold a surprising abundance. This Green Risotto Recipe Garden Pot is designed to do just that – bringing together a collection of fresh summer vegetables and herbs that grow happily side by side and can be harvested for a bright, punchy risotto.

Sketch of Green Risotto in a pot.
Grow a Green Risotto in One Pot

With a little care, one container can become a miniature kitchen garden.


What you’ll need

  • 1 x 60cm pot with good drainage
  • Multi-purpose compost
  • A few bamboo canes for support

Plants

  • Basil
  • Broad bean ‘Sutton’
  • Courgette ‘Patio Star’
  • Dwarf runner bean ‘Hestia’
  • Garlic chives
  • Nasturtium Tropaeolum majus
  • Pea ‘Rondo’
  • Rosemary ‘Corsican Blue’
  • Shallot
  • Tomato ‘Green Zebra’
  • Thyme ‘Archer’s Gold’

Together these plants offer a generous mix of green vegetables, herbs and edible flowers, perfect for creating a flavourful summer risotto.


Preparing the pot

Choose a wide, sturdy pot around 60cm across. Containers of this size hold moisture well and give the plants enough room to thrive through the season.

Fill the pot with fresh multi-purpose compost, leaving a few centimetres at the top for watering. Give the compost a good soak before planting so it settles evenly.


Planting your risotto garden

The secret to a successful recipe pot is arranging plants so each has space and light.

1. Start with the centrepiece

Plant the courgette ‘Patio Star’ in the middle of the pot. This compact variety is ideal for containers and will soon produce tender courgettes perfect for slicing into risotto.

2. Add the taller crops

Around the back of the pot plant:

  • Tomato ‘Green Zebra’
  • Pea ‘Rondo’
  • Broad bean ‘Sutton’
  • Runner bean ‘Hestia’

Insert a few bamboo canes at planting time. Peas and tomatoes will need support as they grow, and it’s easier to add it now than later.

3. Fill the middle layer

Plant the shallot and garlic chives where they’ll receive plenty of sun but won’t crowd the larger plants.

4. Finish with the herbs

Tuck herbs and trailing plants around the edges:

  • Basil
  • Rosemary ‘Corsican Blue’
  • Thyme ‘Archer’s Gold’
  • Nasturtium

The nasturtium will spill gently over the side of the pot, softening the edges while adding peppery leaves and edible flowers.


Caring for the pot

Container gardens thrive with a little regular attention.

  • Water daily, especially during warm weather. Pots dry quickly and vegetables need consistent moisture.
  • Tie in peas and tomatoes as they grow to keep stems upright.
  • Harvest often, which encourages fresh growth.
  • Remove any faded leaves to keep the planting healthy.

With sunshine and steady watering, the pot will soon become a lively patchwork of greens.


Harvesting for your green risotto

As the season unfolds you’ll be able to gather an assortment of ingredients:

  • Sweet peas and broad beans
  • Tender courgettes
  • Fresh basil, thyme and rosemary
  • Fragrant garlic chives
  • Mild shallots
  • Zesty green zebra tomatoes
  • Peppery nasturtium leaves

Together they bring colour, freshness and depth of flavour to a simple risotto.


A pot full of summer

This Green Risotto Recipe Garden Pot shows how even a single container can provide a generous harvest. It’s a small garden with a purpose – herbs to pinch for cooking, vegetables to gather for supper, and flowers to brighten the edge of the pot.

Placed on a patio, balcony or doorstep, it becomes both a decorative planter and a working kitchen garden, quietly growing the makings of a summer meal.

Further Reading: How to Start Your Own Vegetable PatchHow to Plan and Design Your Dream Vegetable PatchWhy Choose Sow It Grow It and Feast for Your Garden?How to Choose the Perfect Flower Pot for Your CropsRecipe Garden Pots: Grow a Pimm’s No.1 Garden in One Pot, Recipe Garden Pots: Grow a Green Risotto in One PotRecipe Garden Pots: Pizza in One Pot

Follow us on InstagramThreadsBlueSkyTwitterPinterest & Facebook

Bring Life to Your Kitchen: Grow a Winter Window Sill Herb Garden

As the days grow shorter and the frost begins to bite, enthusiastic gardeners often feel a sense of melancholy. The vibrant colours of summer fade, and the vegetable patch goes dormant. But just because the temperature has dropped outside, it doesn’t mean your green fingers need to hibernate. In fact, winter is the perfect opportunity to bring the garden indoors and create a thriving, aromatic sanctuary right on your kitchen window sill.

There is something deeply satisfying about bypassing the supermarket aisles and snipping fresh garnish from your own living pantry. We have all experienced the disappointment of buying a packet of herbs, only to find them wilting in the fridge drawer a day later. They lack punch, they lack vitality, and they often result in unnecessary waste.

Growing your own eliminates this frustration entirely. With the Sow It Grow It and Feast Grow Herbs collection, you can transform a simple ledge into a flourishing culinary haven. This comprehensive kit is designed to bridge the gap between the garden and the kitchen, ensuring you have access to vibrant, intense flavours throughout the darker months. Whether you are a seasoned horticulturist or a complete novice looking to reconnect with nature, cultivating herbs indoors is a rewarding journey that pays delicious dividends.

sowitgrowitandfeast.
Grow Herbs
Normally £55 Today £20

Your Complete Herb Garden Solution

Starting an indoor garden can sometimes feel daunting. Which seeds should you buy? What soil do they need? How long will they take to germinate? The Sow It Grow It and Feast collection removes these hurdles by providing ten robust plug plants. These aren’t seeds that require weeks of anxious waiting; they are established plants ready to settle into their new home on your windowsill or in containers.

Each of the ten varieties in this collection has been carefully selected for two specific reasons: culinary versatility and ease of cultivation. This ensures that even if you haven’t inherited a green thumb, you can still achieve magnificent results. You receive a diverse range of flavours that will inspire new recipes and breathe life into your winter cooking.

More Than Just Plants: A Guide to Success

One of the greatest barriers to gardening success is a lack of knowledge. We often buy a plant, water it occasionally, and hope for the best. This collection takes a different approach. It doesn’t just send you plants; it equips you with the skills to nurture them.

Included with your ten robust plants is an expertly crafted guidance booklet. Think of this not merely as a set of instructions, but as a comprehensive companion for your horticultural journey. It delves into the fascinating history behind each herb, exploring ancient medicinal uses that have been passed down through generations.

Beyond the history, the manual offers practical, hands-on advice. You will learn:

  • Essential care instructions to keep your plants vibrant.
  • Harvesting techniques that encourage new growth rather than damaging the plant.
  • Inspiring recipe suggestions to help you make the most of your harvest.
  • Planting guidance on how to create dedicated herb beds or adapt your plants for containers.

This knowledge transforms the act of gardening from a chore into a learning experience, allowing you to understand the needs of your plants and helping them flourish in a container environment.

Expert Support at Your Fingertips

Have you ever noticed a yellowing leaf or a drooping stem and wished you could ask an expert for advice? With this collection, you can. Your investment extends far beyond the initial unboxing.

Every collection comes with twelve months of exclusive access to an online support portal. This digital resource acts as your personal horticultural consultant. Throughout the year, you can log in to find expert advice, troubleshooting guidance for those tricky moments, and seasonal growing tips. This ensures that your herb garden doesn’t just survive the winter but reaches its full potential all year round. It is like having a head gardener in your pocket, ready to assist whenever you need a helping hand.

Why Your Kitchen Needs a Living Pantry

The difference between dried herbs, supermarket packets, and fresh-cut plants is night and day. When you harvest fresh herbs moments before using them, you preserve the essential oils and flavour compounds at their peak intensity.

Imagine the scene: you have a roast dinner in the oven. Instead of reaching for a jar of dried herbs, you step over to your window sill and pinch off sprigs of fresh rosemary. The scent fills the kitchen immediately—piney, woody, and fresh. Or perhaps you are making a simple pasta dish. A handful of vibrant, fragrant basil leaves, harvested seconds ago, can elevate a quick Tuesday night meal into something extraordinary.

This connection to your food changes the way you cook. It encourages experimentation. You might find yourself adding a sprig of thyme to a cocktail or scattering fresh chives over your morning eggs simply because you can.

A Therapeutic Escape

Gardening is about more than just the output; it is about the process. In a world that is often loud and fast-paced, tending to plants provides a quiet moment of calm. The simple act of watering, pruning, and checking on your herbs can be a peaceful escape from daily stresses.

Watching your ten plug plants establish themselves, grow new leaves, and turn towards the light offers a daily reminder of nature’s resilience. It is a slow, steady process that encourages mindfulness. In the depths of winter, having vibrant green life inside your home lifts the spirits and brightens the room. It is a small slice of nature that belongs entirely to you.

The Perfect Gift for Foodies and Gardeners

If you are looking for a thoughtful present, the Sow It Grow It and Feast collection is an inspired choice. It is a gift that keeps on giving, providing the recipient with months of fresh produce and a new hobby to enjoy.

To make it even more special, the collection includes a personalised message option. Whether it is for a birthday, a housewarming, or simply a treat for a loved one who enjoys cooking, you can add your own words to be included with the gift before dispatch. It also includes a gift voucher, adding an extra layer of value for the recipient.

Tips for Window Sill Success

While your guidance booklet will provide detailed instructions, here are a few quick tips to get you thinking about where your new herb garden will live:

  • Light is Key: Most culinary herbs crave sunlight. A south-facing window is usually the ideal spot, providing the bright light they need to produce those essential oils. If your windows are a bit dark, try to rotate the pots every few days so they grow evenly and don’t lean too heavily towards the glass.
  • Watch the Water: Inside a warm home, pots can dry out faster than you expect, but they also hate sitting in water. Check the soil with your finger before watering. If it feels dry an inch down, give them a drink.
  • Harvest Often: Don’t be afraid to use your herbs! Regular harvesting actually encourages the plants to become bushier and produce more leaves. Pinching out the tips is a great way to keep them productive.

Start Your Aromatic Journey

There is no need to wait for spring to get your hands in the soil. Transform your kitchen today with the Sow It Grow It and Feast Grow Herbs collection. With ten robust plants, a wealth of expert knowledge, and year-round support, you have everything you need to create a flourishing, fragrant display.

Experience the joy of growing your own food, reconnect with the rhythms of nature, and enjoy the unbeatable taste of fresh ingredients every single day. Your culinary creations will never taste the same again.

Buy our Sow It Grow It and Feast! Grow Herbs here!

Find Grow your Own Christmas Lunch here, Why Not Grow Your Own Chillies in 2026?, A Guide to the Winter Salad Garden

Follow us in Instagram for Daily Grow Your Own Inspiration 🌶

Homemade Gifts: Heartfelt Presents from Your Plot

The tradition of gifting homemade treasures from one’s garden stretches back centuries, when resourceful gardeners transformed their seasonal bounty into cherished presents for loved ones. Victorian households particularly excelled at this art, creating elaborate preserves, floral arrangements and herbal remedies that conveyed both affection and domestic prowess. This November, as your garden transitions from autumn’s final flourishes into winter’s dormancy, the opportunity to craft meaningful Christmas gifts from your plot’s harvest has never been more appealing.

Creating garden-inspired gifts connects us to this rich heritage whilst offering something far more valuable than any shop-bought alternative: the irreplaceable touch of personal care and seasonal timing. Whether you’ve cultivated sprawling vegetable beds, tended fruit trees, or nurtured ornamental borders, your garden holds the raw materials for presents that will be treasured long after the festive season ends.

The beauty of garden gifts lies not only in their handcrafted nature but in their ability to capture the essence of your growing year. Each jar of jam tells the story of summer’s sweetest moments, while every carefully arranged wreath speaks of autumn’s generous harvest and your thoughtful preparation for winter celebrations.

Preserving Summer’s Sweetness: Jams and Jellies

Few gifts capture the warmth of summer quite like homemade preserves. Apple and rosemary jelly makes an exceptional present, combining the orchard’s crisp harvest with aromatic herbs from your kitchen garden. To create this sophisticated preserve, combine 1 kg of cooking apples (chopped but not peeled) with 4-5 fresh rosemary sprigs in a large pan. Add just enough water to barely cover the fruit, then simmer until completely soft. Strain through muslin overnight, measure the resulting juice, and return to the pan with 450g sugar per 600ml of liquid. Add a final sprig of rosemary and boil rapidly until setting point is reached.

The technique of preserve-making has remained largely unchanged since the 18th century, when sugar became more readily available to domestic households. Georgian housekeepers took immense pride in their preserving skills, often competing with neighbours over who could produce the clearest jellies or most flavourful chutneys.

Present your finished preserves in attractive glass jars tied with seasonal ribbons, perhaps including a handwritten label detailing the harvest date and garden location of the key ingredients.

Tangy Treasures: Chutneys and Pickles

Green tomato chutney transforms end-of-season vegetables that might otherwise go to waste into a gift that improves with age. This traditional recipe celebrates the gardener’s resourcefulness, turning unripened tomatoes, onions, and apples into a complex condiment perfect for winter meals.

Combine 1kg green tomatoes (roughly chopped), 500g cooking apples (peeled and diced), 250g onions (sliced), and 200g sultanas in a large preserving pan. Add 300ml malt vinegar, 250g soft brown sugar, 1 tablespoon each of mustard seeds and ground ginger, plus salt to taste. Simmer gently for 1-2 hours until thick and glossy, stirring occasionally to prevent sticking.

Pickled beetroot offers another delightful option, particularly striking when made with different coloured varieties. The deep crimson and golden yellow varieties create stunning visual contrasts when layered in preserving jars, whilst candy-striped Chioggia beetroot adds an element of surprise to any preserve cupboard.

From Garden to Oven: Bakes and Cakes

Courgette and lemon drizzle cake transforms prolific summer vegetables into an unexpectedly elegant gift. The mild flavour of grated courgette adds moisture without overwhelming the delicate citrus notes, creating a cake that keeps exceptionally well. This recipe particularly suits gardeners who’ve experienced the familiar courgette glut of late summer.

For a 20cm square tin, cream 175g butter with 175g caster sugar until light and fluffy. Beat in 2 eggs gradually, then fold in 175g self-raising flour, the zest of 2 lemons, and 200g finely grated courgette. Bake at 180°C for approximately 35 minutes until golden and firm to touch. While still warm, pierce the surface and drizzle with a mixture of lemon juice and icing sugar.

Herb-infused shortbread makes another sophisticated gift, particularly when made with lavender, rosemary or thyme from your herb garden. The subtle aromatic qualities of these herbs complement the rich, buttery shortbread base whilst adding an unexpected gourmet touch to a traditional favourite.

Sweet Delights: Garden-Fresh Confections

Crystallised rose petals and mint leaves create elegant confections that showcase your flower garden’s beauty. This ancient preservation technique, perfected in medieval monasteries, transforms delicate petals into jewel-like sweets perfect for decorating cakes or enjoying as after-dinner treats.

Select unblemished petals and leaves during dry morning hours after the dew has evaporated. Brush each petal carefully with lightly beaten egg white, then dust thoroughly with caster sugar. Place on parchment paper and leave in a warm, dry place for 24-48 hours until completely crisp. Store in airtight containers between layers of tissue paper.

Elderflower cordial represents another traditional sweet gift, capturing the heady perfume of early summer hedgerows. Though elderflowers typically bloom in May and June, cordial made earlier in the season and carefully stored makes an exceptional winter gift, bringing memories of warm summer evenings to dark December days.

Natural Beauty: Fresh and Dried Arrangements

Fresh flower arrangements might seem impossible for winter gifting, but many late-flowering garden plants provide excellent material for November cutting. Chrysanthemums, late-blooming roses, and evergreen foliage create sophisticated bouquets that celebrate autumn’s unique palette.

The Victorian language of flowers imbued each bloom with specific meanings, making flower arrangements particularly thoughtful gifts. Rosemary signified remembrance, ivy represented fidelity and holly conveyed foresight—all appropriate sentiments for year-end gifting.

Dried flower arrangements offer even greater longevity, with materials harvested throughout the growing season. Lavender, statice, honesty seed pods and ornamental grasses create texturally interesting displays that perfume rooms naturally. The key to successful drying lies in harvesting at the right moment: just before flowers reach full bloom, when stems contain optimal moisture but petals haven’t begun deteriorating.

Seasonal Splendour: Festive Wreaths

Christmas wreaths crafted entirely from garden materials carry special significance, representing the gardener’s year-long dedication to cultivation. Traditional evergreen wreaths utilise holly, ivy, pine and fir, but creative alternatives might incorporate dried hydrangea heads, seed pods, or even preserved autumn leaves.

The circular form of wreaths has symbolised eternal life since ancient times, making them particularly meaningful Christmas decorations. Roman households hung laurel wreaths during winter festivals, whilst Celtic traditions associated evergreen circles with protection and renewal.

To construct a basic wreath, create a foundation using pruned grape vines, willow branches, or purchased wire frames. Attach evergreen branches using floral wire, working in one direction to create smooth, overlapping layers. Add decorative elements like berries, pine cones or dried flowers as finishing touches.

Practical Pleasures: Herb and Spice Blends

Dried herb blends showcase your kitchen garden’s aromatic bounty whilst providing practical gifts that enhance everyday cooking. Mediterranean herb mixtures combining oregano, thyme, rosemary and marjoram capture summer’s warmth in convenient, shelf-stable form.

The process of air-drying herbs connects modern gardeners to generations of herbalists who understood the importance of preserving seasonal flavours. Medieval monasteries perfected these techniques, creating complex spice blends that enhanced both flavour and preservation of foods during long winter months.

Package dried herbs in small glass jars with tight-fitting lids, including handwritten labels that suggest usage ideas. Attach small cards explaining storage requirements and recommending specific culinary applications for each blend.

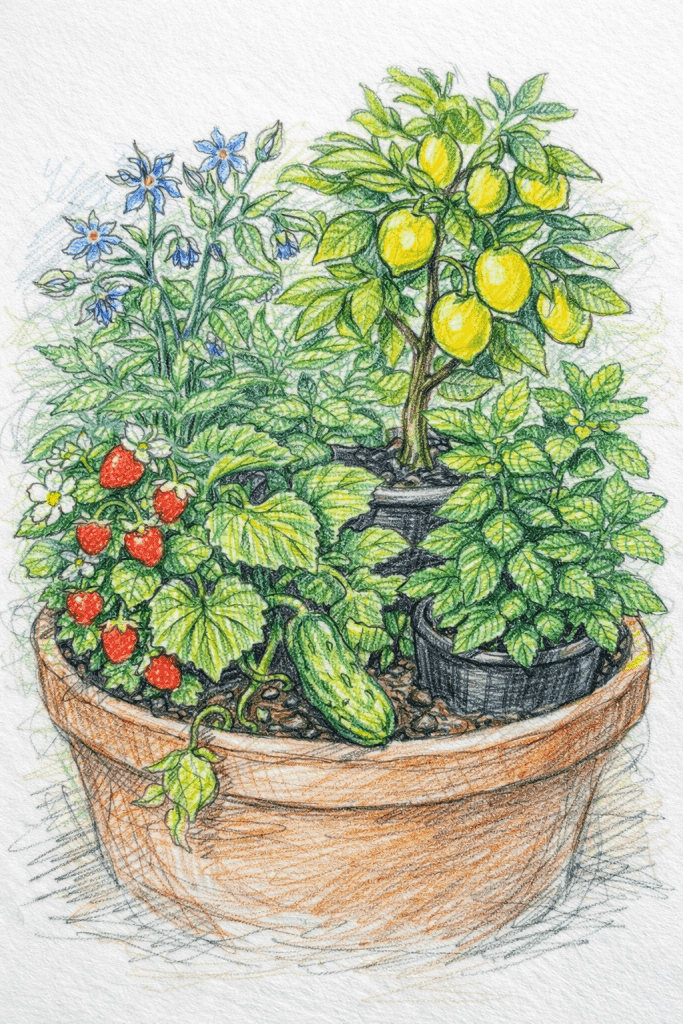
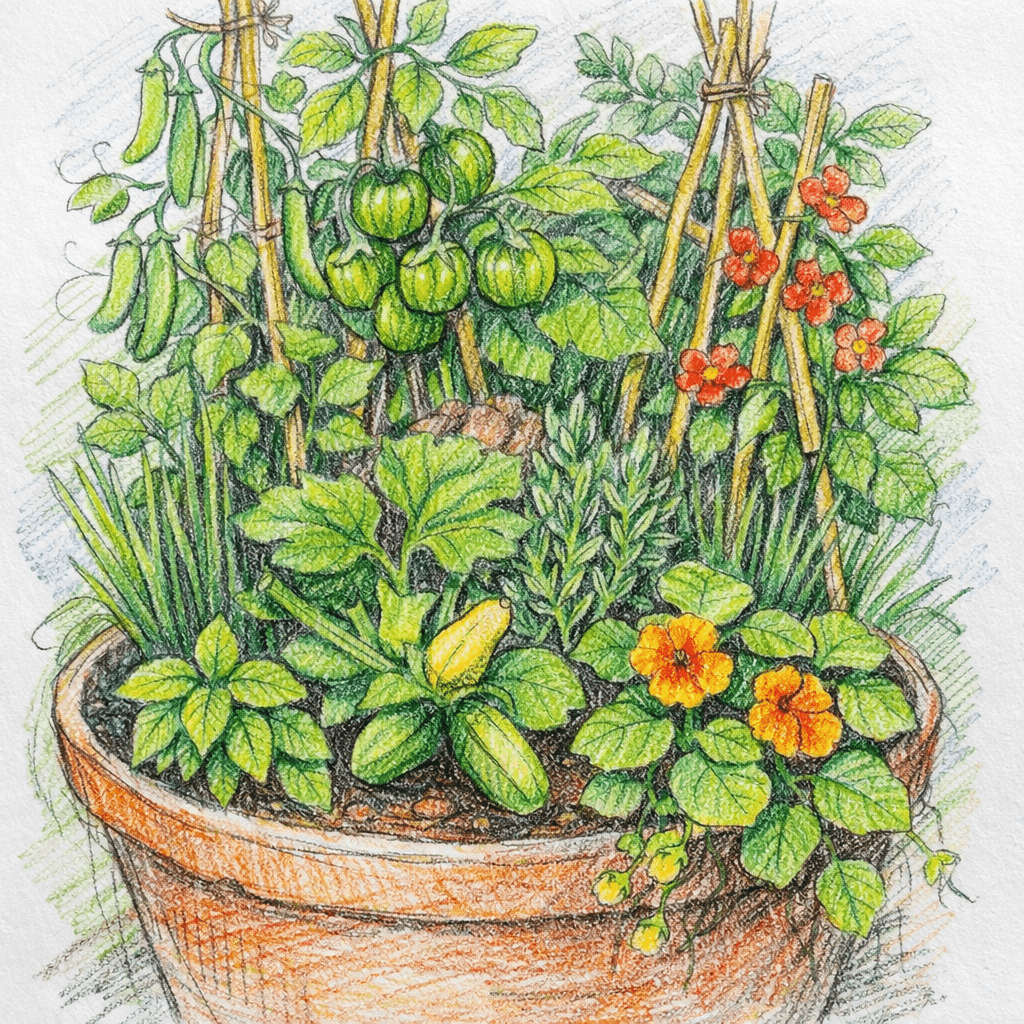
Living Gifts: Potted Plants and Bulbs

Potted herbs represent gifts that continue giving throughout winter months. Rosemary, thyme, and sage thrive in indoor conditions, providing fresh flavours for winter cooking whilst filling kitchens with natural fragrance. Young plants potted in attractive containers make particularly thoughtful presents for cooking enthusiasts or beginning gardeners.

Spring-flowering bulbs planted in decorative pots create anticipation for the coming growing season. Daffodils, tulips, and crocuses forced for early flowering bring colour to late winter days whilst promising garden renewal. The Dutch perfected bulb-forcing techniques during the 17th century, creating elaborate displays that brightened wealthy households during Europe’s coldest months.

Creative Expressions: Unique Garden Crafts

Potpourri blends utilising dried flowers, herbs, and spices from your garden create long-lasting decorative gifts with personal significance. Traditional recipes often included rose petals, lavender flowers, lemon verbena leaves, and citrus peel, combined with spices like cinnamon and cloves for warming winter scents.

Seed packets saved from your most successful varieties make meaningful gifts for fellow gardeners, particularly when accompanied by growing notes documenting your experiences with specific varieties. Heritage varieties and unusual cultivars carry special value, representing genetic diversity and gardening history.

Natural soaps infused with garden herbs offer luxurious gifts that showcase your herb garden’s versatility. Lavender, mint, and chamomile add therapeutic properties to handmade soaps, whilst their natural fragrances create spa-like experiences that celebrate the garden’s ability to nurture both body and spirit.

The Timeless Joy of Personal Touch

Garden gifts embody values that transcend their material worth: time invested, care demonstrated, and seasonal awareness celebrated. Each homemade preserve represents hours spent tending plants, each arrangement reflects understanding of seasonal rhythms, and each herb blend captures the essence of a growing year’s dedication.

The recipients of garden gifts receive more than beautiful objects or delicious treats—they share in the gardener’s intimate connection with natural cycles and seasonal abundance. Victorian gift-givers understood this principle, creating elaborate presentations that celebrated both the maker’s skill and the recipient’s worthiness of such personal attention.

These handcrafted presents connect us to traditions spanning centuries whilst addressing contemporary desires for authentic, sustainable, and meaningful exchanges. In a world increasingly dominated by mass production and digital interactions, garden gifts offer tactile reminders of human creativity and natural abundance.

Begin planning your garden gift collection this November, gathering materials whilst autumn’s bounty remains available and winter’s contemplative pace allows for careful crafting. Your recipients will treasure these tokens of personal care long after shop-bought alternatives have been forgotten, carrying forward the ancient tradition of sharing nature’s gifts transformed by human hands into expressions of love and seasonal celebration.

Further Reading: Microgreens: The Perfect Addition to Your Healthy Salad

Inspiration: InstagramBlueSkyThreadsTwitter & TikTok

A Guide to Pickling Vegetables

Step into any well-stocked pantry, and you will likely find a jar of something pickled. From the familiar tang of a pickled onion to the vibrant hue of beetroot, pickling is a timeless tradition that transforms everyday vegetables into something truly special. This age-old preservation method is not just practical; it’s a wonderful way to capture the taste of the seasons, reduce food waste, and add a burst of flavour to your meals.

If you’ve ever wondered how to turn your garden harvest into delicious, long-lasting pickles, you’ve come to the right place. This guide will walk you through everything you need to know to start your pickling adventure. We will explore the history of this fascinating process, learn the basic steps, and discover which vegetables from your garden are perfect for pickling. Get ready to fill your jars with colour and taste!

What is Pickling?

At its heart, pickling is the process of preserving food in an acidic solution, typically vinegar, or through anaerobic fermentation in brine (a salt and water solution). The high acidity or salt content creates an environment where harmful bacteria cannot survive, allowing food to be stored for long periods without refrigeration.

There are two main methods of pickling:

  • Vinegar Pickling (Quick Pickling): This is the most common method for home pickling. Vegetables are submerged in a hot pickling liquid, usually made from vinegar, water, salt, and sugar. Spices and herbs are often added for extra flavour. These pickles, also known as “quick pickles” or “refrigerator pickles,” are stored in the fridge and are ready to eat in as little as 24 hours. For long-term storage, they can be processed in a water bath canner.
  • Fermentation Pickling: This traditional method relies on the natural lactobacilli present on the surface of vegetables. When submerged in a saltwater brine, these good bacteria convert sugars in the vegetables into lactic acid. This lactic acid acts as a natural preservative and gives fermented pickles their distinctive sour taste. This process takes longer, often several weeks, and results in a product rich in probiotics.

Both methods produce delicious results, but this guide will focus primarily on the simpler and more immediate vinegar pickling method, which is perfect for beginners.

A Brief History of Pickling

The practice of pickling is ancient, with evidence suggesting that cucumbers were first pickled in Mesopotamia over 4,000 years ago. In the UK, pickling became a household necessity long before the advent of refrigerators. It was an essential way for families to preserve their summer and autumn harvests to see them through the lean winter months.

During the 17th and 18th centuries, pickled foods were a staple on long sea voyages, providing sailors with a source of vitamins to help prevent scurvy. Exotic spices brought back from these journeys, like cloves, mace, and peppercorns, began to appear in pickling recipes, adding new and exciting flavours.

The Victorian era saw a surge in the popularity of pickling. Mrs. Beeton’s famous Book of Household Management (1861) contained numerous recipes for pickled onions, red cabbage, walnuts, and a zesty mixed pickle known as piccalilli. These pickles were not just for preservation; they became a key part of the British culinary identity, served alongside cold meats, cheeses, and ploughman’s lunches in pubs across the country.

Today, while we have modern preservation methods, the tradition of home pickling is enjoying a revival. It connects us to our heritage, allows us to be more sustainable, and offers a hands-on way to create unique and flavourful foods.

How to Pickle: A Step-by-Step Guide

Making your own pickles is a rewarding and straightforward process. Here’s a basic guide to get you started with vinegar pickling.

1. Prepare Your Jars

Your jars must be perfectly clean and sterilised to prevent bacteria from spoiling your pickles. Wash your glass jars and lids in hot, soapy water, then rinse them thoroughly. To sterilise them, place the jars and lids on a baking tray and put them in a preheated oven at 140°C (120°C fan) for at least 10 minutes. Keep them warm until you’re ready to fill them.

2. Prepare Your Vegetables

Choose fresh, firm, and blemish-free vegetables. Wash them well under cold running water. Depending on the vegetable, you might need to peel, trim, slice, or chop them into your desired shape and size. Try to keep the pieces uniform so they pickle evenly. Some hard vegetables, like carrots or beetroot, benefit from a quick blanching (a brief plunge into boiling water) to help them absorb the pickling liquid more effectively.

3. Make the Pickling Liquid (Brine)

The brine is the heart of your pickle. A standard ratio is one part vinegar to one part water, but you can adjust this for a sharper or milder taste.

  • Vinegar: Use a vinegar with at least 5% acidity. Malt vinegar is traditional for British-style pickles, offering a strong, distinct flavour. Cider vinegar provides a fruity tang, while white wine vinegar is milder.
  • Water: Use filtered water if possible, as the chemicals in tap water can sometimes affect the pickle quality.
  • Salt: Use pickling salt or a pure sea salt without anti-caking agents, which can make the brine cloudy.
  • Sugar: Castor or granulated sugar balances the acidity of the vinegar. You can adjust the amount to your taste.

Combine the vinegar, water, salt, and sugar in a non-reactive saucepan (like stainless steel or enamel). Bring the mixture to a boil, stirring until the salt and sugar have completely dissolved.

4. Pack and Fill the Jars

Add any spices or herbs to the bottom of your warm, sterilised jars. Popular additions include mustard seeds, peppercorns, cloves, bay leaves, and fresh dill.

Pack your prepared vegetables tightly into the jars. Pour the hot pickling liquid over the vegetables, ensuring they are completely submerged. Leave about a 1cm (1/2 inch) head space at the top of the jar. Use a non-metallic utensil to poke around the inside of the jar and release any trapped air bubbles.

5. Seal and Store

Wipe the rims of the jars clean, then seal them tightly with the sterilised lids. Let the jars cool completely. As they cool, you may hear a ‘pop’ as the vacuum seal forms.

Label your jars with the contents and the date. Store them in a cool, dark place for at least a few weeks to allow the flavours to develop. For quick pickles, you can store them in the refrigerator and they’ll be ready to eat in a day or two.

What to Pickle From the Vegetable Garden

Many garden vegetables are perfect for pickling. Here are a few favourites:

  • Cucumbers: The classic choice for gherkins.
  • Onions: Small shallots or pearl onions are ideal.
  • Beetroot: Cooked and sliced or diced before pickling.
  • Carrots: Sliced into rounds or sticks.
  • Cauliflower: Broken into small florets.
  • Green Beans: Trimmed and pickled whole.
  • Radishes: Sliced thinly for a peppery crunch.
  • Courgettes: Sliced into rounds or spears.
  • Red Cabbage: Shredded for a vibrant, crunchy pickle.

Feel free to experiment with other vegetables like bell peppers, chillies, or even unripe green tomatoes.

Classic Pickling Recipes

Ready to try your hand at pickling? Here are two classic recipes to get you started.

Traditional Pickled Onions

This recipe creates the sharp, crunchy onions that are a perfect accompaniment to a cheese board.

Ingredients:

  • 1kg small shallots or pickling onions
  • 100g sea salt
  • 1 litre malt vinegar
  • 2 tbsp soft brown sugar
  • 1 tsp black peppercorns
  • 1 tsp mustard seeds
  • 1 bay leaf

Method:

  1. Peel the onions and place them in a large bowl. Sprinkle with the salt, mix well, and cover. Leave for 24 hours, then rinse the onions thoroughly and pat them dry.
  2. In a saucepan, gently heat the vinegar, sugar, and spices until the sugar dissolves. Bring to a simmer, then remove from the heat and let it cool completely.
  3. Pack the onions into sterilised jars.
  4. Pour the cooled, spiced vinegar over the onions, ensuring they are fully covered.
  5. Seal the jars and store them in a cool, dark place for at least one month before eating.

Sweet and Tangy Pickled Beetroot

A British classic, perfect in sandwiches or alongside a salad.

Ingredients:

  • 1kg fresh beetroot, scrubbed
  • 500ml cider vinegar
  • 250g castor sugar
  • 1 tsp black peppercorns
  • A few cloves

Method:

  1. Boil the beetroot in a large pan of water for 30-40 minutes, or until tender. Drain and let them cool enough to handle.
  2. Wearing gloves to avoid staining your hands, peel the beetroot and slice it into rounds or dice it.
  3. While the beetroot is cooling, prepare the brine. Heat the vinegar, sugar, and spices in a saucepan until the sugar dissolves. Bring to a boil, then simmer for 5 minutes.
  4. Pack the beetroot into warm, sterilised jars.
  5. Pour the hot vinegar mixture over the beetroot. Seal the jars.
  6. Store in a cool, dark place for at least two weeks.

Tips for Perfect Pickles

  • Use the freshest produce: Pickling won’t improve the quality of old or wilted vegetables.
  • Don’t use reactive pans: Avoid aluminium, copper, or iron pans, as they can react with the vinegar and give your pickles a metallic taste.
  • Check your seals: After your jars have cooled, press the centre of the lid. If it doesn’t move, the jar is sealed. If it ‘pops’ back, the seal is not secure, and the jar should be refrigerated and used within a few weeks.
  • Be patient: Most pickles taste better after the flavours have had time to meld and develop.

Storing Your Pickles and Their Benefits

Properly sealed and processed pickles can be stored in a cool, dark pantry for up to a year. Once opened, keep them in the refrigerator and consume them within a few months.

Pickled vegetables retain many of their original nutrients, including vitamins and minerals. The vinegar used in pickling also has potential health benefits, such as aiding digestion. Fermented pickles are an excellent source of probiotics, which are beneficial for gut health.

While pickles can be a healthy addition to your diet, they are often high in sodium. It’s best to enjoy them in moderation as part of a balanced diet.

Get Started on Your Pickling Journey

Pickling is more than just a method of food preservation; it’s a way to connect with the seasons, reduce food waste, and create something delicious with your own hands. By following these simple steps, you can fill your pantry with colourful jars of homemade pickles that will brighten up your meals all year round.

Ready to explore the world of pickling? Plan a visit to a garden or local farm shop, gather some fresh produce, and get ready to transform your harvest into tangy treasures.

Further Reading: Chutney: A Taste of History in a Jar, Warming Autumn Soups to Soothe the SoulFrom Garden to Oven: Autumn Vegetable Bakes for the FamilyTransform Leftover Veggies into Delicious House PicklesSave Time and Money with Batch Cooking